Assignment 3
Written on October 25th, 2022 by Petrina Chan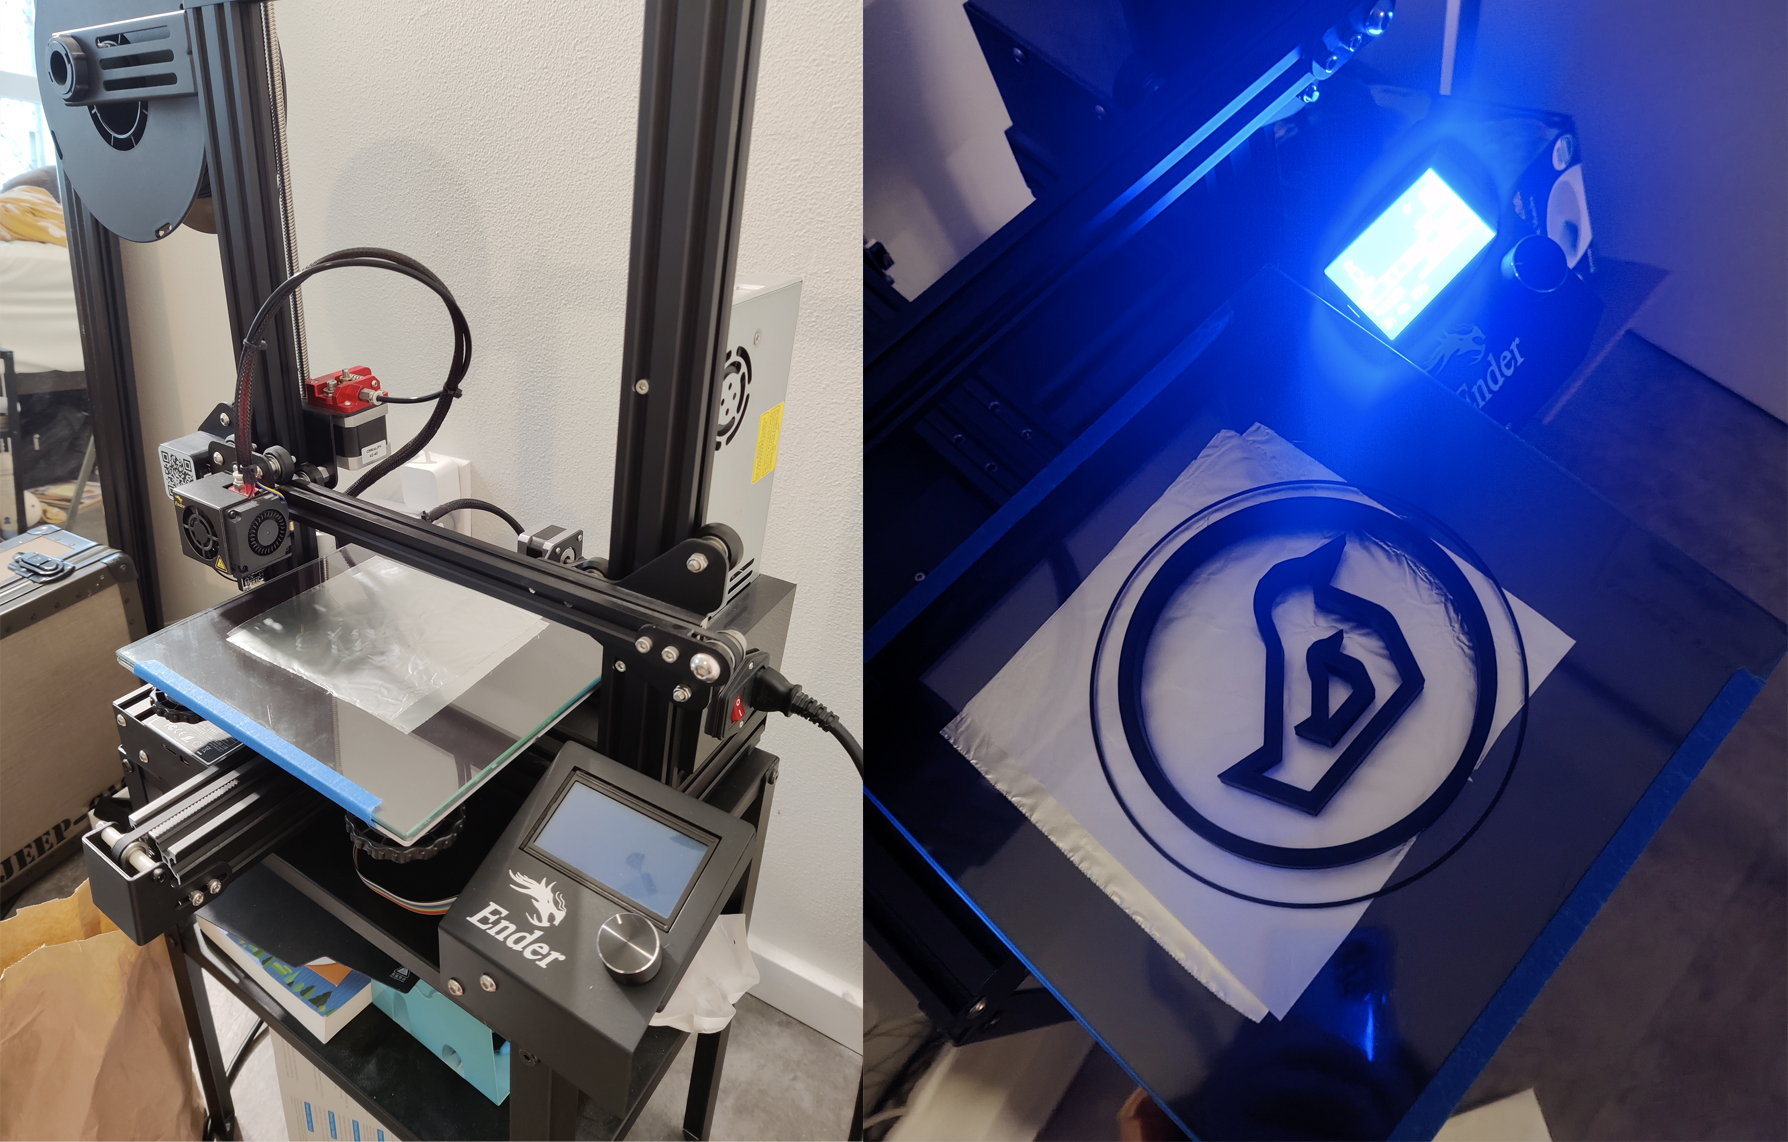
Assignment 3 - Getting started with 3D printing!
Files
3DM
STL
gCode
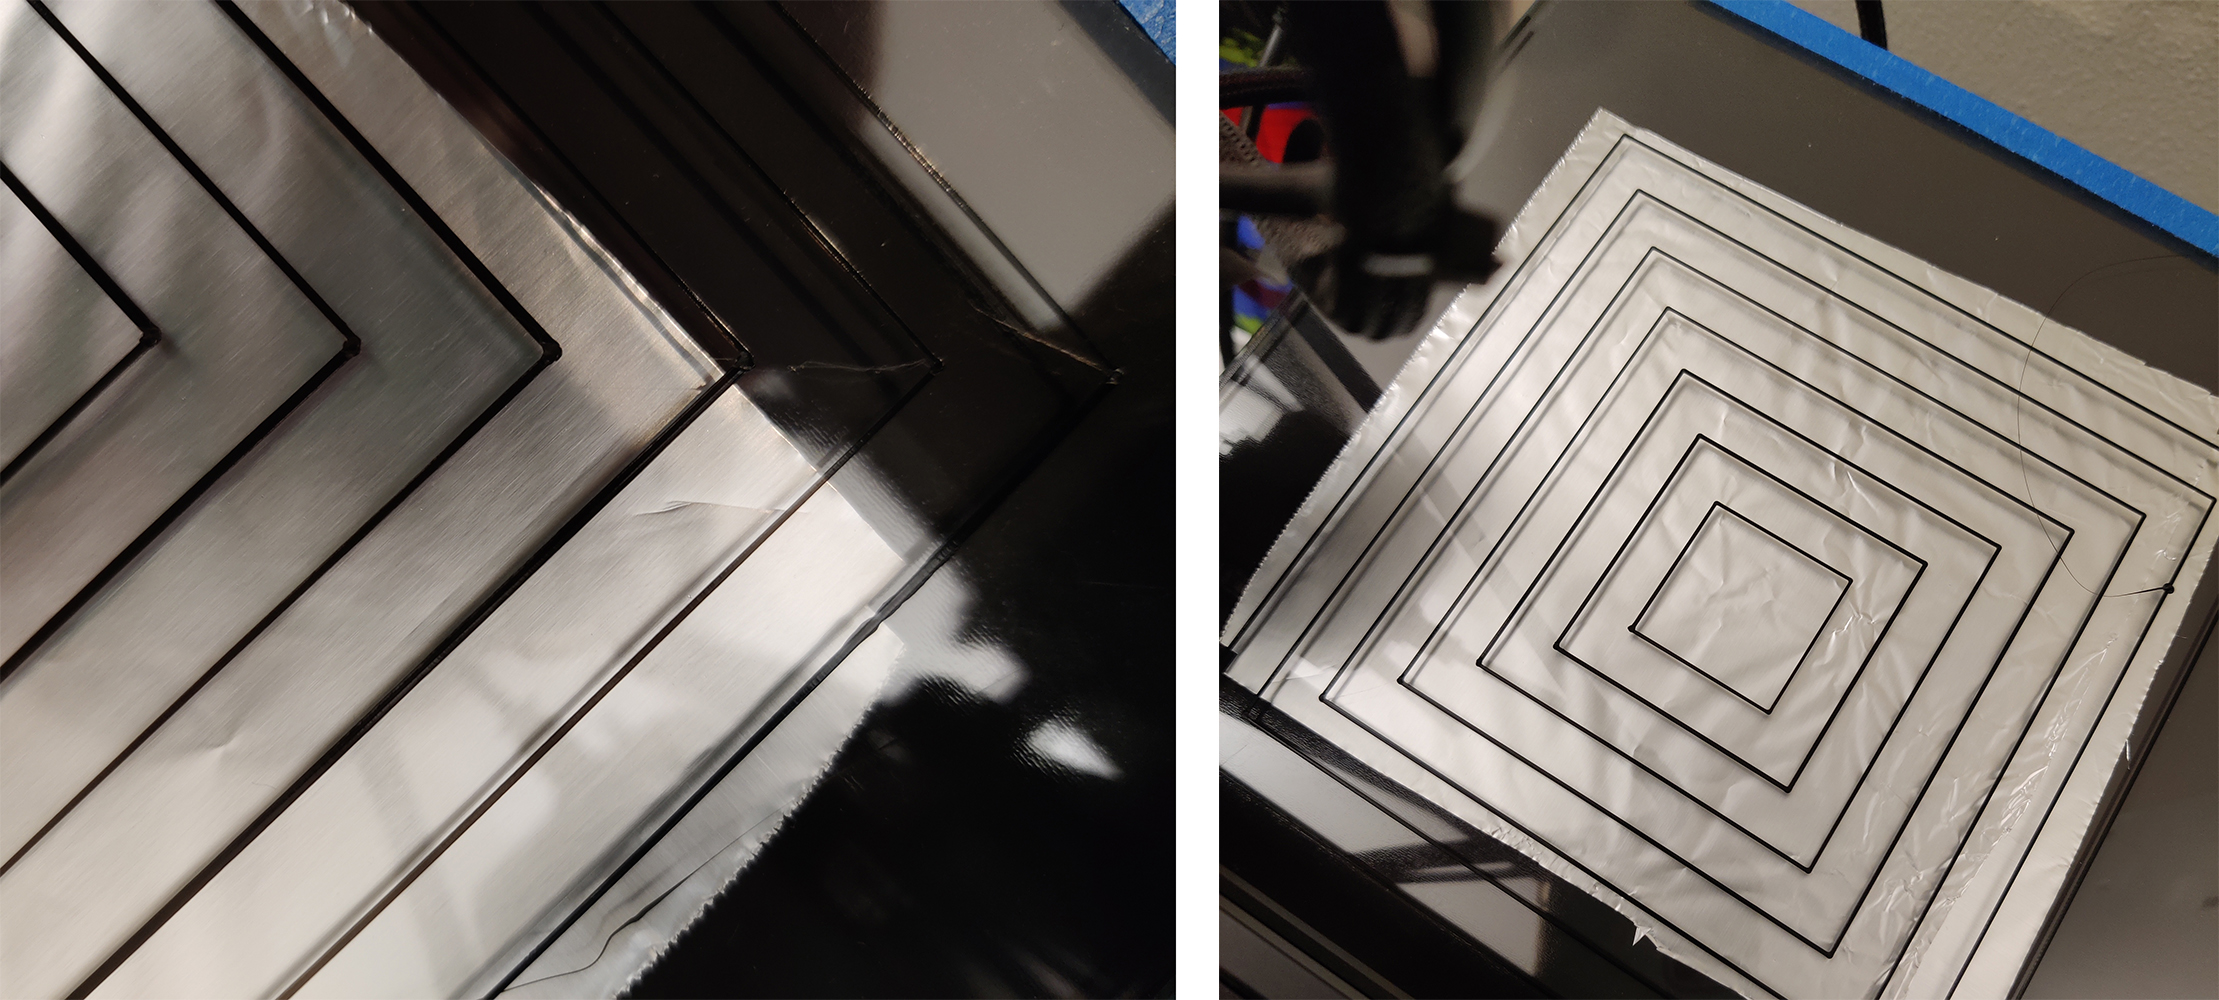
2cm cube, standard quality, concentric layers
3cm cylinder, on side w/ supports on
3cm cylinder, spiralized outer contour
 Excitement capture by my partner
Preface
I scored a great deal on a used Ender 3 Pro off Craigslist! The guy lived just a few blocks away from me and was super nice. He sold me the printer along with a spool of black filament already loaded, a glass bed already attached, in addition to a bunch of tools and odds and ends.
Since the printer was already all assembled, I didn’t have to put it together from scratch. After finding a nice spot for it in my studio apartment (it sits across the dining table from me), I checked to see that it was still set up well and nothing shifted during moving.
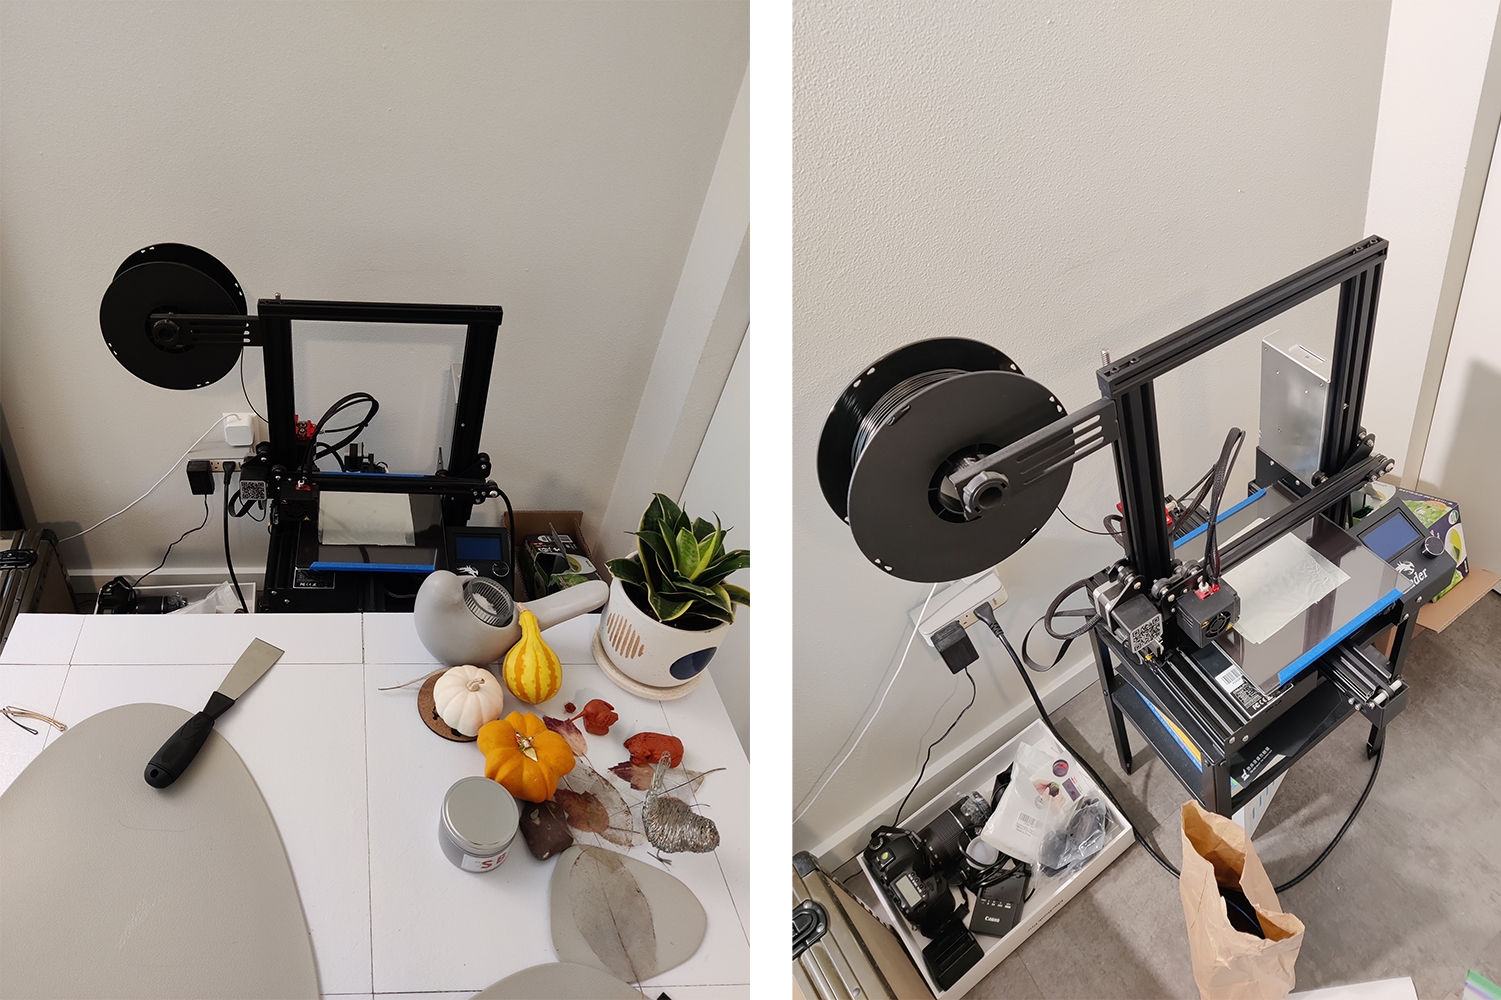
I didn’t have to adjust anything with the hardware during the initial setup inspection. It looked great! The guy I bought it from also said that he did a test print just the day before to check that everything was working as it should.
Since I was going to be out of town for a week almost immediately after the class where we would be learning about setting up our printers and printing, I had to get a head start on the assignment since the next time I would see my printer would be late Monday night before the due date. I got all of my prints done, except for the nested object, before the lecture on 3D printing.
Leveling
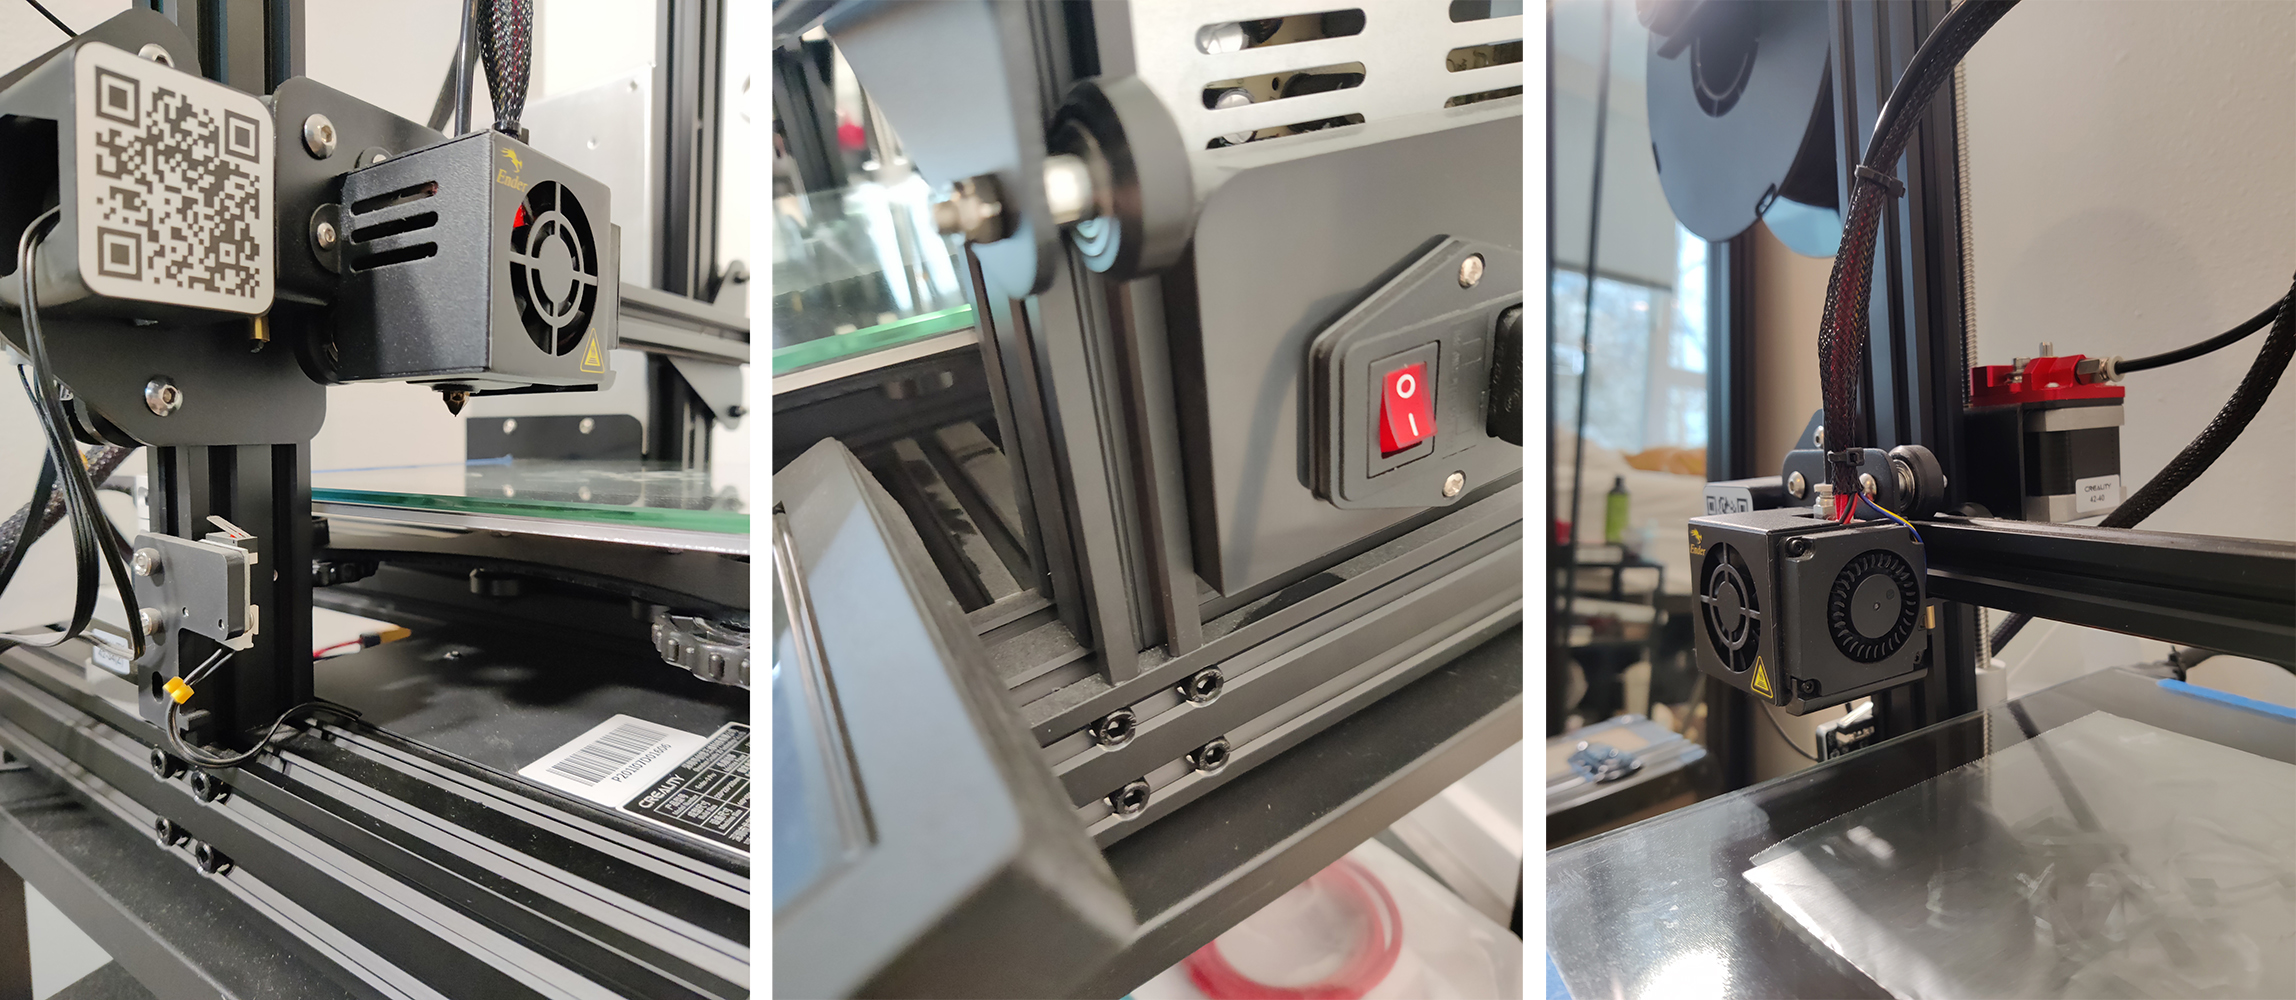
Before becoming aware of the CHEP protocol that we were going to use for class, I used the built in bed leveling program on the printer. It is very similar to the CHEP protocol, but has 9 stops instead of 5. I leveled the bed to the point that I could barely slip a piece of printer paper under the extruder and move it around (with significant amount of friction)
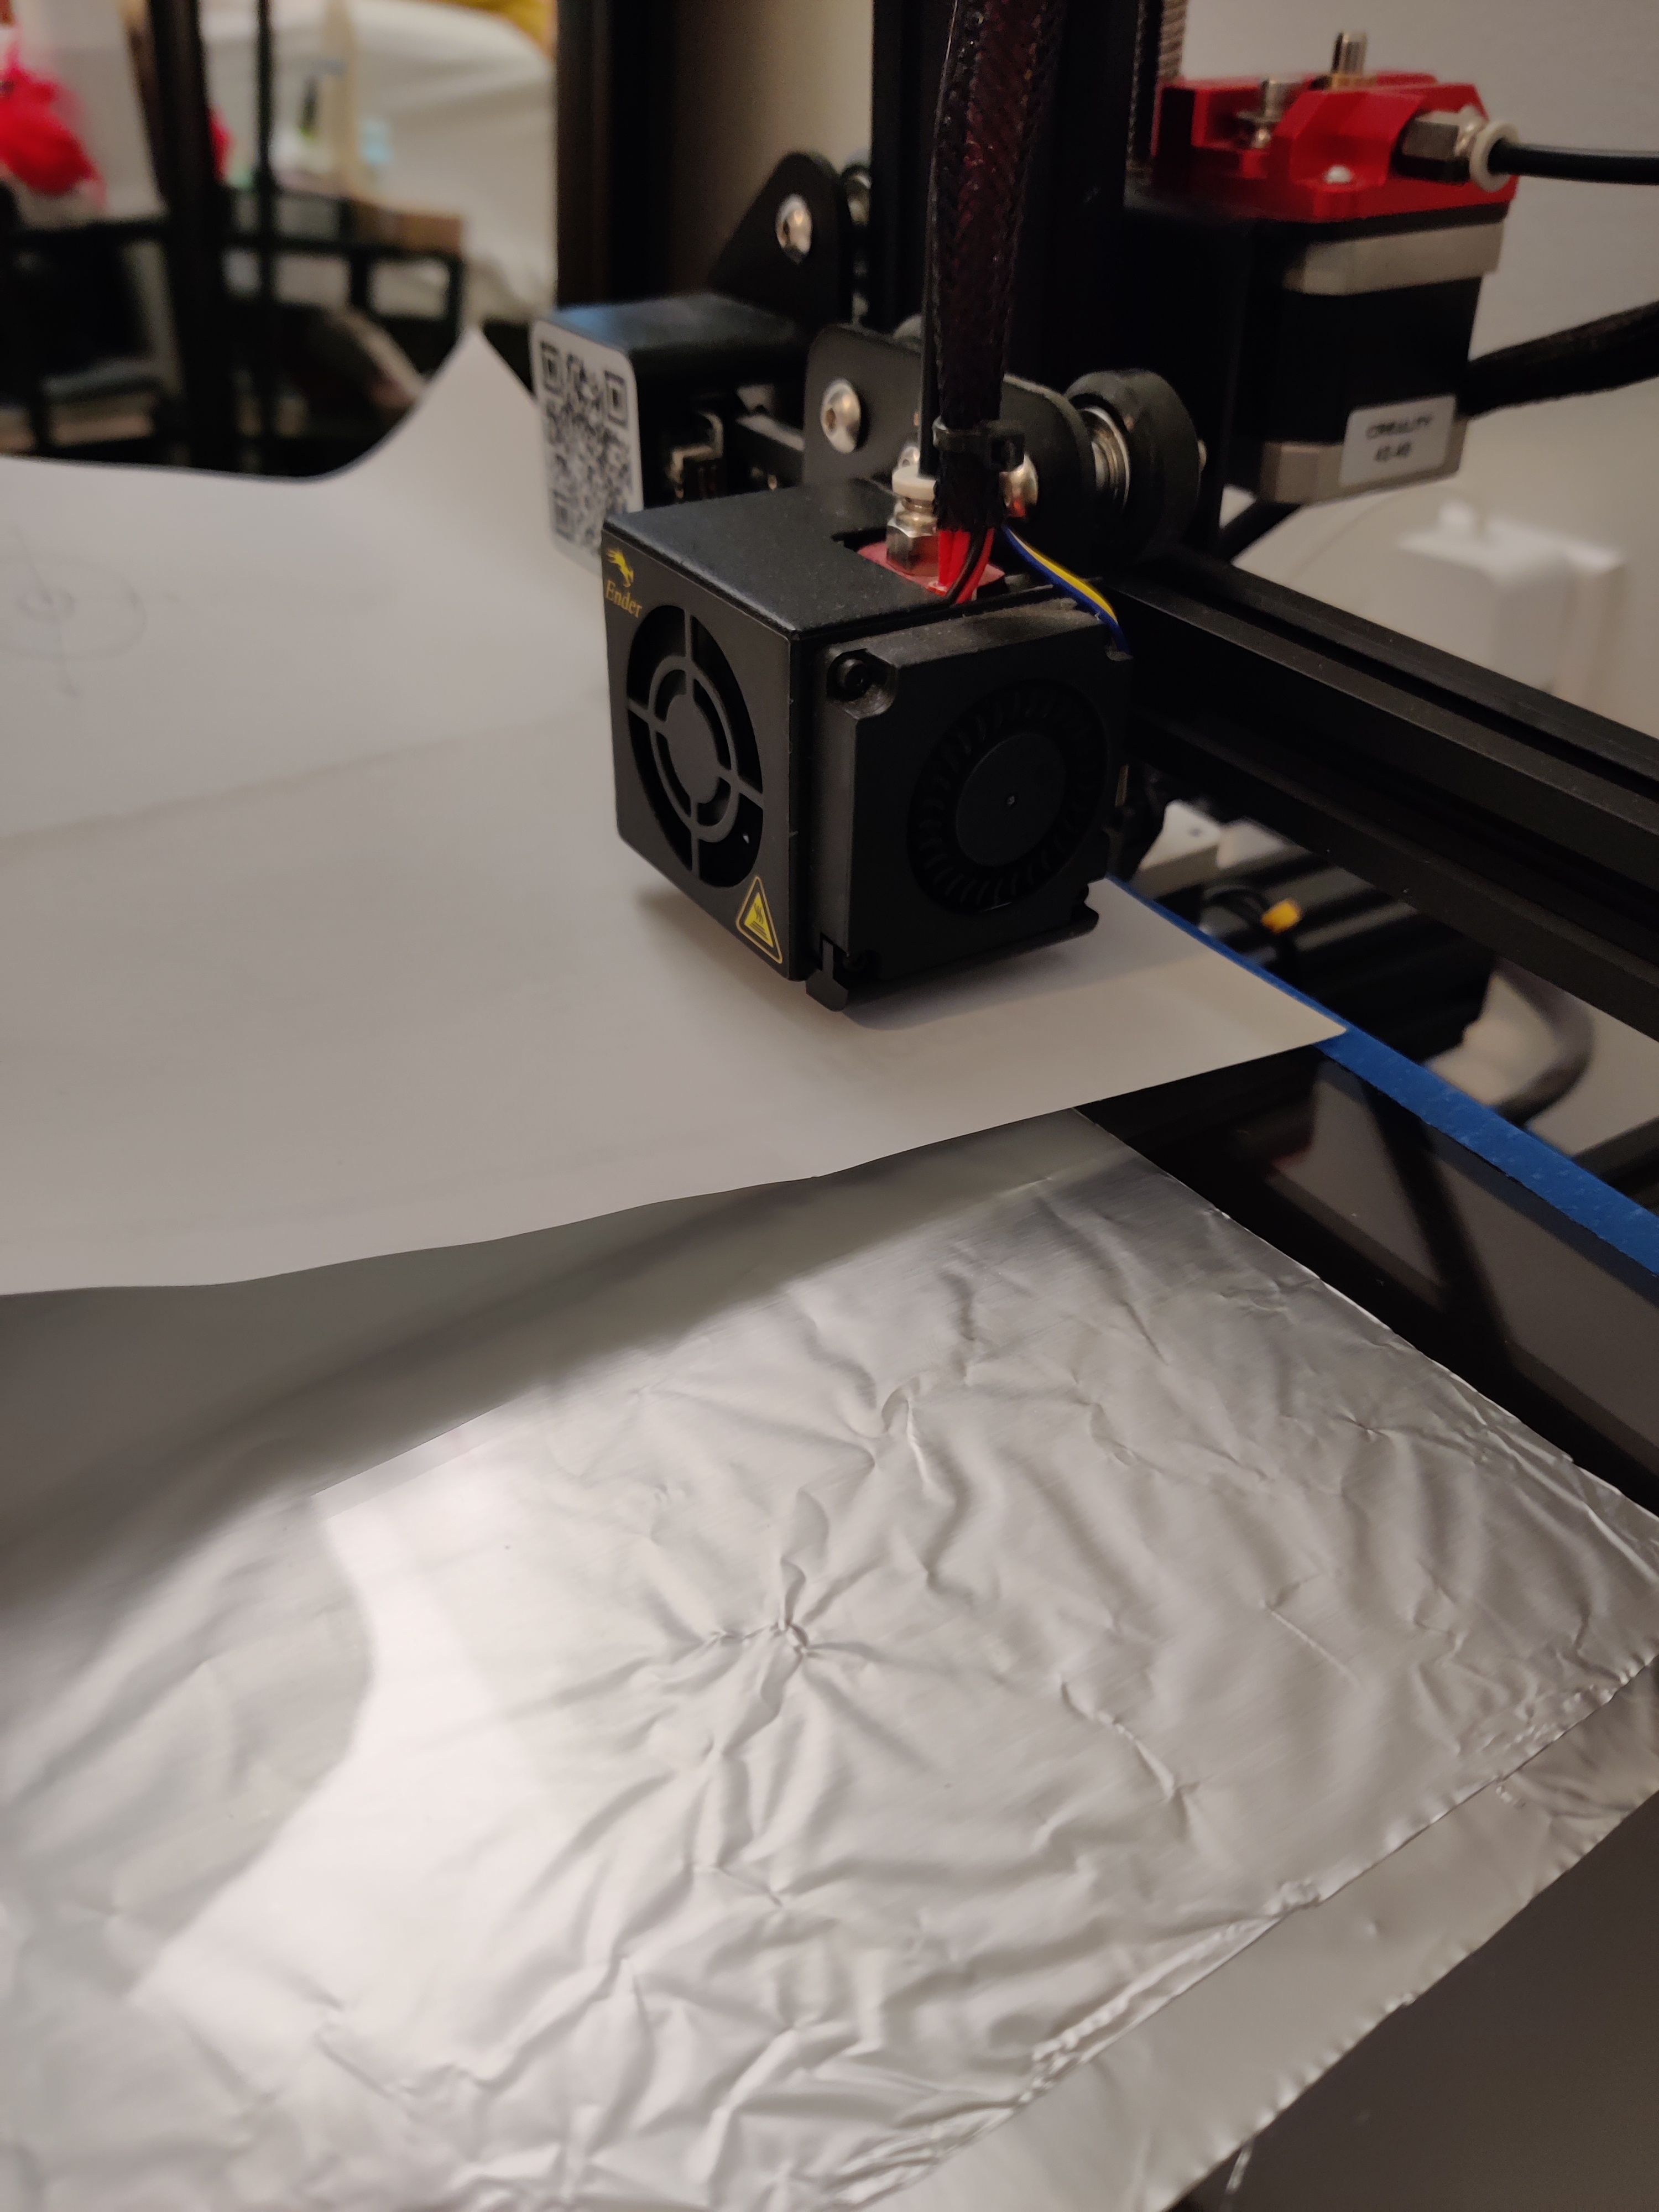
When I went through the CHEP protocol, upon running the print code, I saw some variations in the line thicknesses. I did live adjustments and started over several times until I got lines that looked sufficiently even. The adjustments that I made were not that major, and it all went smoothly! At first, I wasn’t sure if I needed to manually preheat, but I soon realized that the printer will preheat everything for you when you start the print. To save time, I guess you could preheat it manually before, but it only takes about 2 minutes anyway.
 Uneven lines (left) and even lines (right)
Printing cubes
I’ve never been so excited about a simple plastic cube! It’s crazy how we can just create these things almost out of thin air. There is a TikTok series that someone does called “Would a Pilgrim Think This is Witchcraft?”, and this would definitely be a yes.
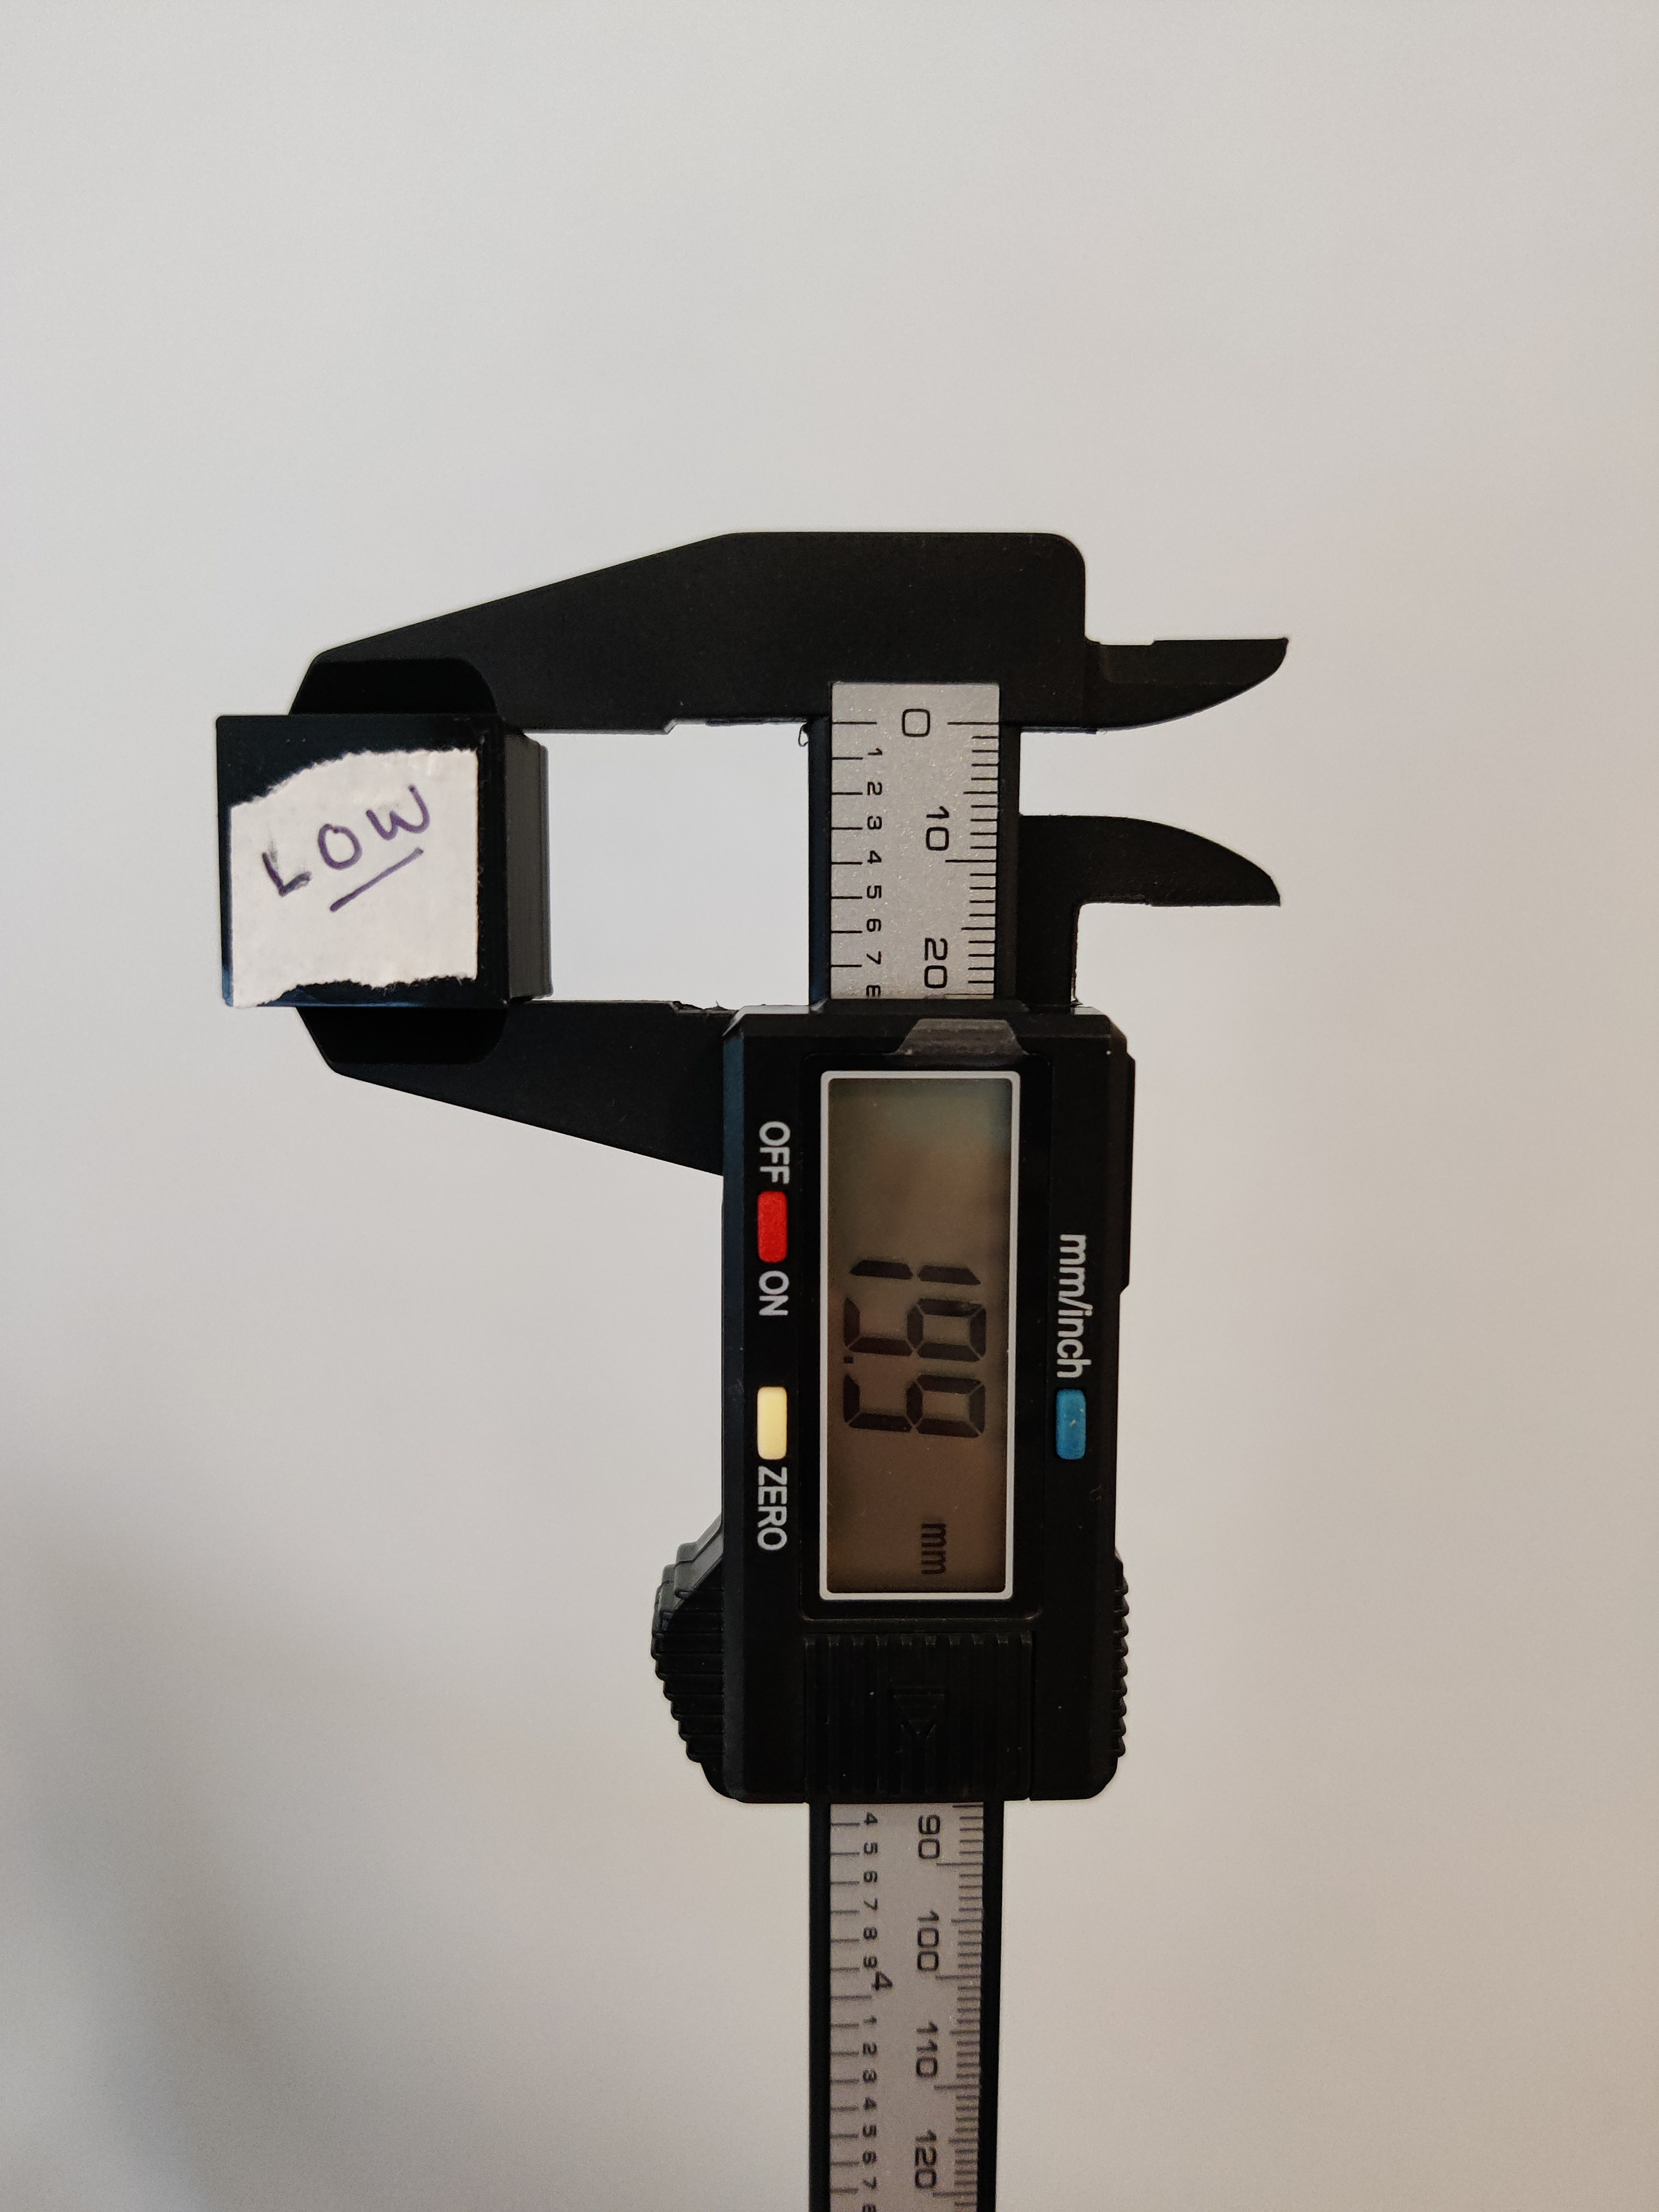
I first made my cube in Rhino using the Cube command. I exported to STL with all the default settings. I quickly found that the print quality was a setting determined in Cura.The low quality cube measured in at 19.9mm. This was already well within the 1mm tolerance outlined in the assignment, which felt awesome! The print took about 21 minutes.
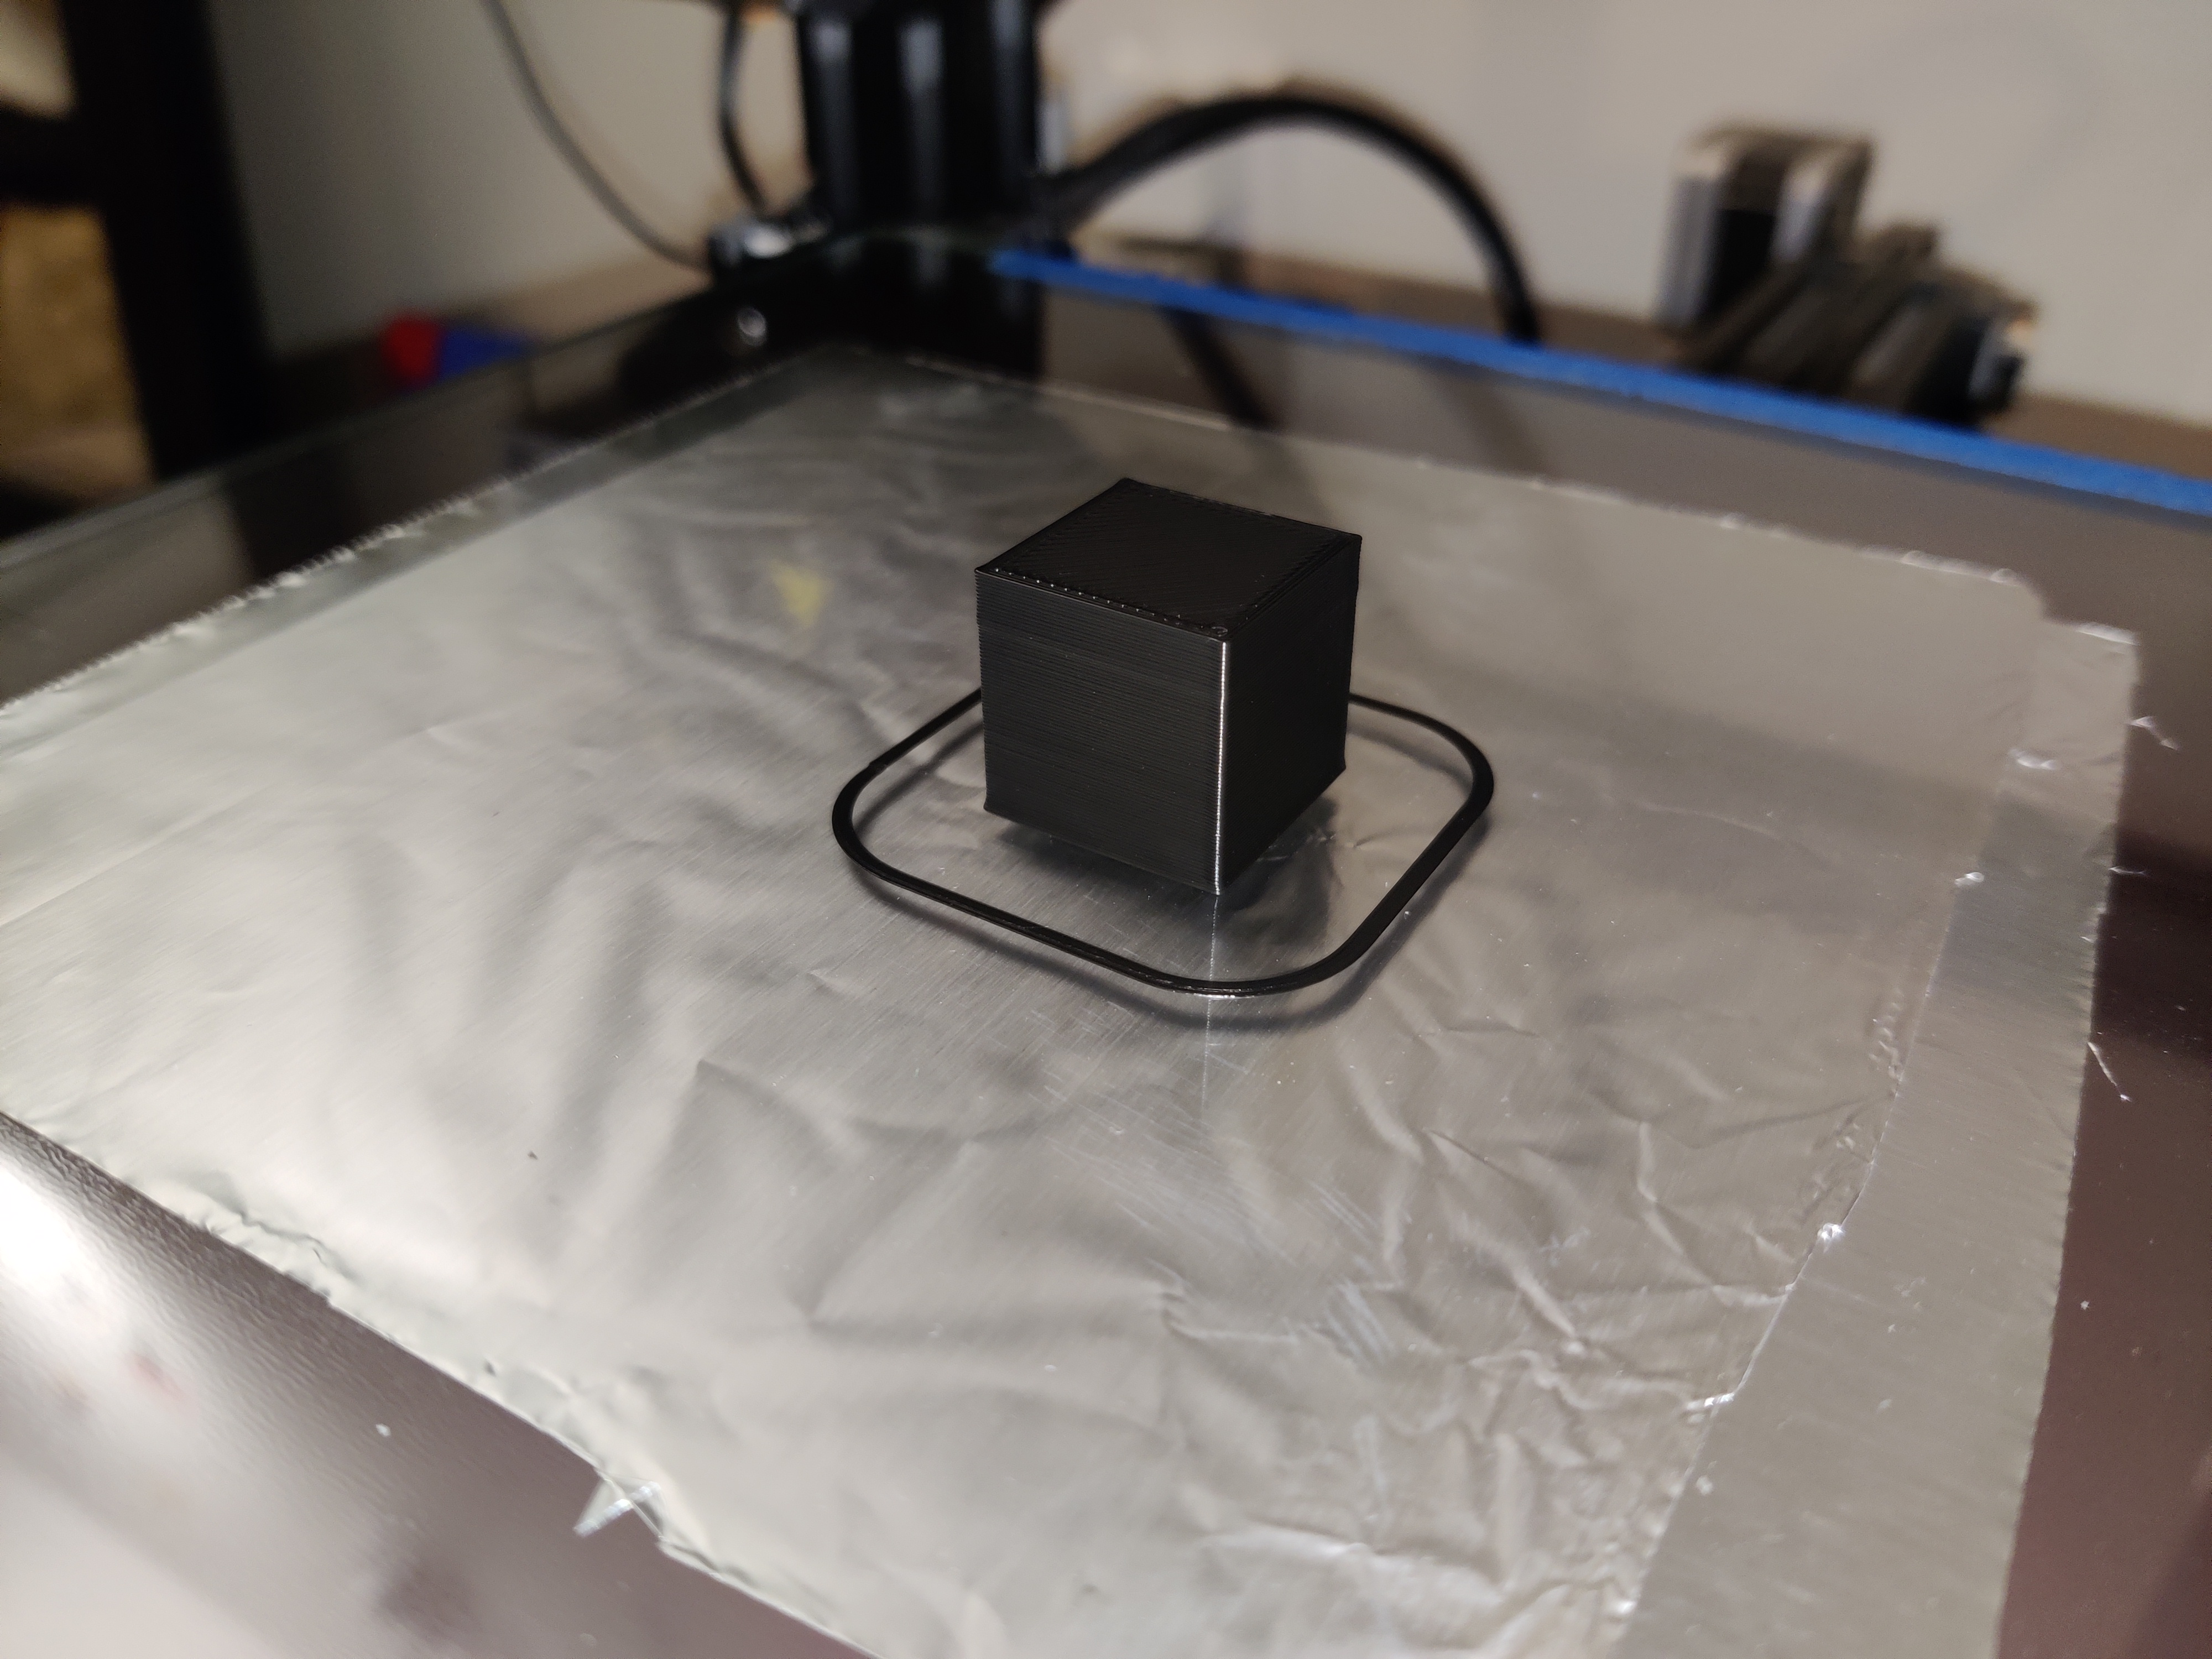 My first cube
Both the standard quality and super cubes measured exactly 20.0mm! The standard cube took about 26 minutes to print while the super took 50 minutes.
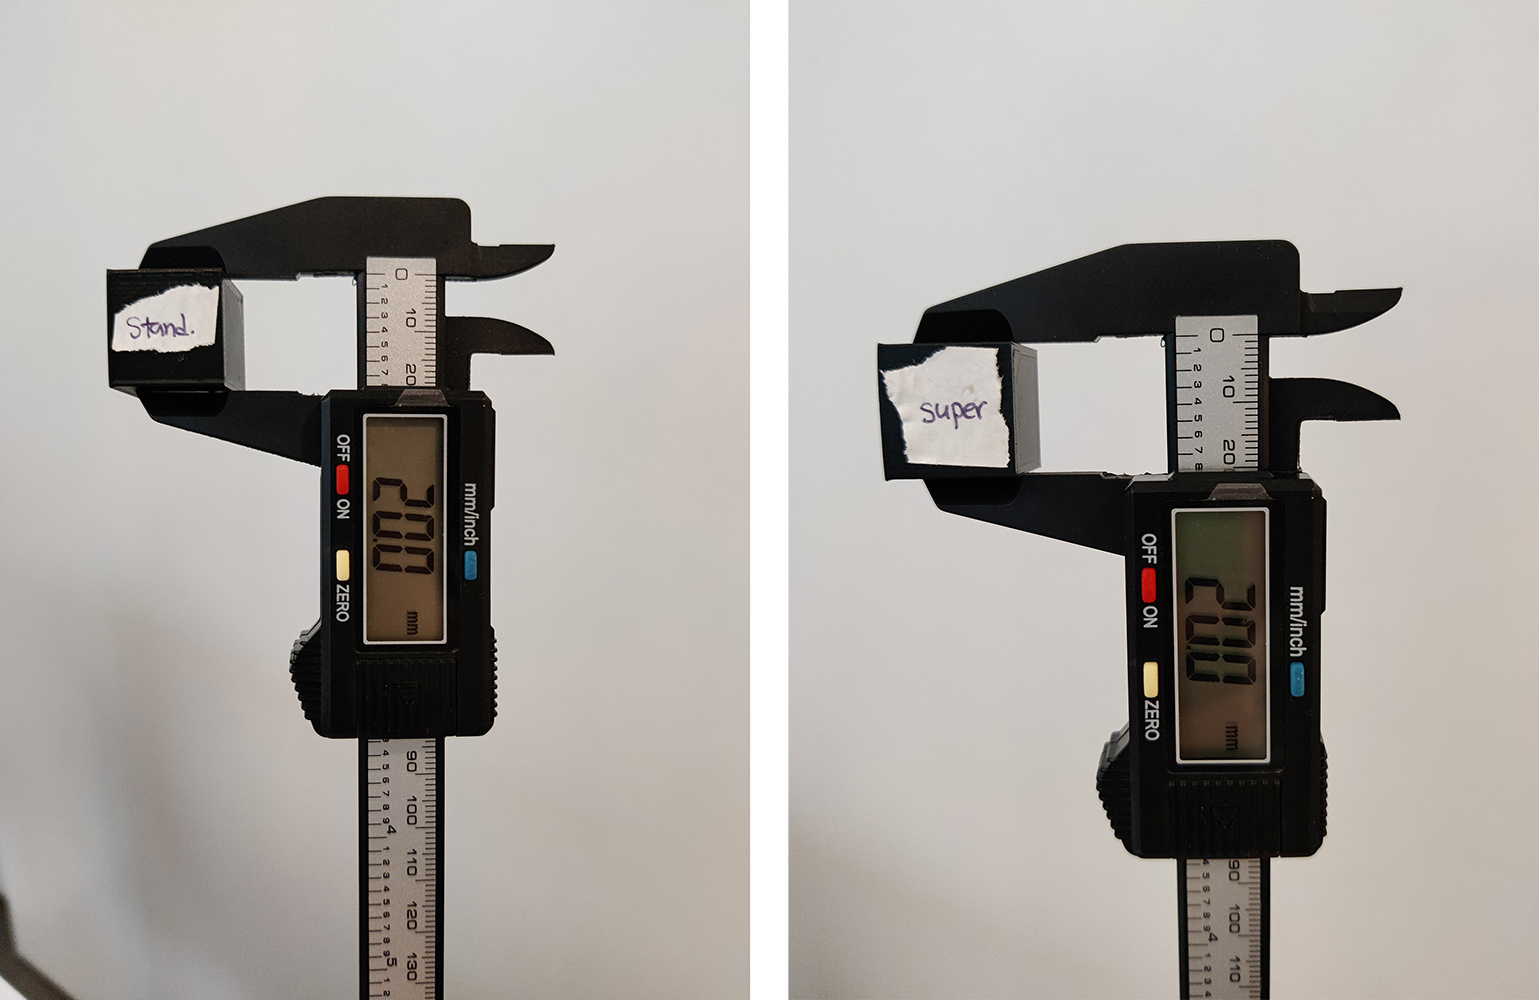
Considering the difference in time it took to print the super vs. standard but the same accuracy and precision, I opted to use the standard setting for the rest of my prints.
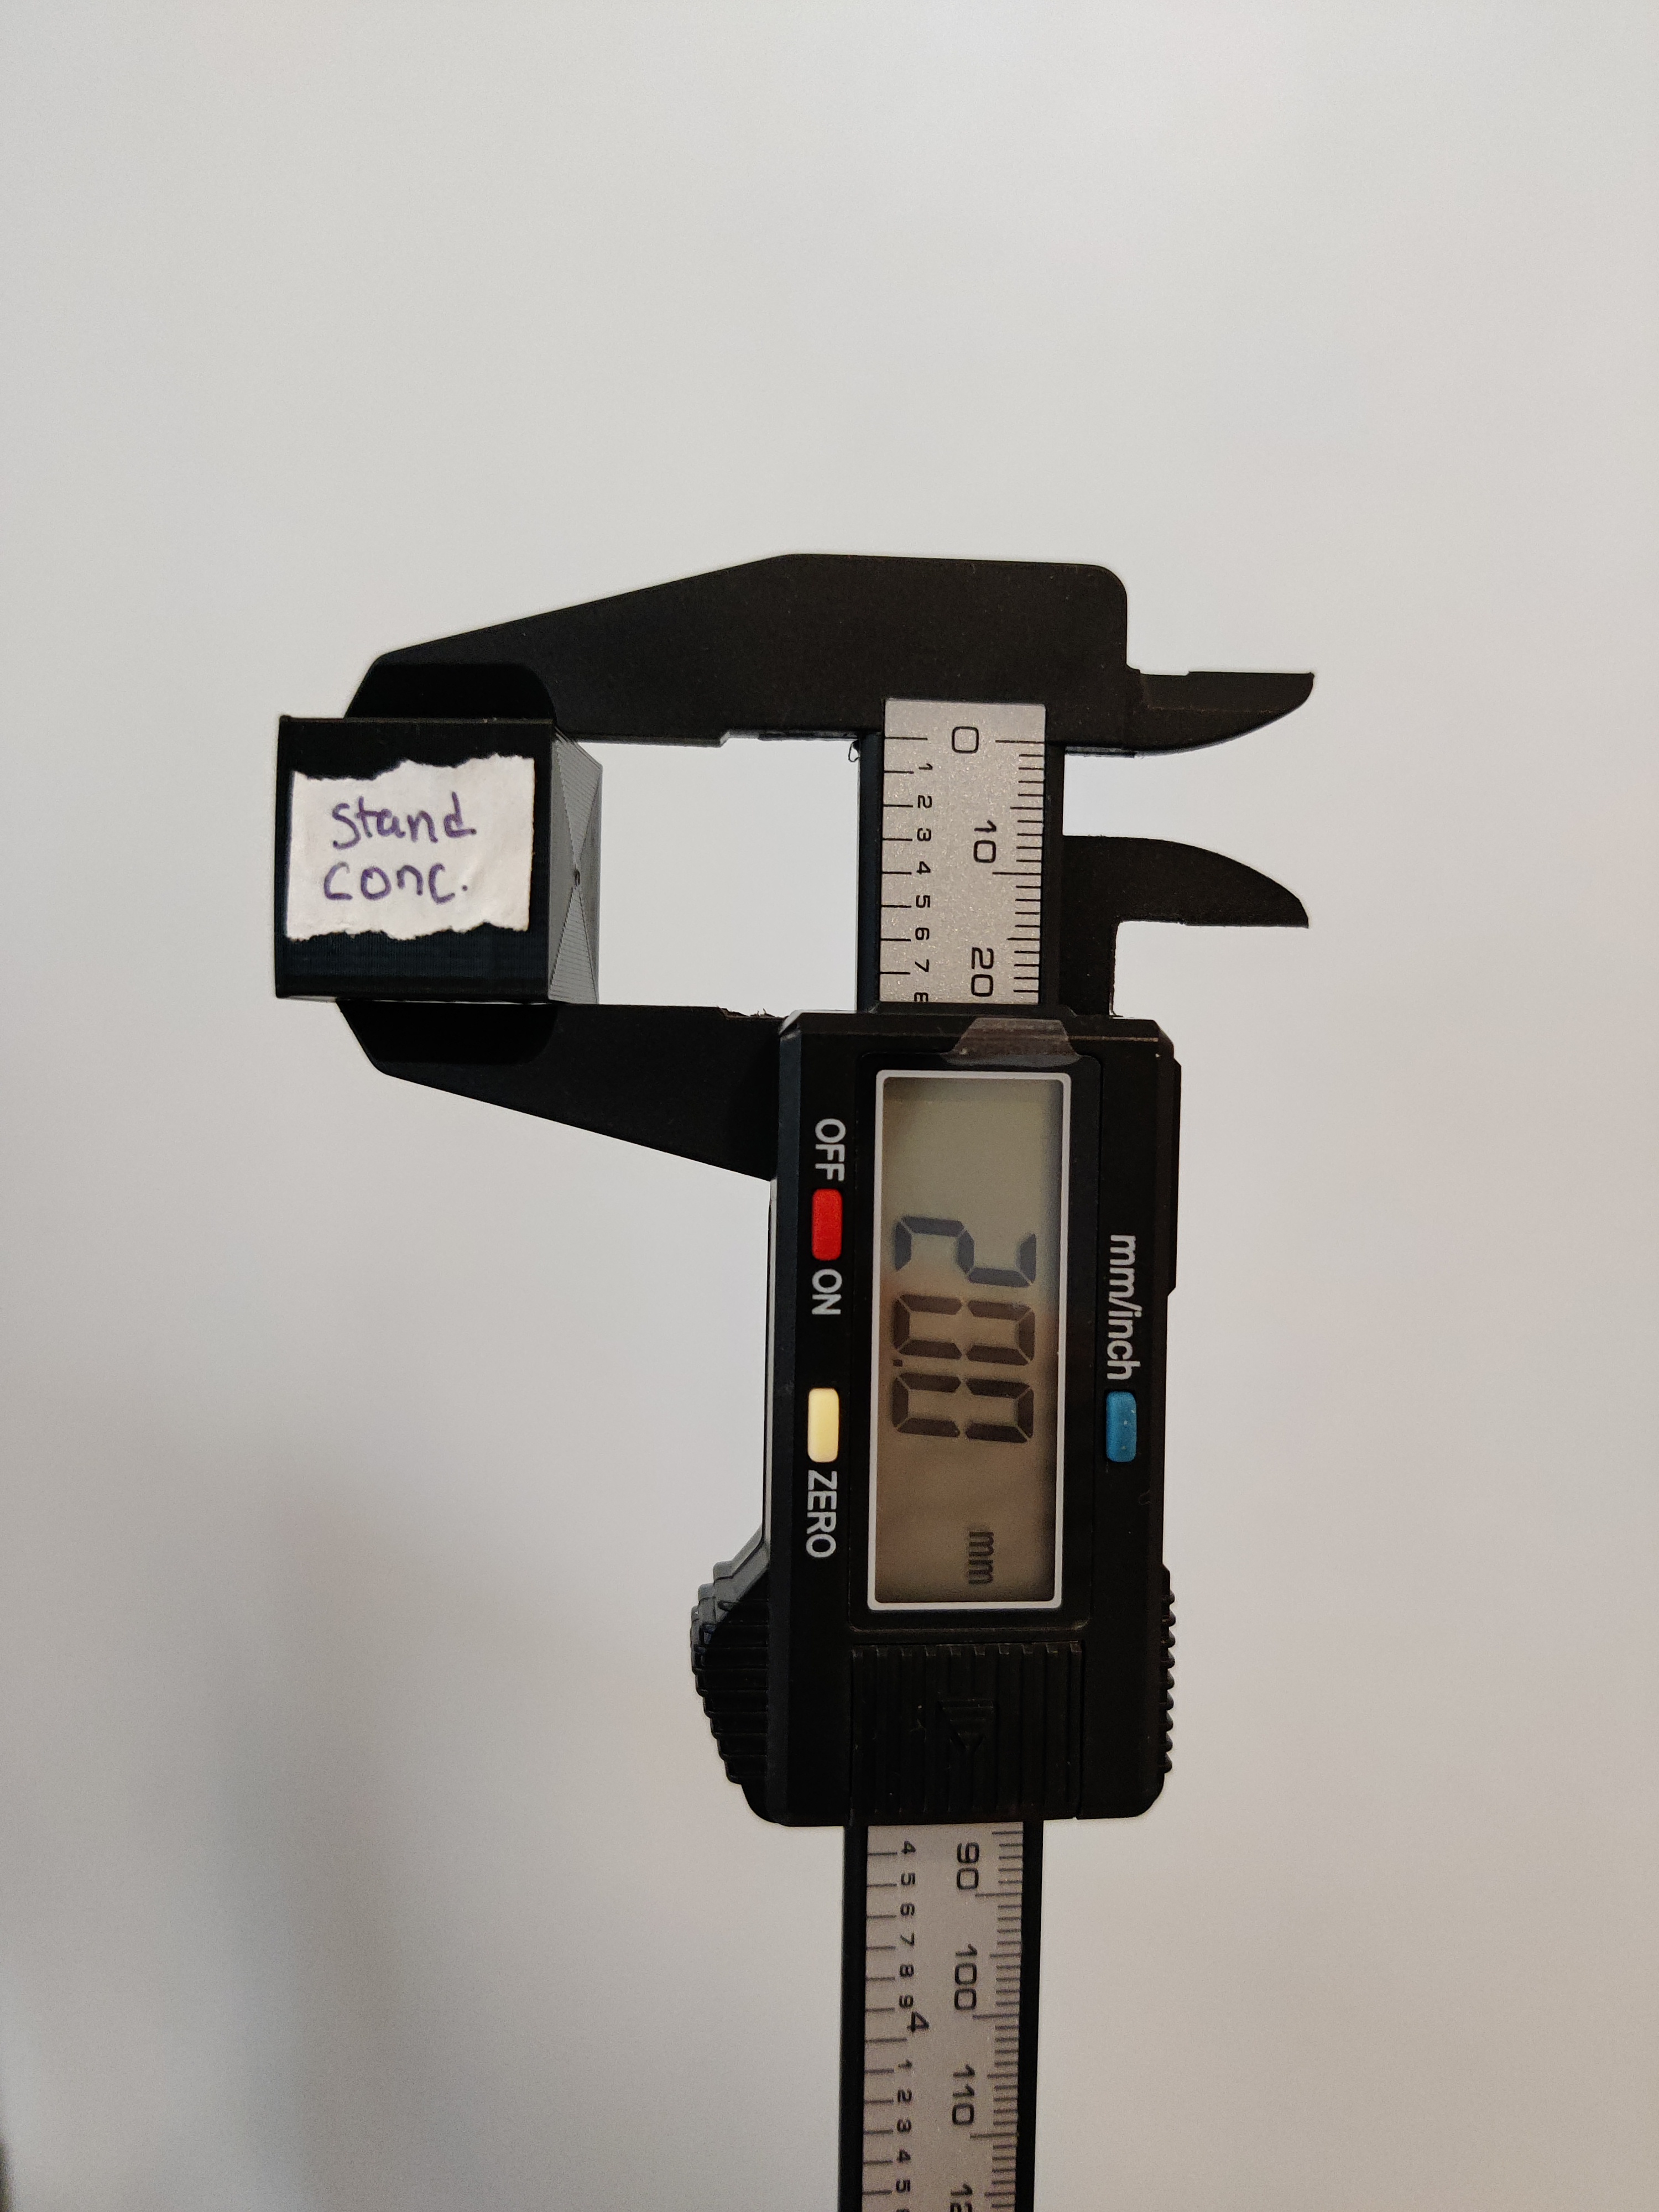
Even though I didn’t have any adhesion issues with these cubes, I wanted to test the glue stick out because it seemed interesting. Before printing my concentric cube, I put some glue down on the bed. HOWEVER… I definitely put way too much glue down and after the print was done, I could not scrape off the cube even after the bed cooled all the way!
I started to panic and ran to printing forums and trusty Reddit threads for solutions. One common solution was to cool the bed and object extremely, either by placing the entire bed in the freezer or fridge. I opted to fill a Ziploc bag with ice cubes and place it on my cube and bed to avoid having to take off the bed and re-level everything. In my panic, I forgot to take any pictures of this debacle. I cleaned off the glue afterward with rubbing alcohol.
After sweating (on my part) and chilling (on the printer), I was finally able to scrape off my concentric layered cube. Before finding this setting in Cura (shoutout to the settings search function), I was really confused about what “a concentric top and bottom layer” could mean for a cube. I was trying to figure out a way that the actual top and bottom layer could be concentric like inside of each other. It was not computing in my head. But when I saw what was being printed it seemed so obvious! It was cool to see the difference in layer structure between the default cube and the concentric one. You can really see the concentric square rings on the top and bottom. This cube also measured 20.0mm.
 Looking at the cool structural differences
Printing tubes & cylinders
Next up were the tubes and cylinders. I first created the tubes in Rhino by using the Tube command. I decided to make the negative space and positive space in my tube the same width. I also created the cylinders using the Cylinder command.
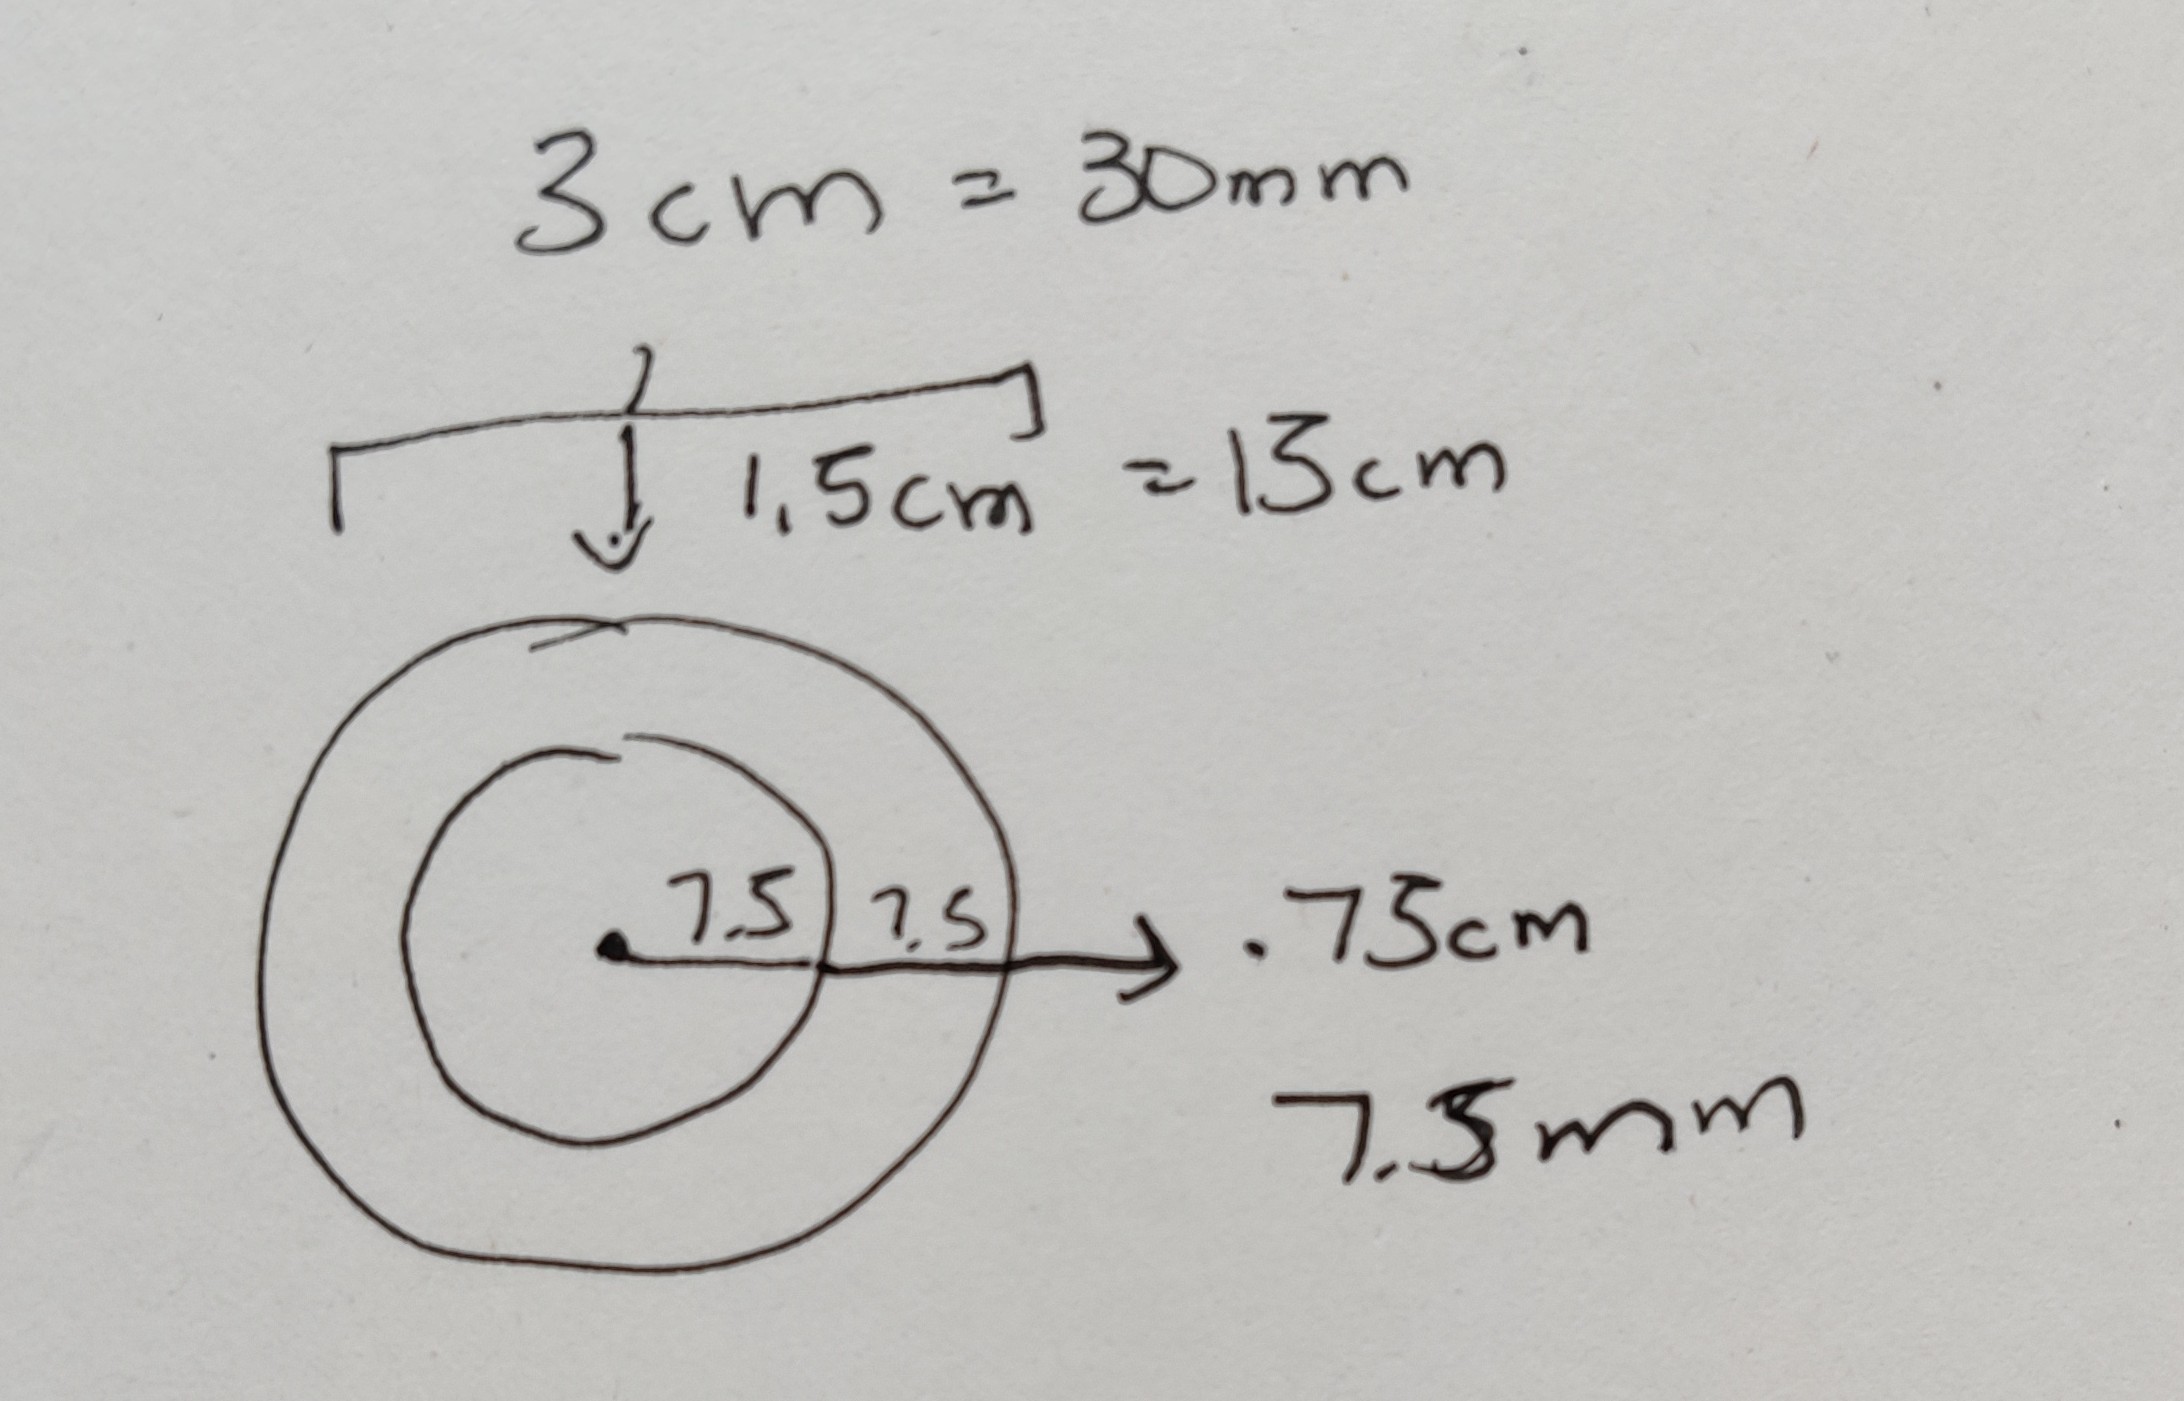 Measurements for my tube
After exporting my tube to STL, I loaded it into Cura and was surprised to see that it looked like a box! So weird… After poking around a little bit online to see what the issue may be, I came across this guide which brought my attention to the Polygon Mesh Detailed Options, or STL Mesh Options as they are called in the current version of Rhino that we have. Since the site says that the defaults settings are “coarse, and therefore large surfaces will be low in polygons to reduce the upload size. If the settings make details look too tessellated, then you can use finer settings on specific objects by converting them to a mesh before the export.”, I decided to increase the options one by one and preview the export. I found that changing the maximum angle to 3 made the tube export normally.
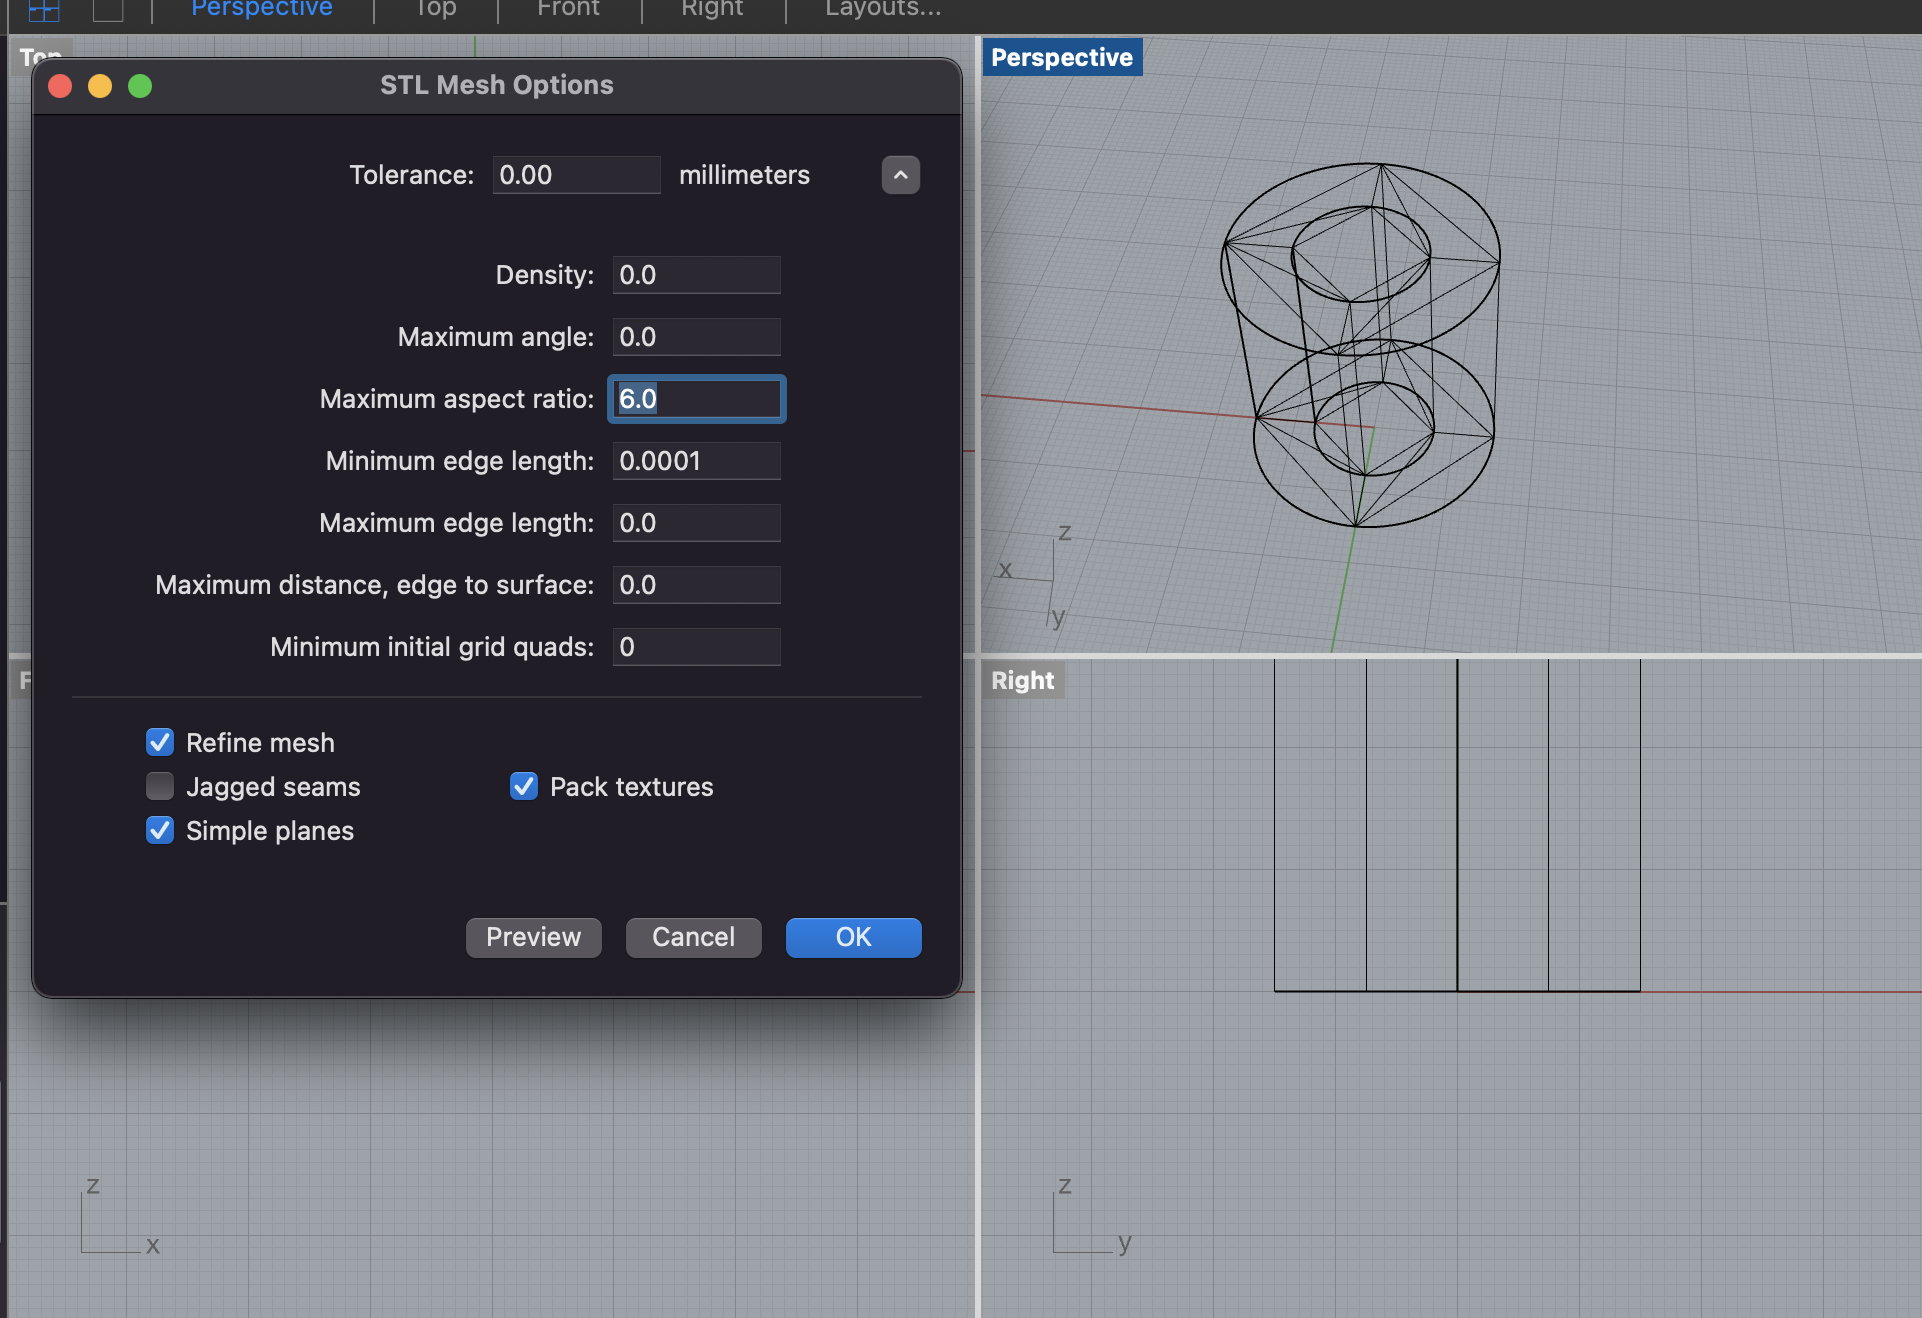 Exporting preview without changing settings
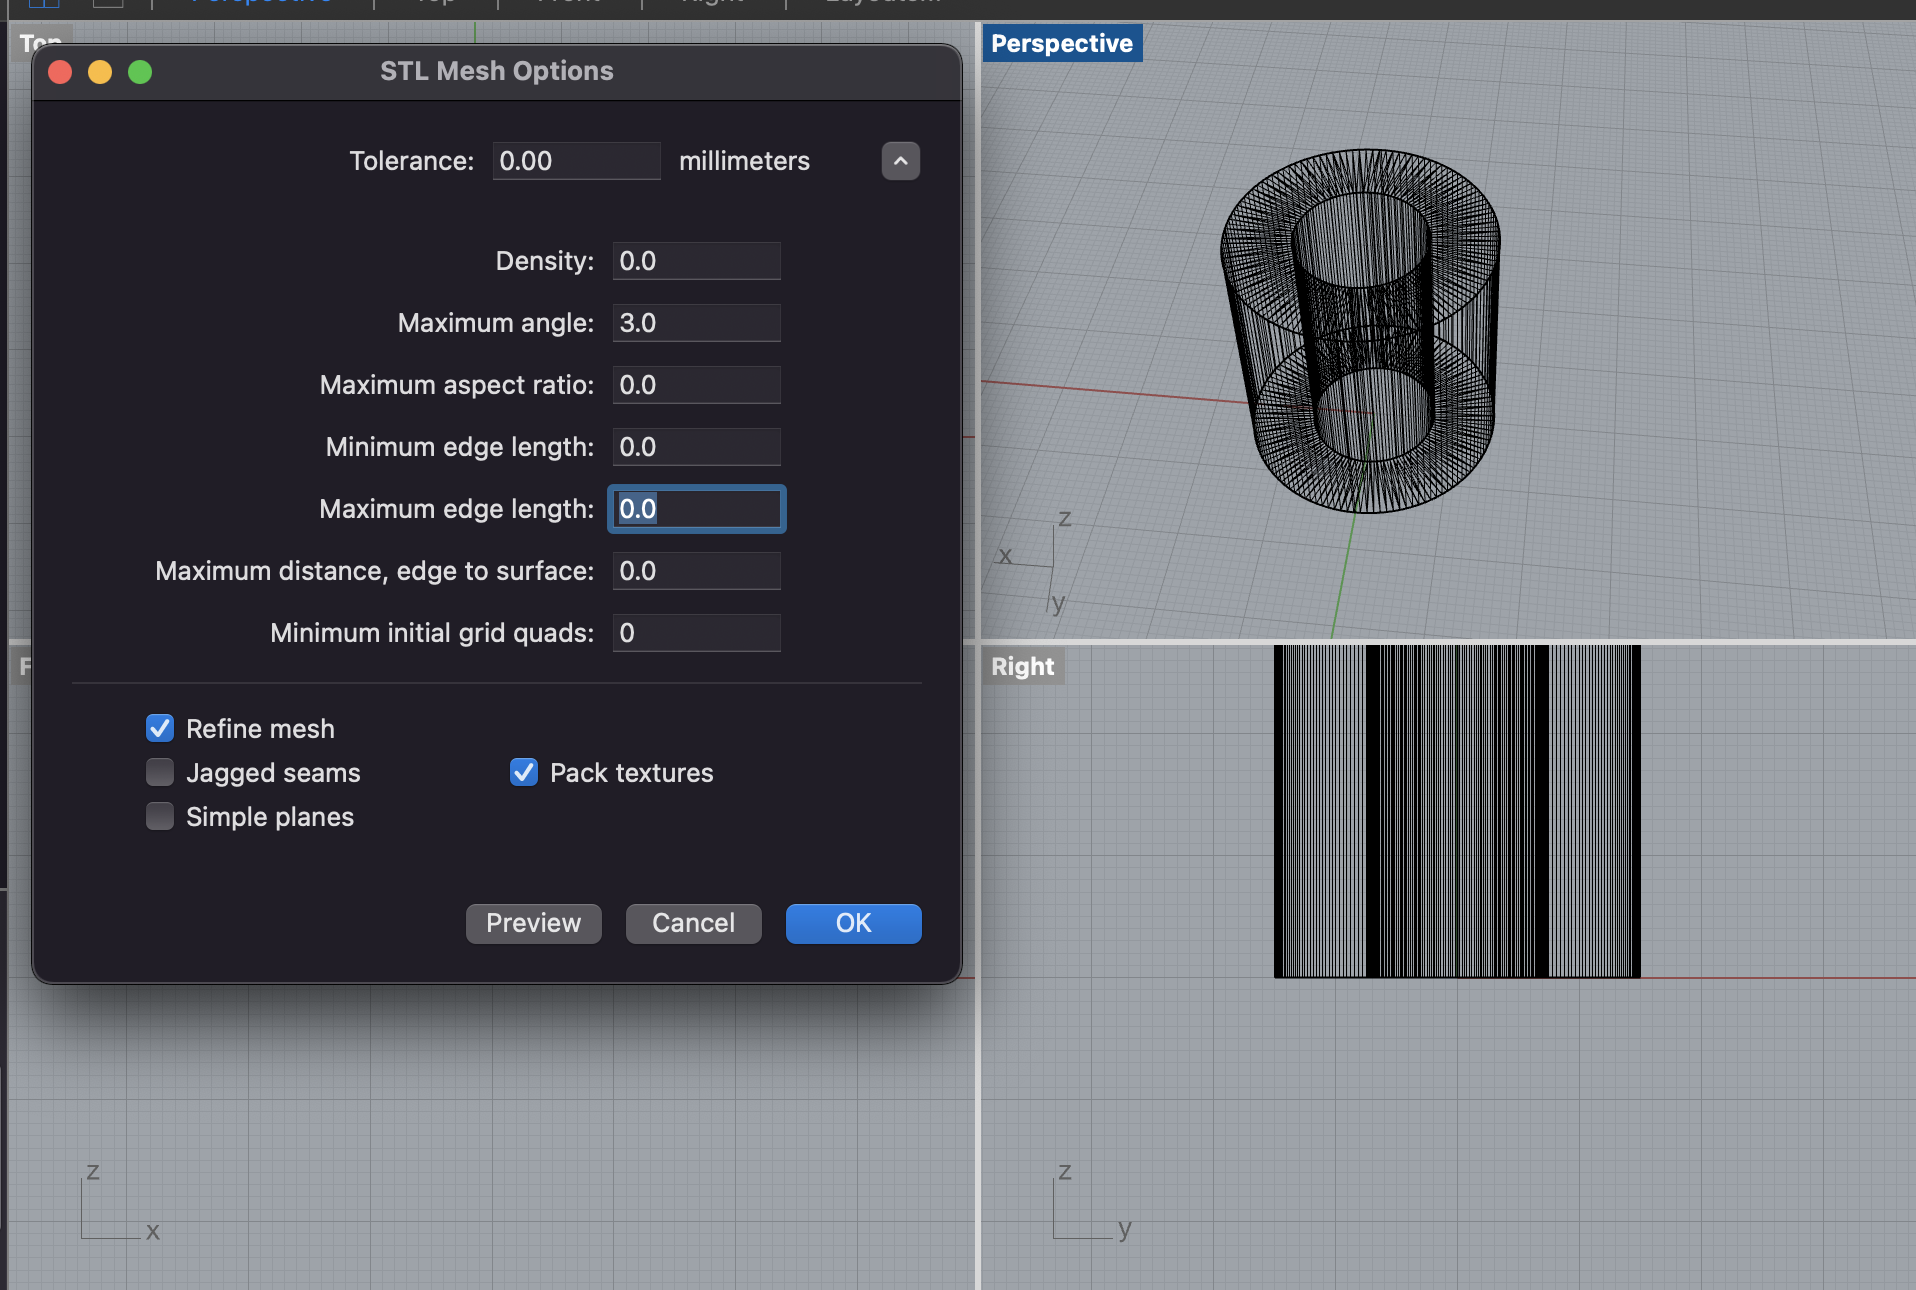 Exporting preview after changing settings
Now, with my correct tube, I could start printing!
I realized that I could put a few prints on one job to be more efficient. The objects in this batch were:
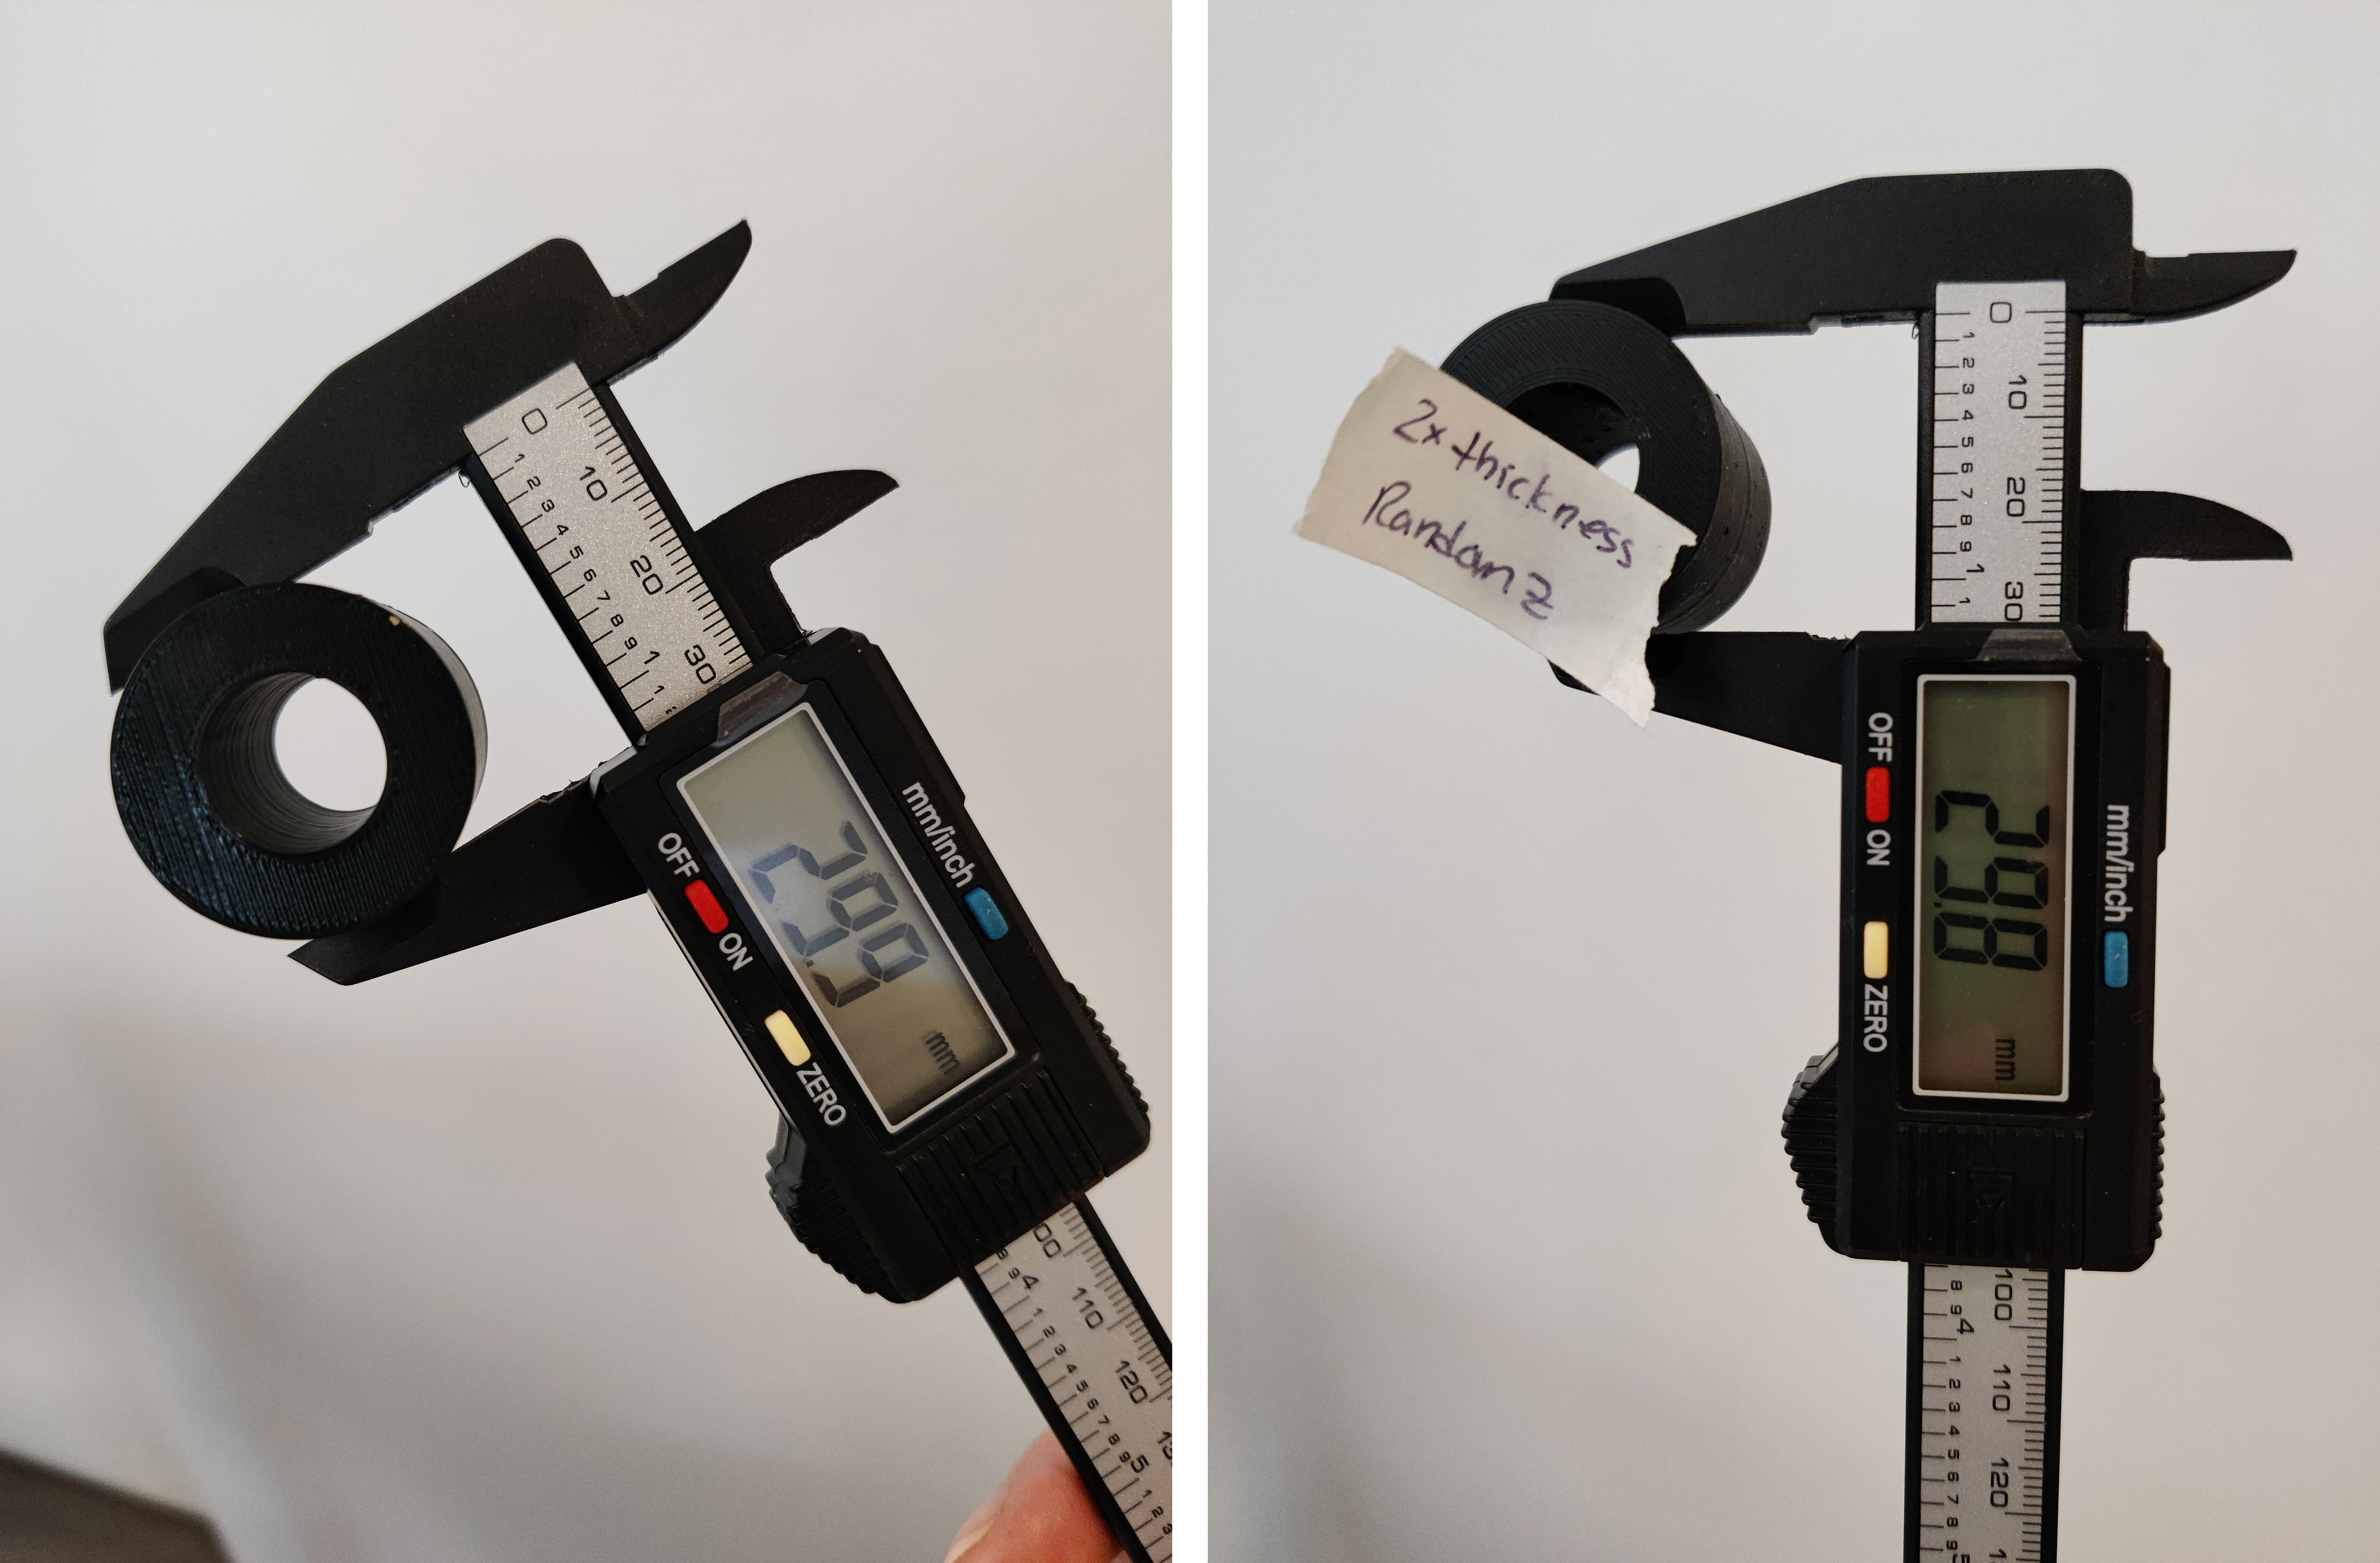
- A tube 3cm in diameter and 3cm high with a single extrusion wall thickness
- A tube 3cm in diameter and 3cm high with a double extrusion wall thickness and random z-seam alignment
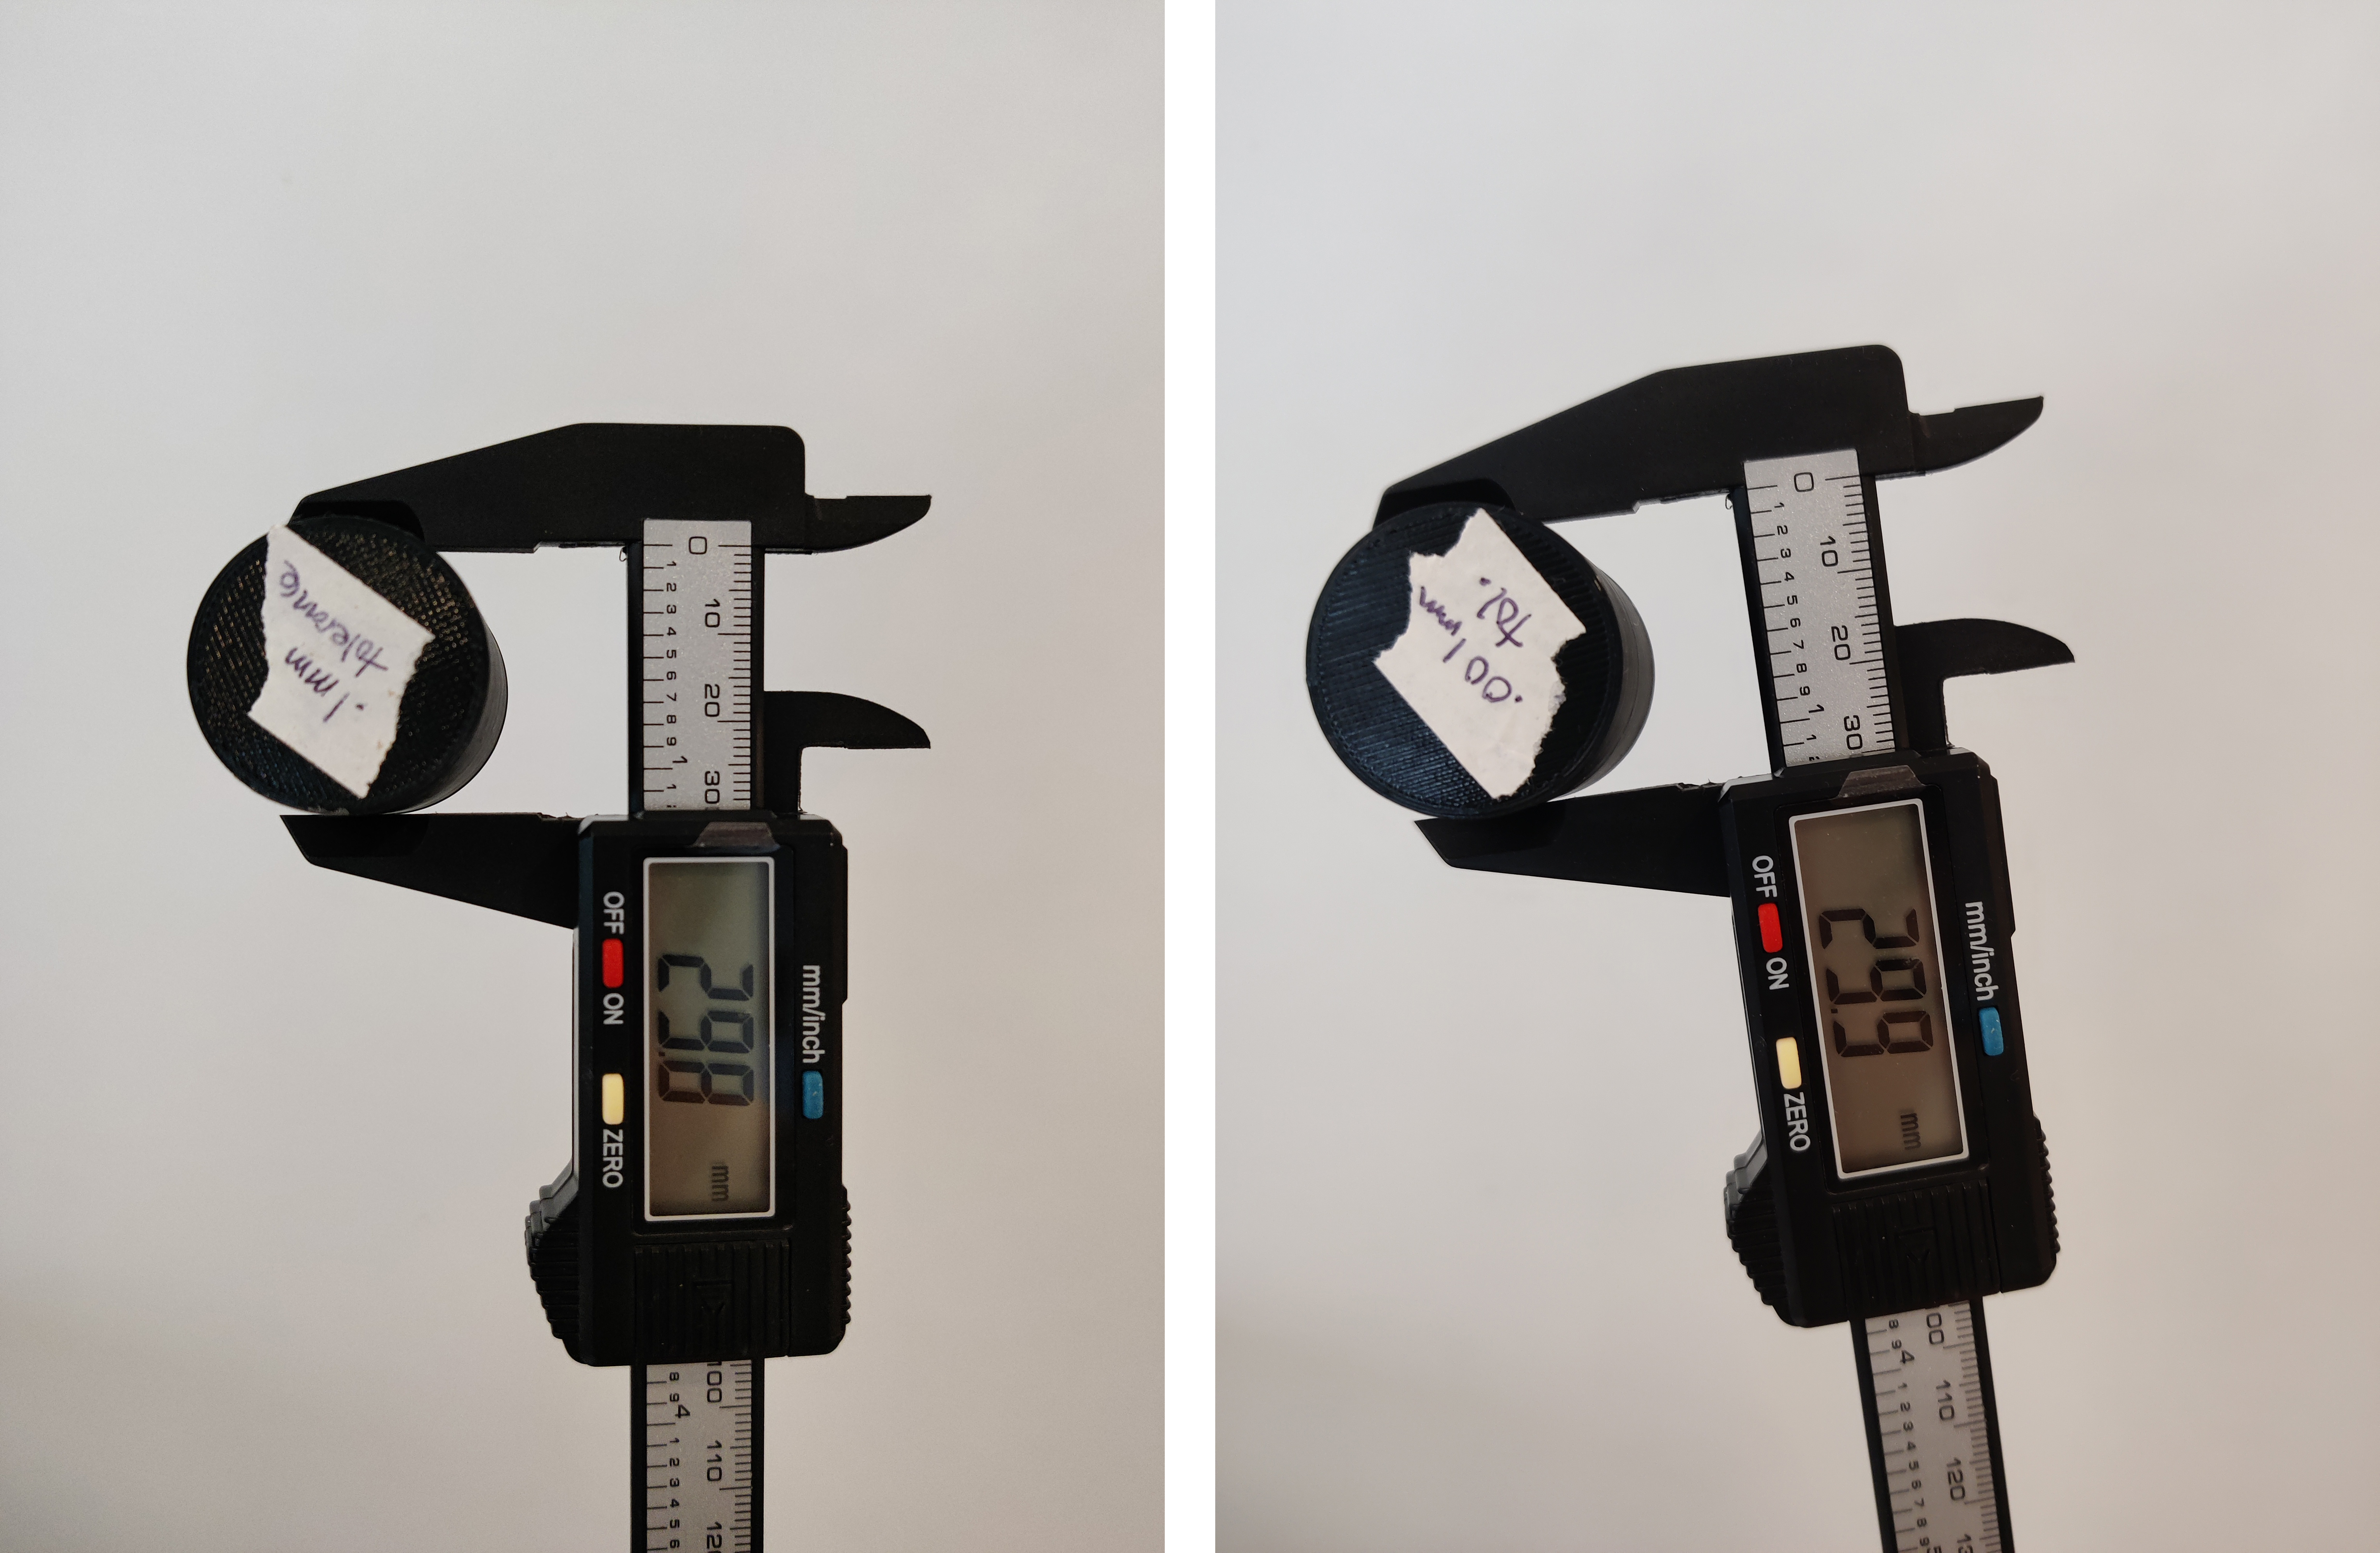
- A cylinder 3cm in diameter exported with a 0.1mm tolerance
- A cylinder 3cm in diameter exported with a 0.001mm tolerance
These could all be printed in the same batch since you can adjust these in the per model settings. These 4 objects all printed with no problems.
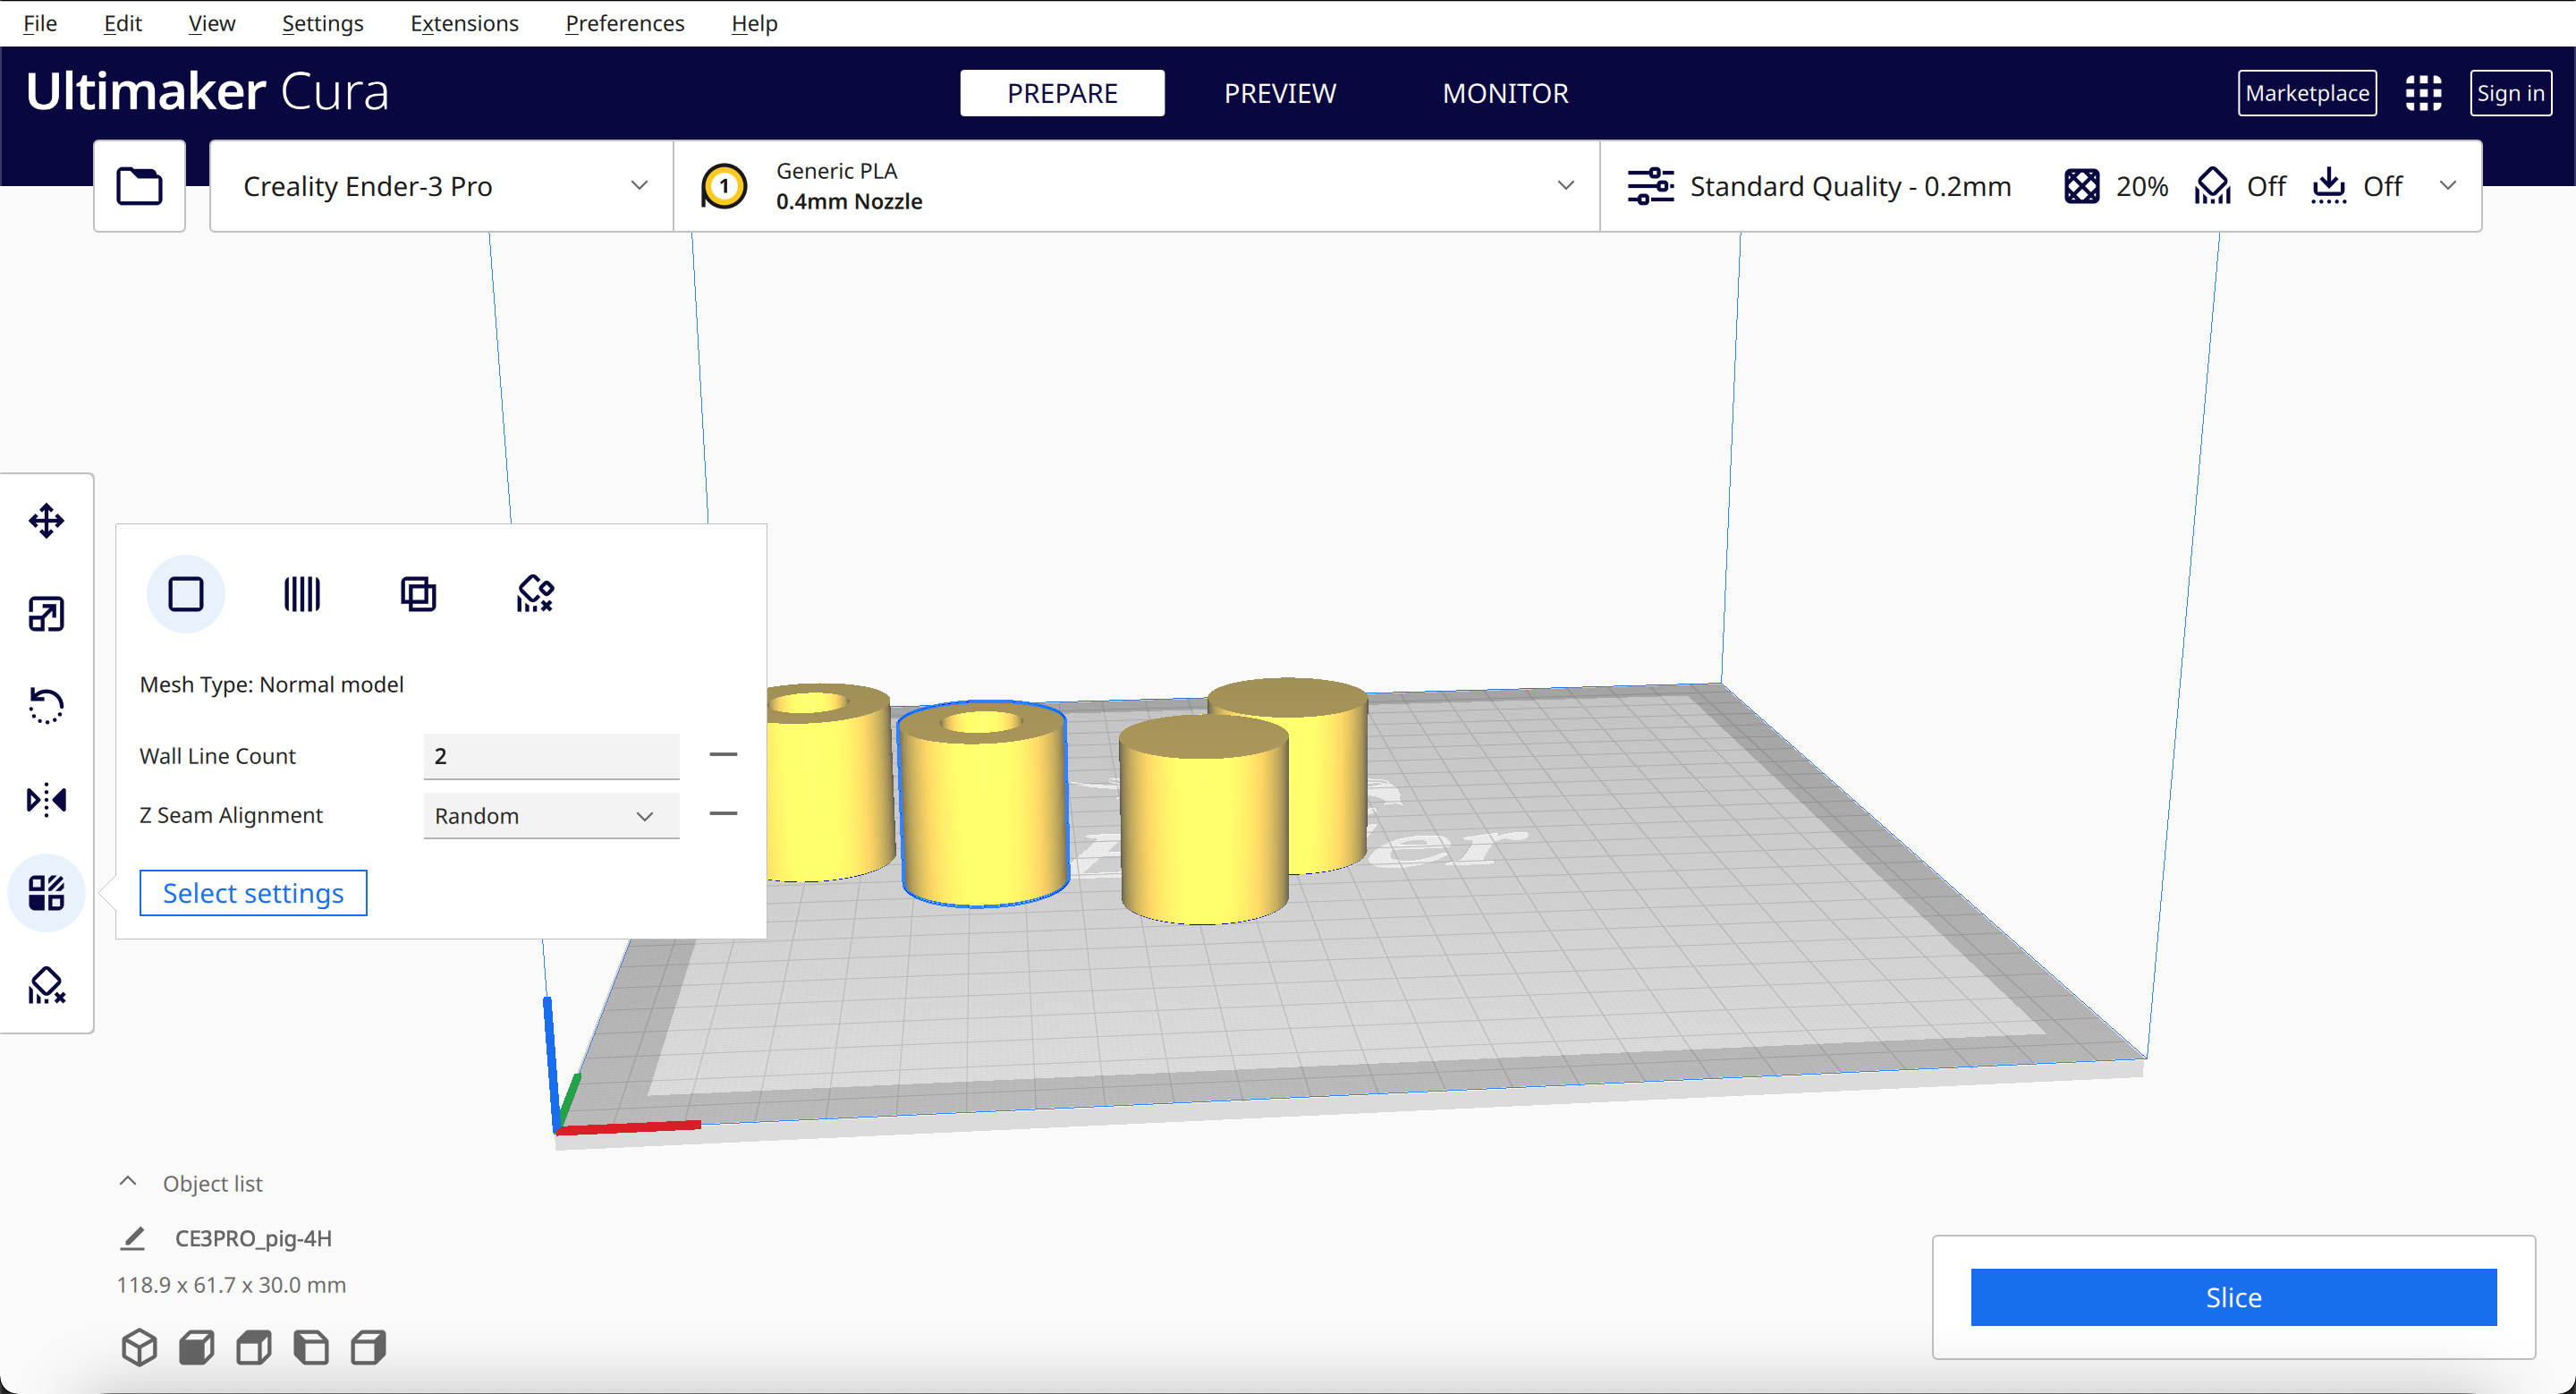 Setting per model settings
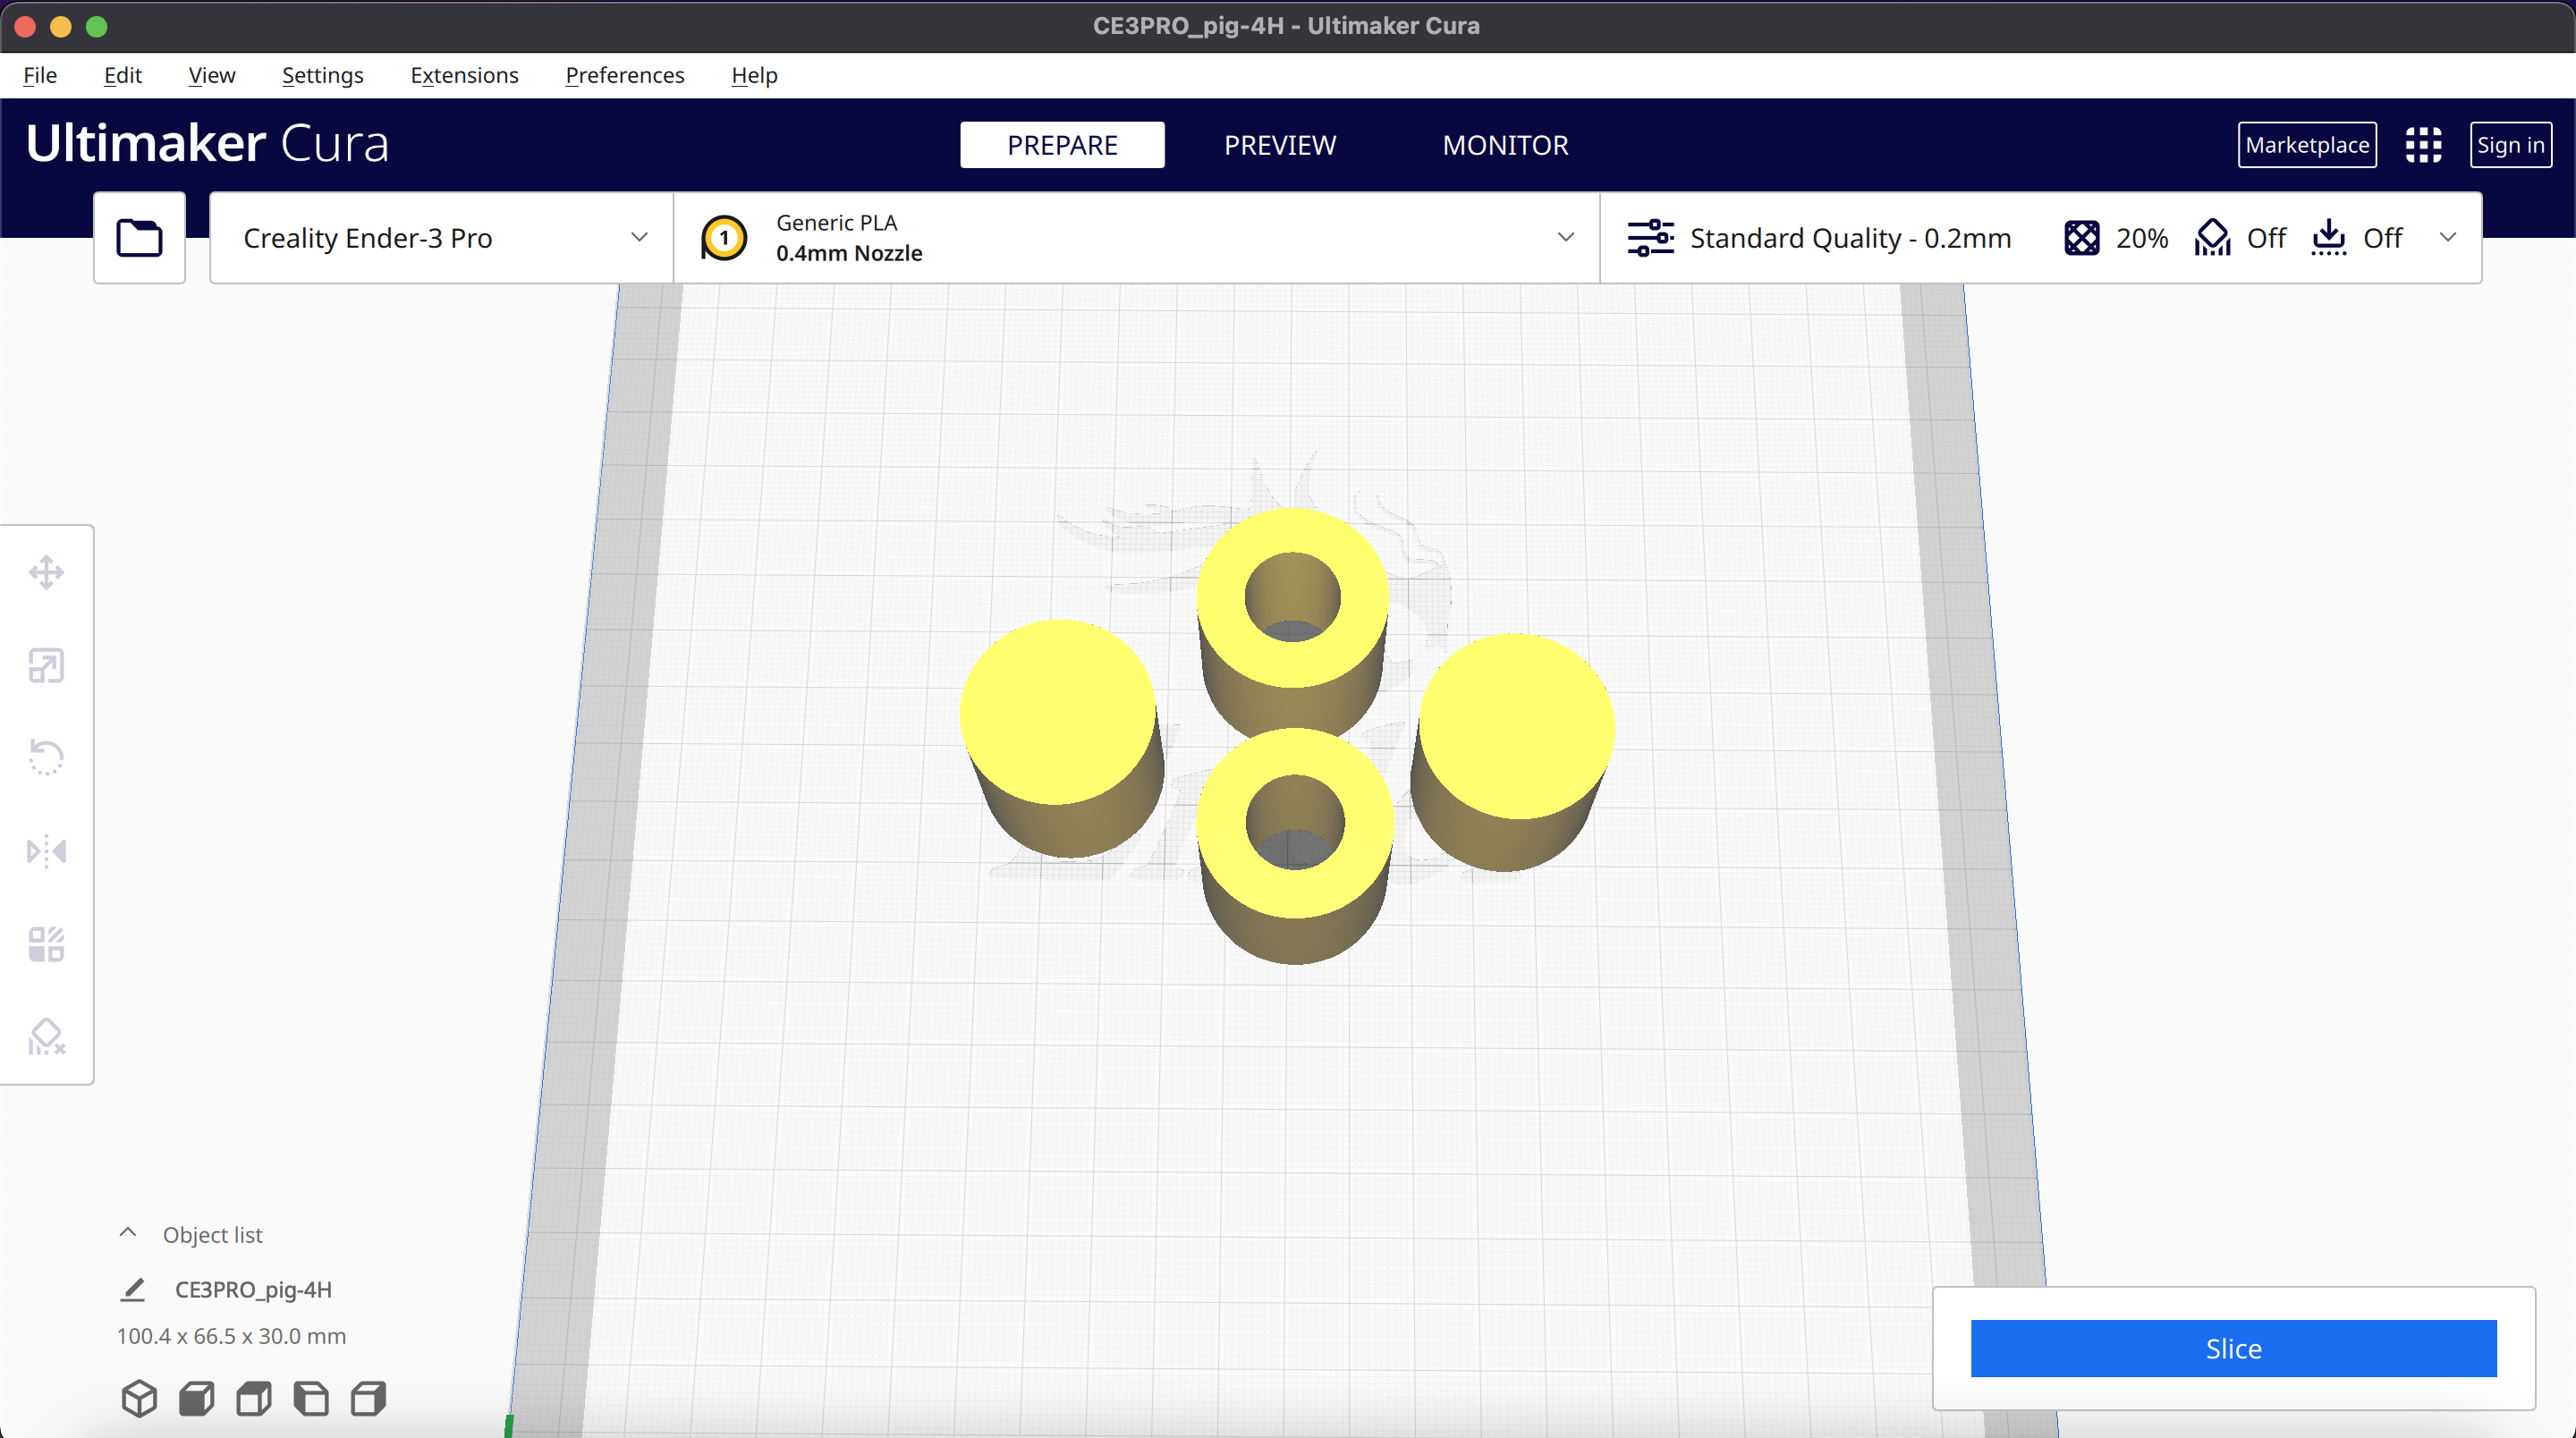 Sliced models ready to go
Total, the batch with 4 objects, 2 tubes and 2 cylinders, took just under 4 hours to complete.
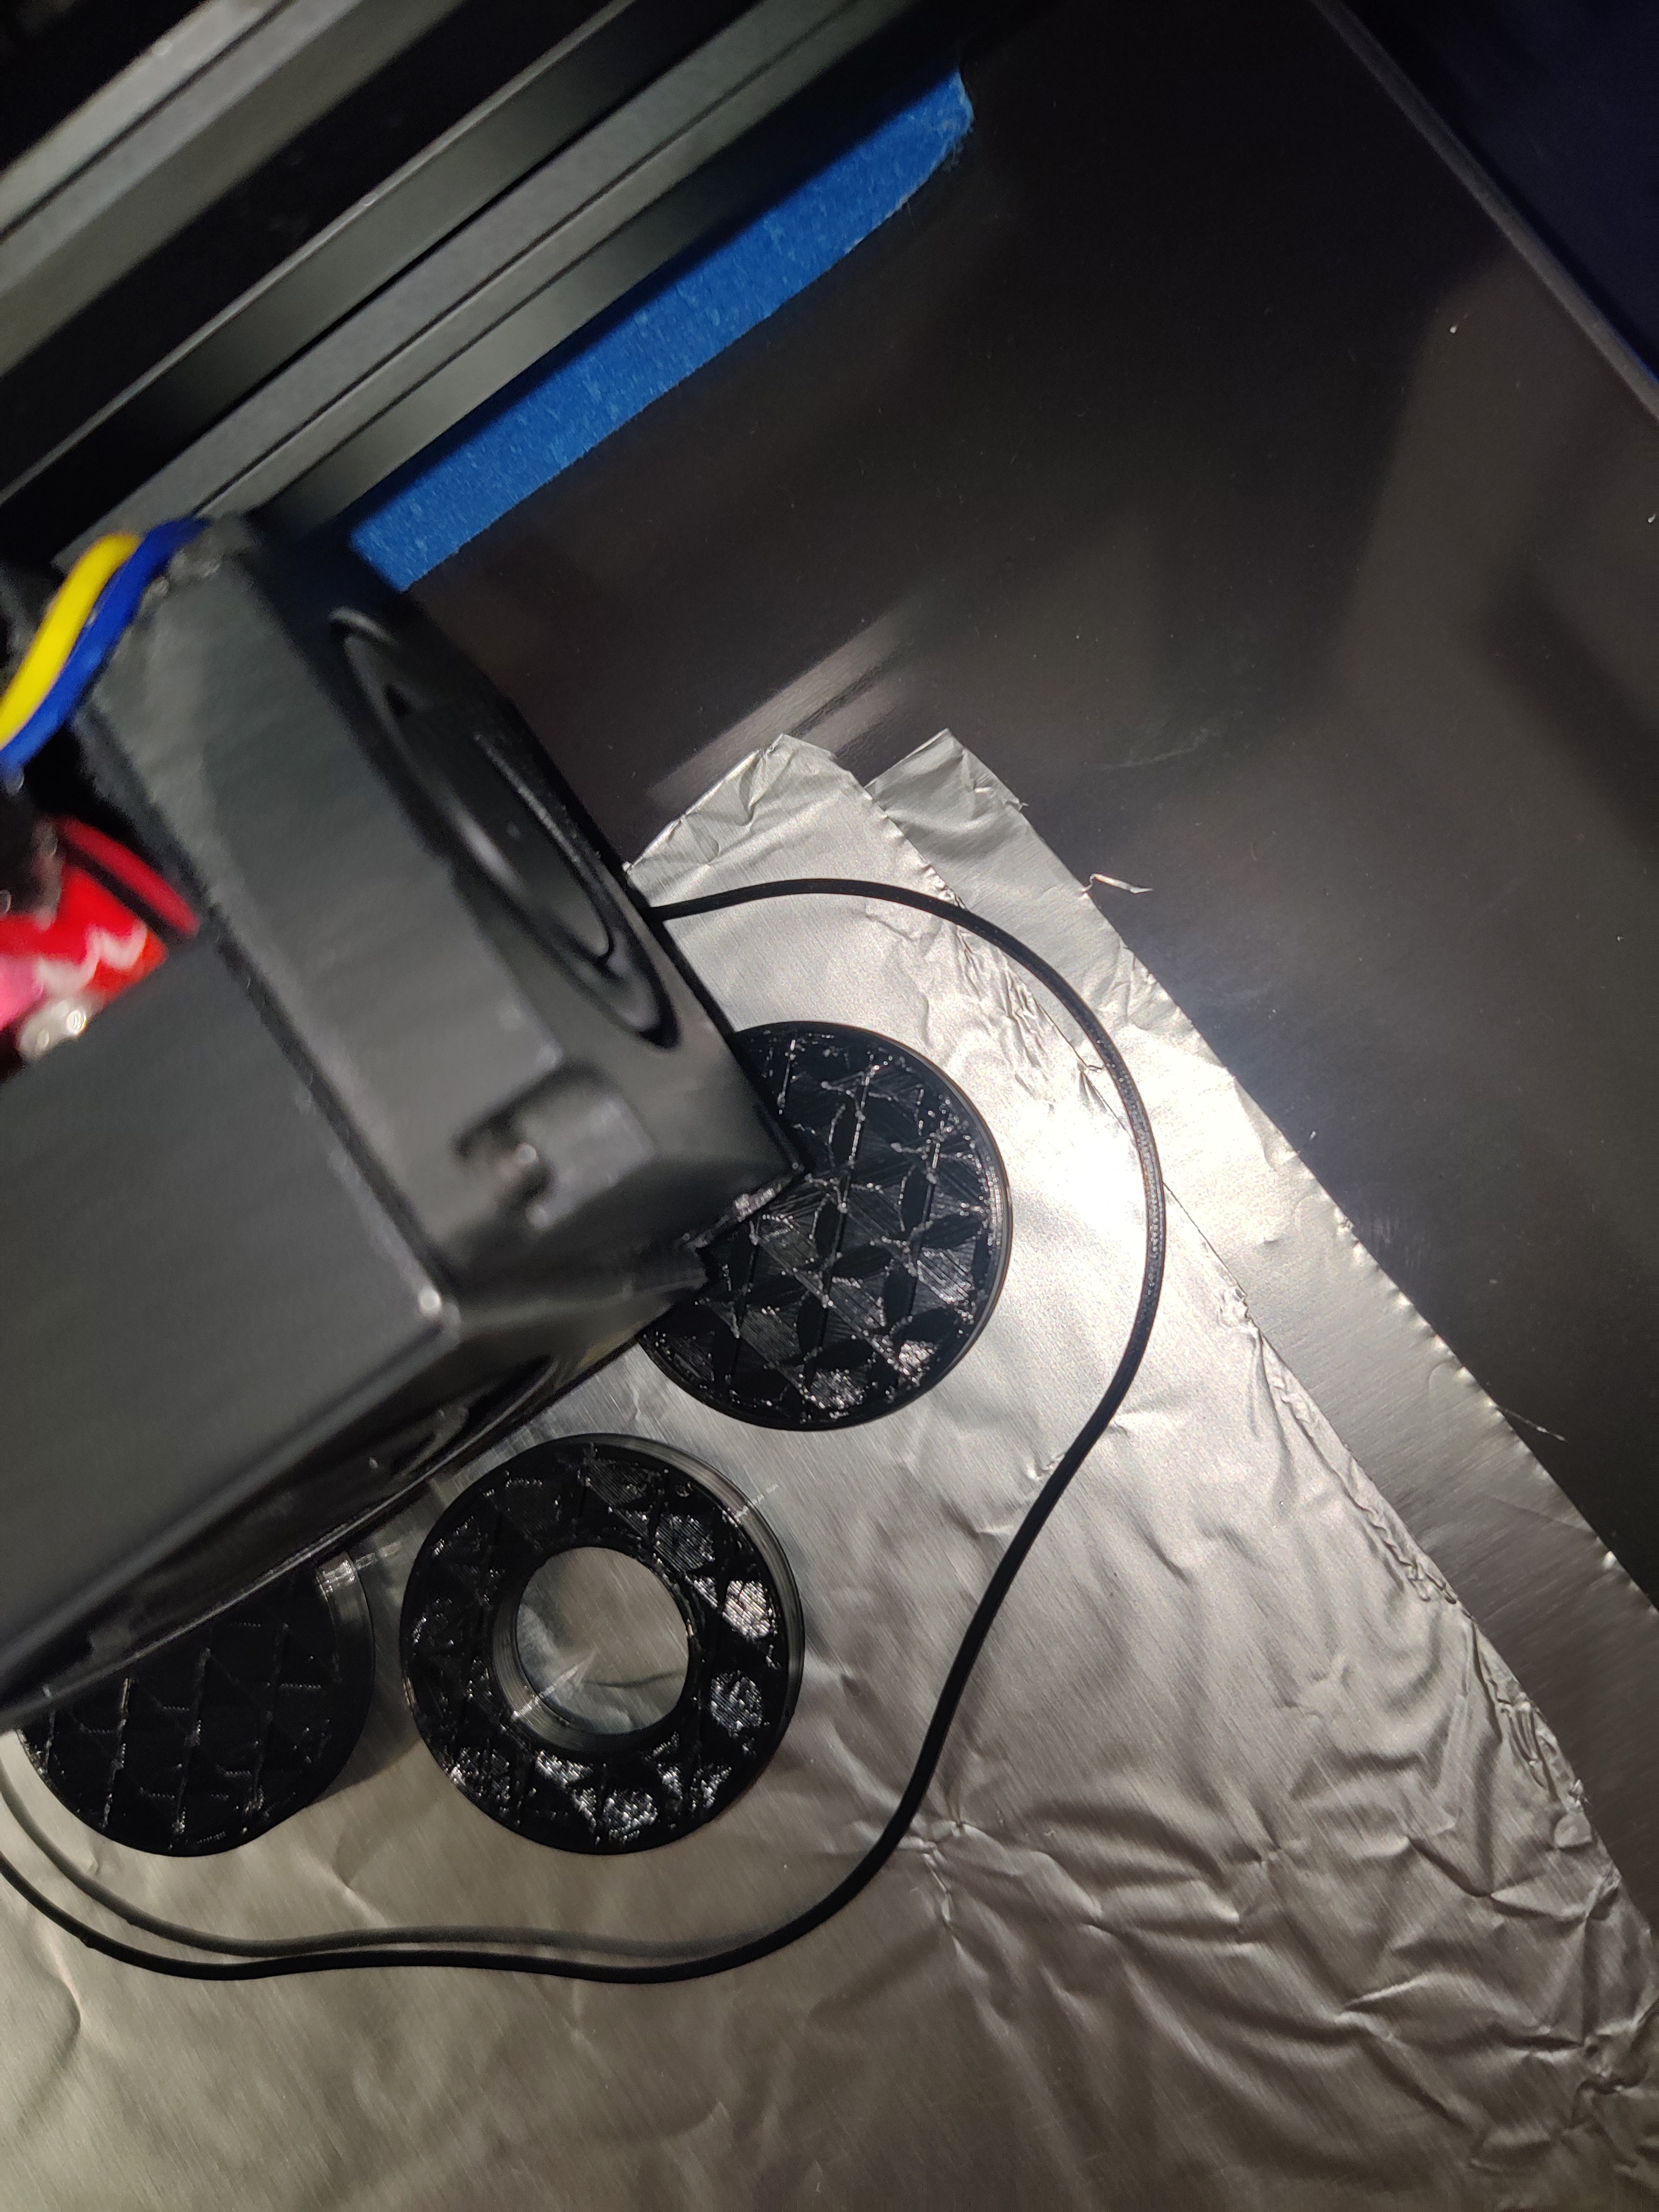
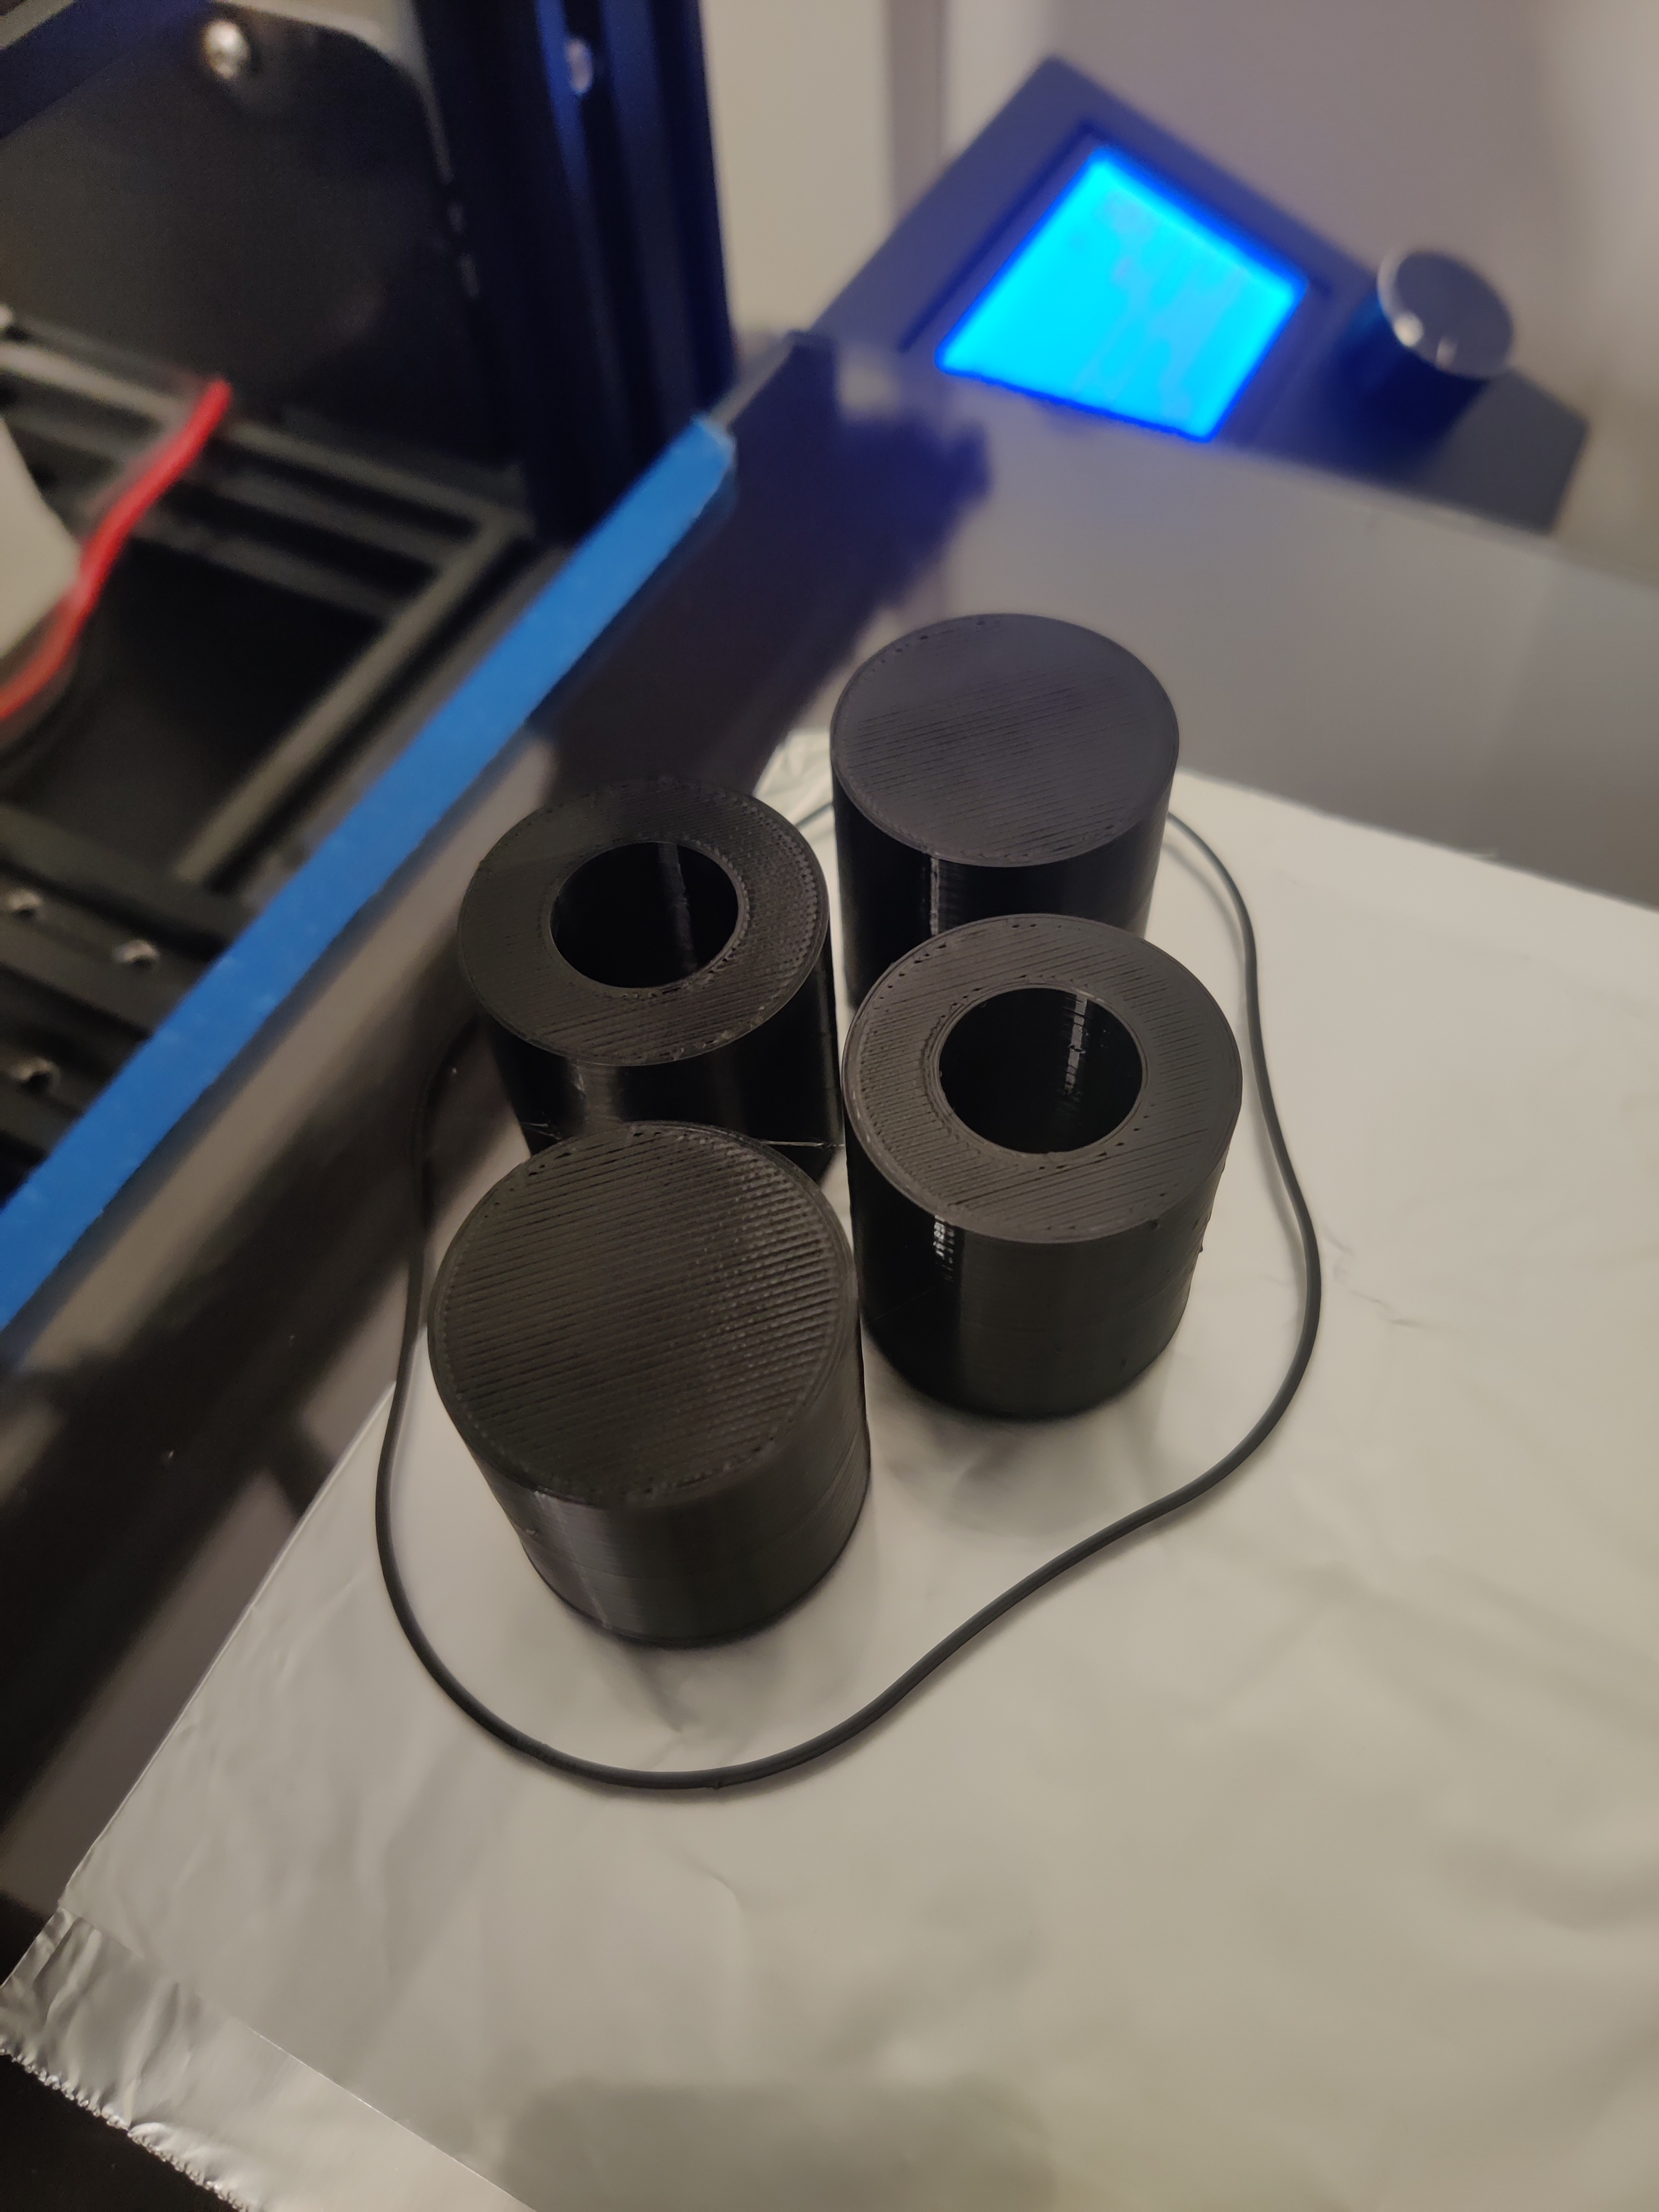
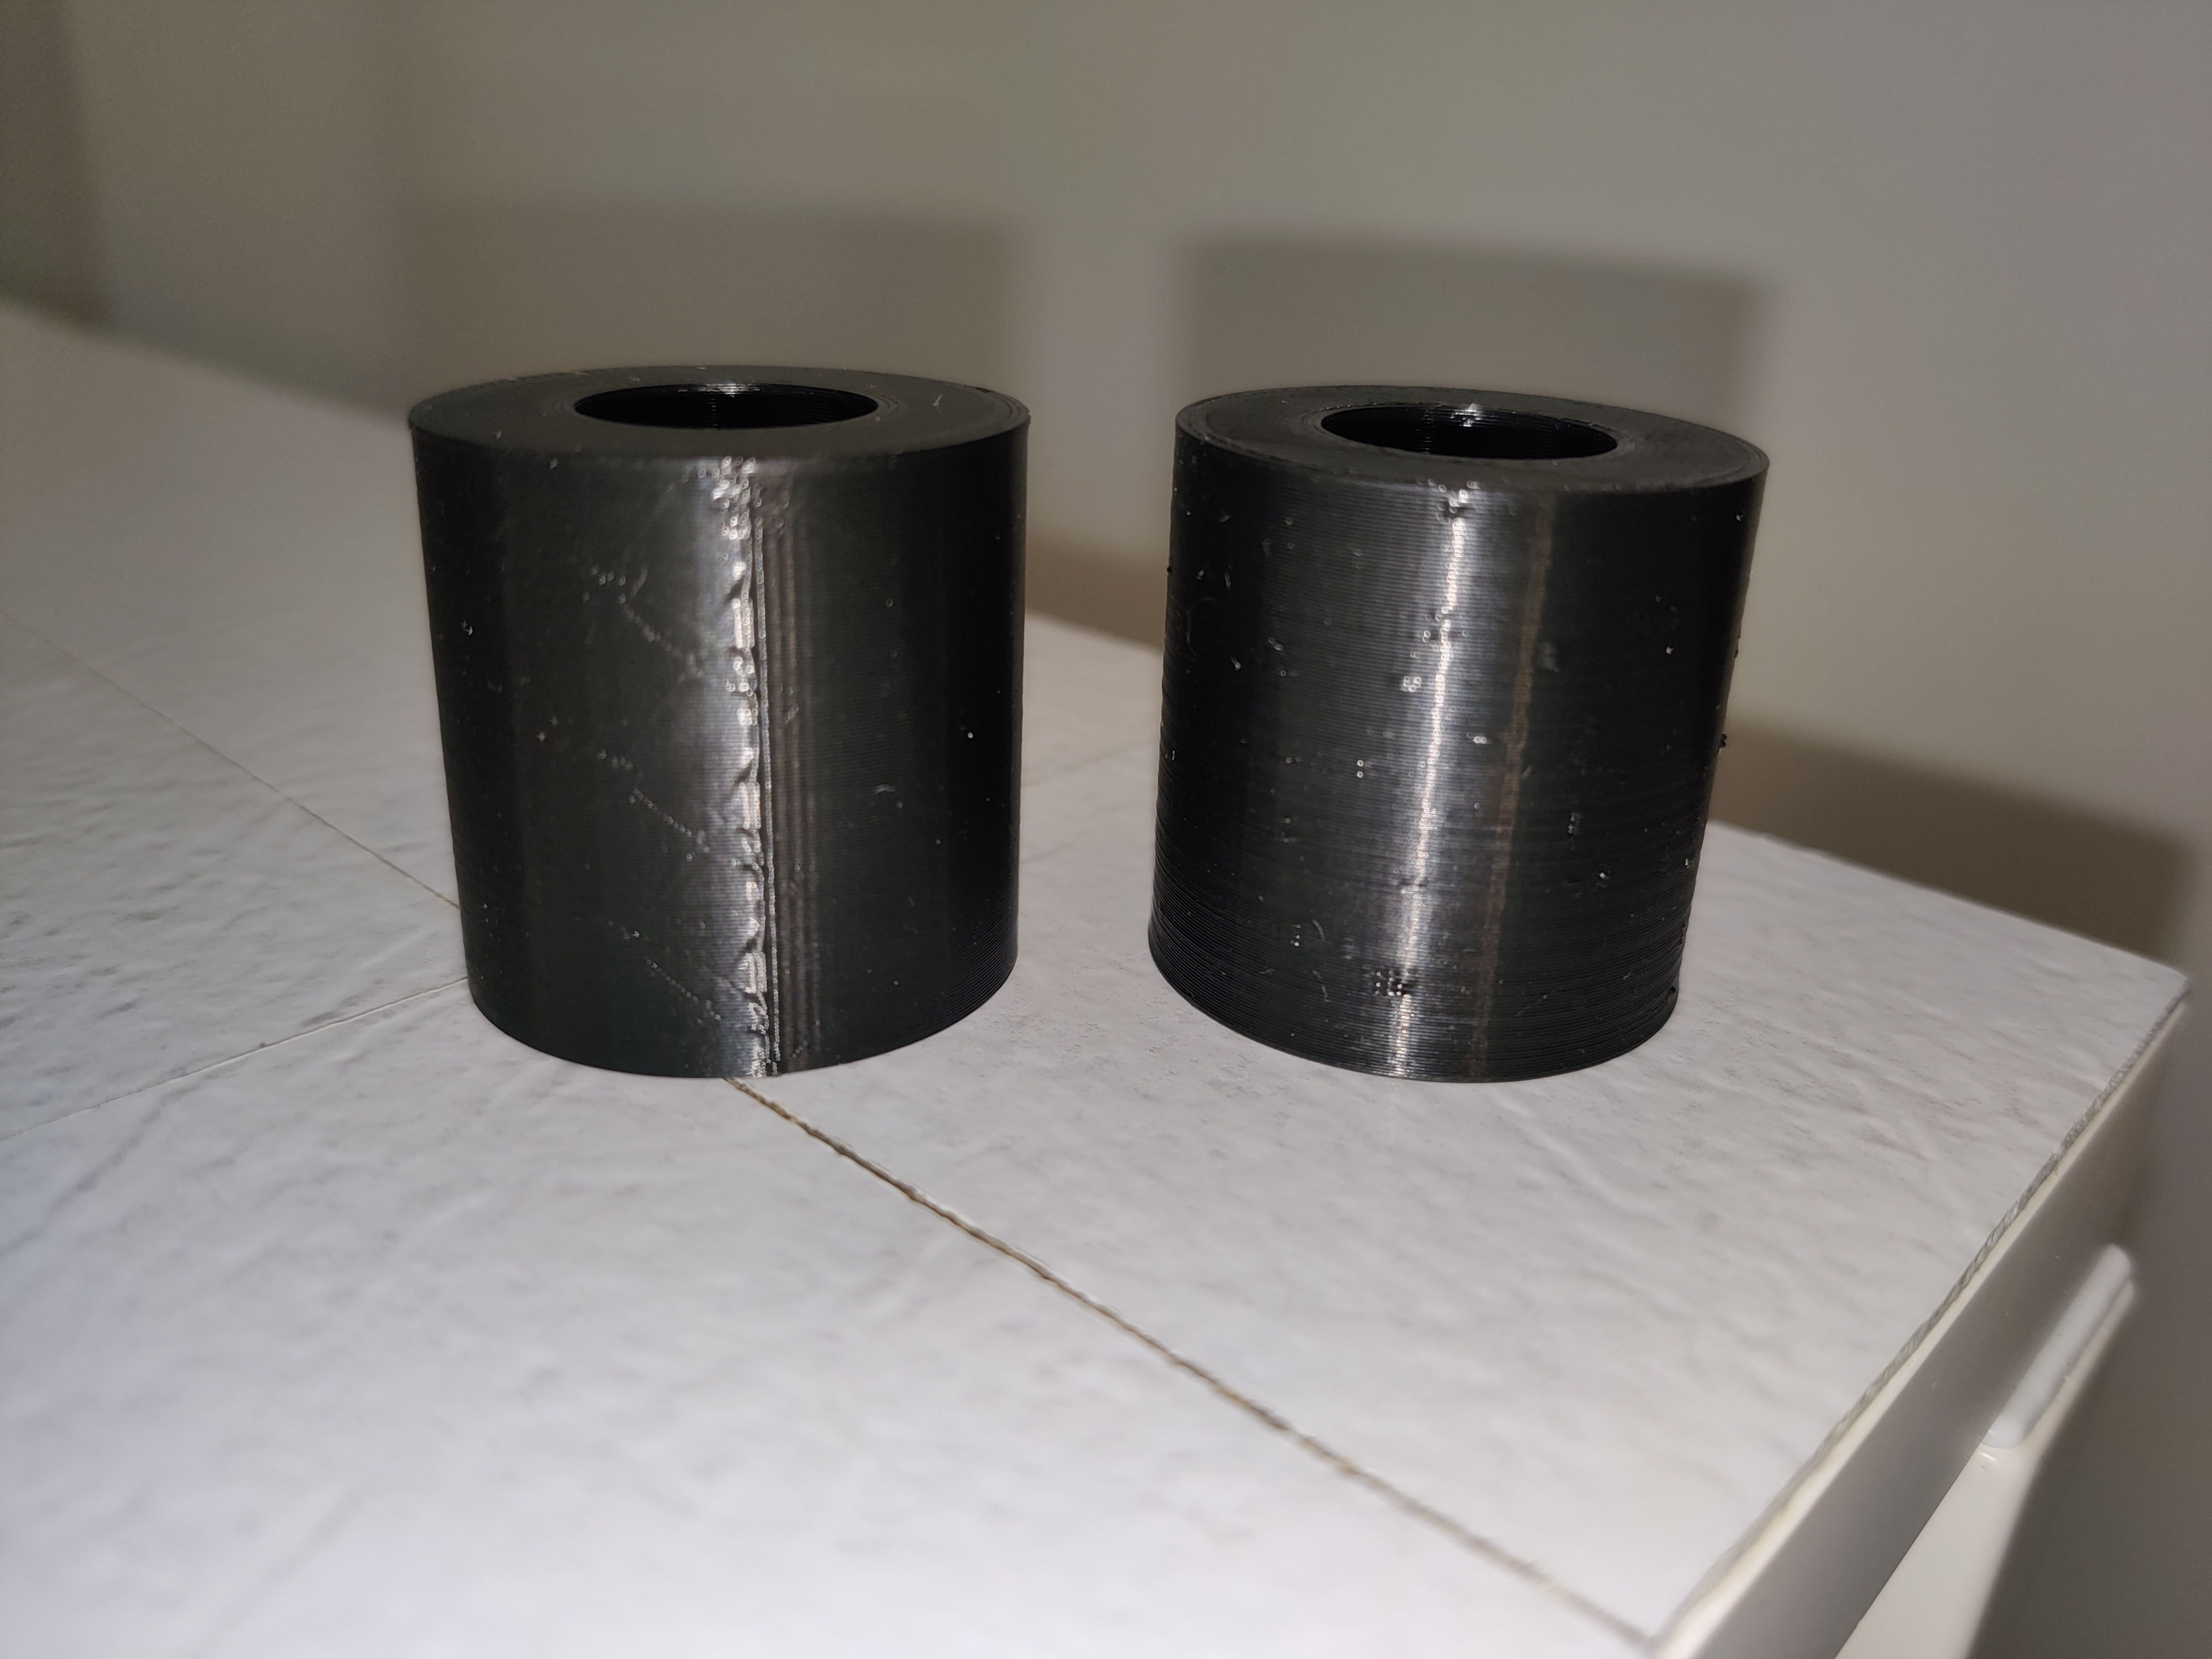
You can immediately see the difference in texture between the two tubes. The random z seam tube has little bumps of the seam scattered around the shape, while the standard tube has one straight seam. They varied (probably negligibly) by size (.01 mm)
The two cylinders also varied the same amount – 29.8mm for the .1 tolerance cylinder, and 29.9mm for the .001 tolerance cylinder.
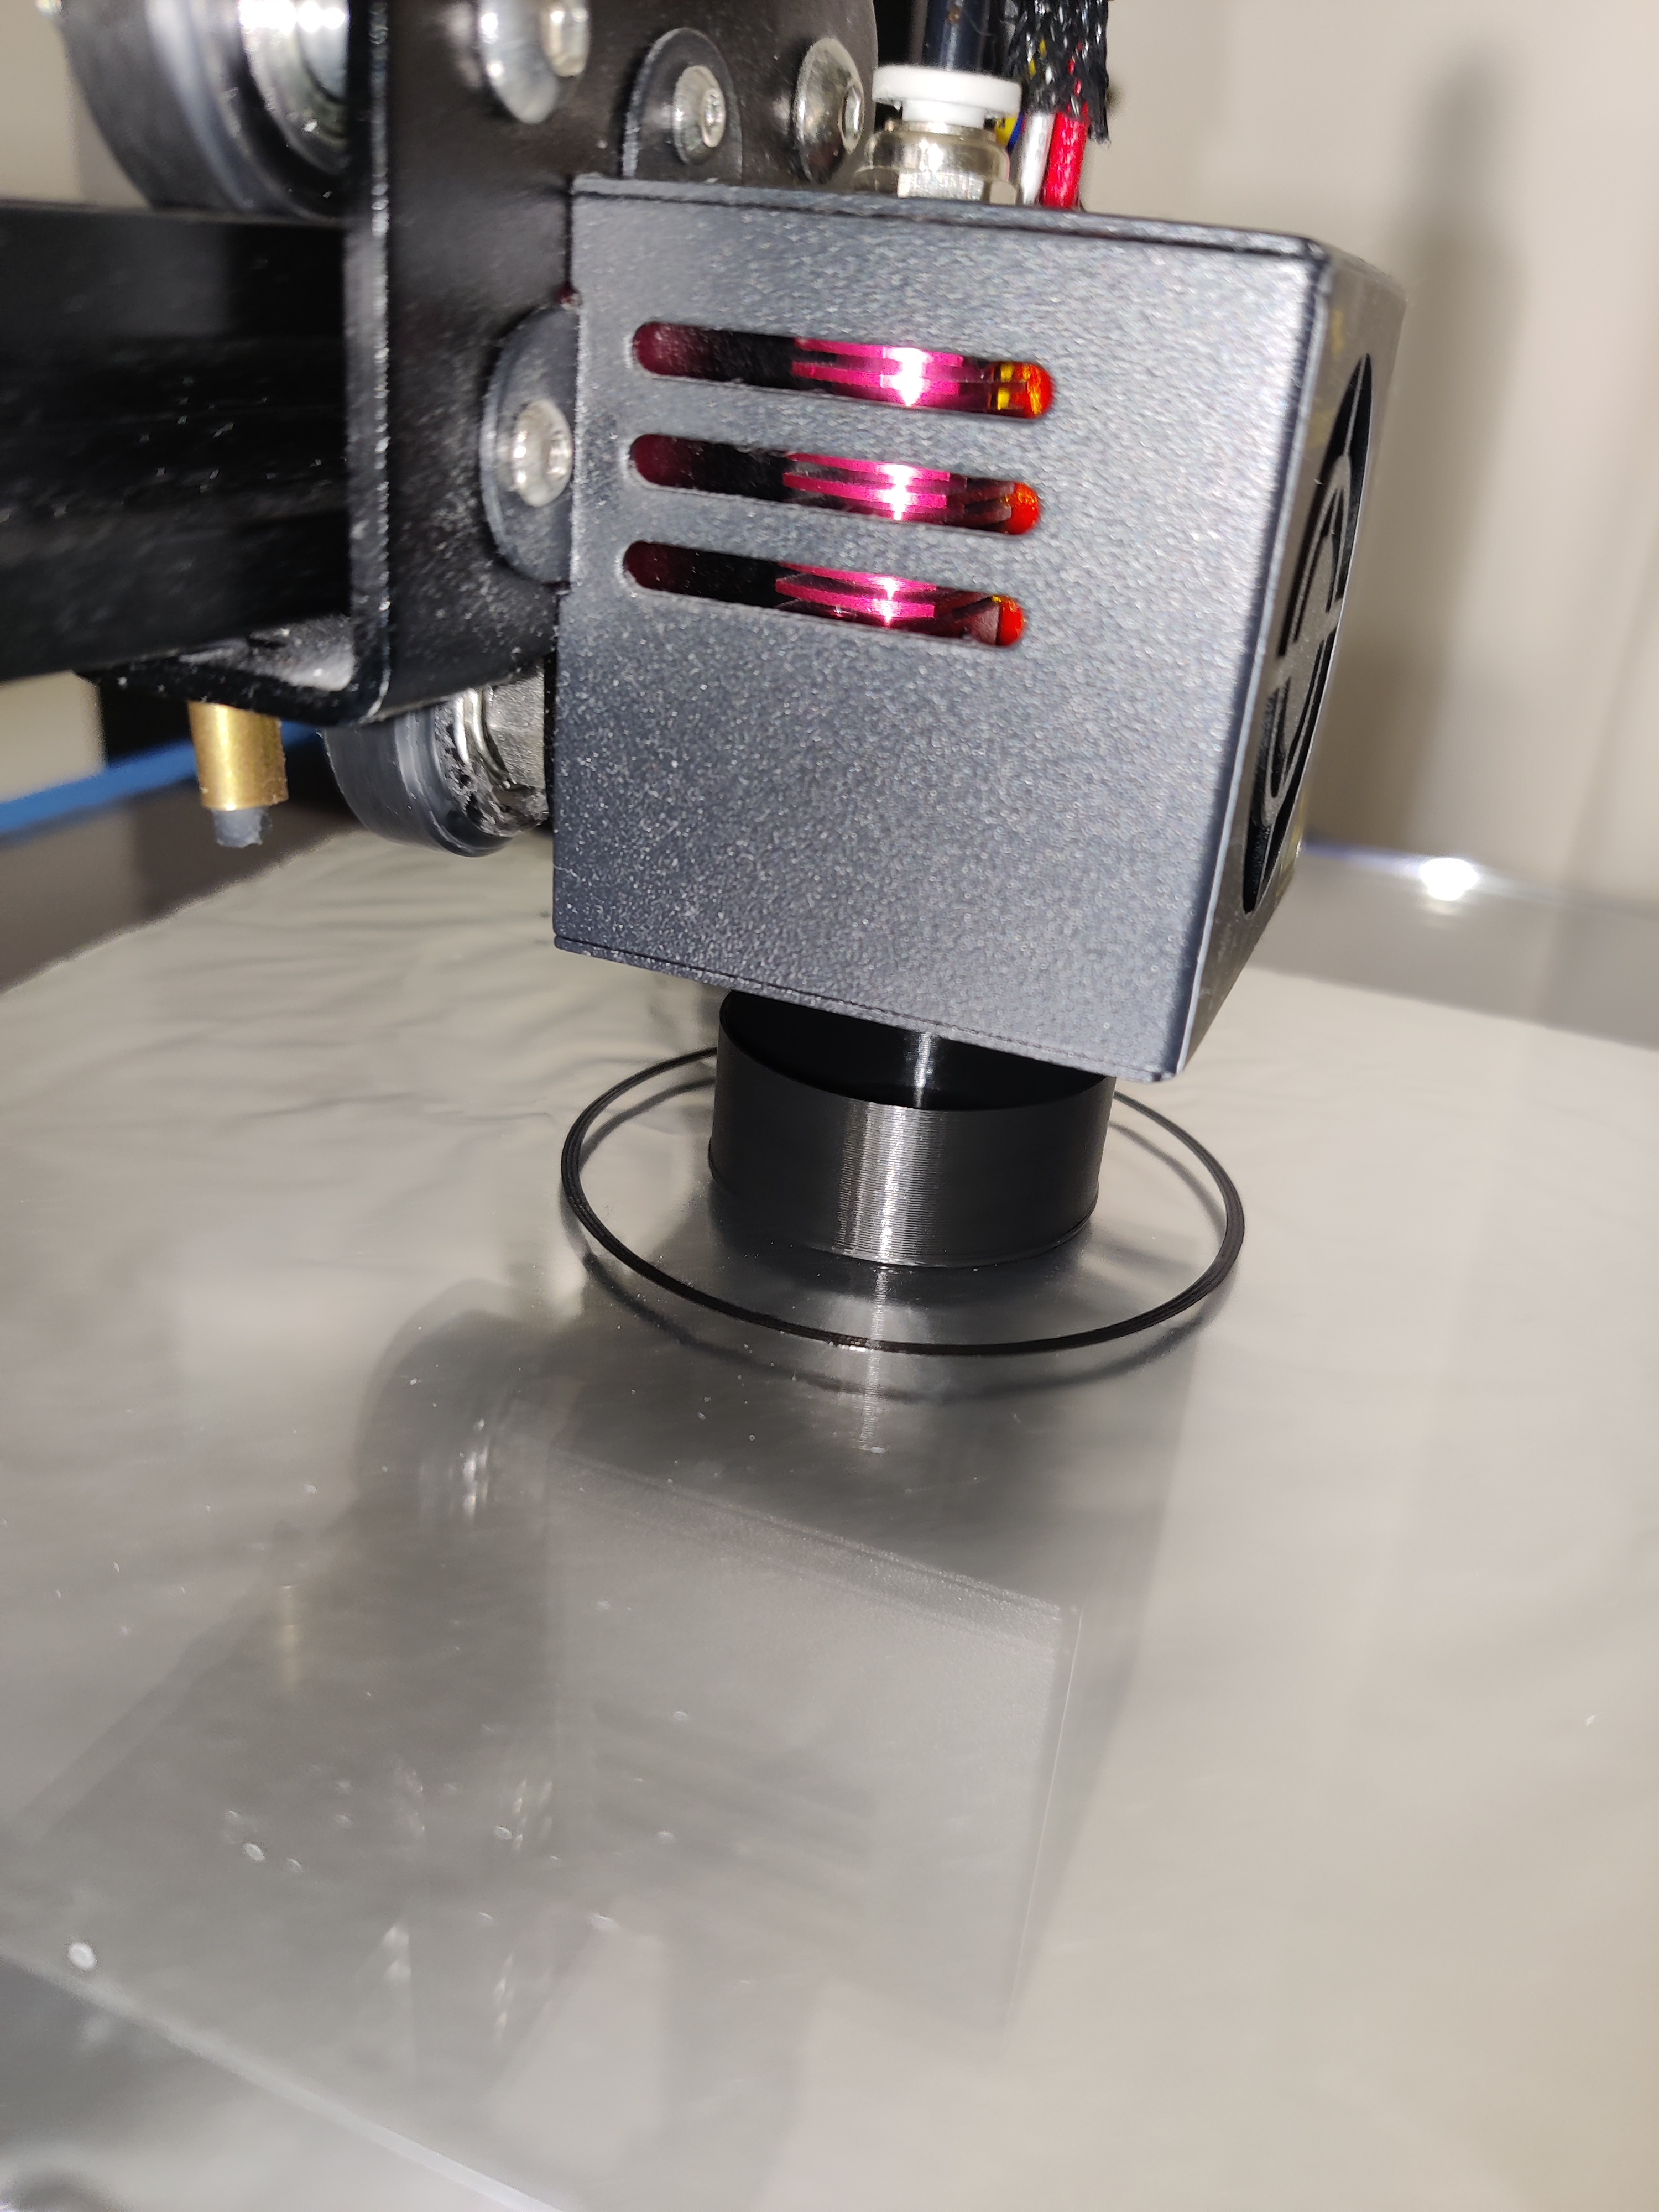
The next two cylinders, the spiralized and sideways supported, had to be printed separately because their designated settings are global settings that affect all objects in the print. It’s amazing how the program can just determine supports when not too long ago people had to manually program and draw those as part of the model.
I rotated the cylinder by using the rotate tool in Cura and rotating it 90 degrees. I wanted to print this on its own, so I turned on supports in the global print settings. I saw the supports that were generated in the preview, which looked good to go.

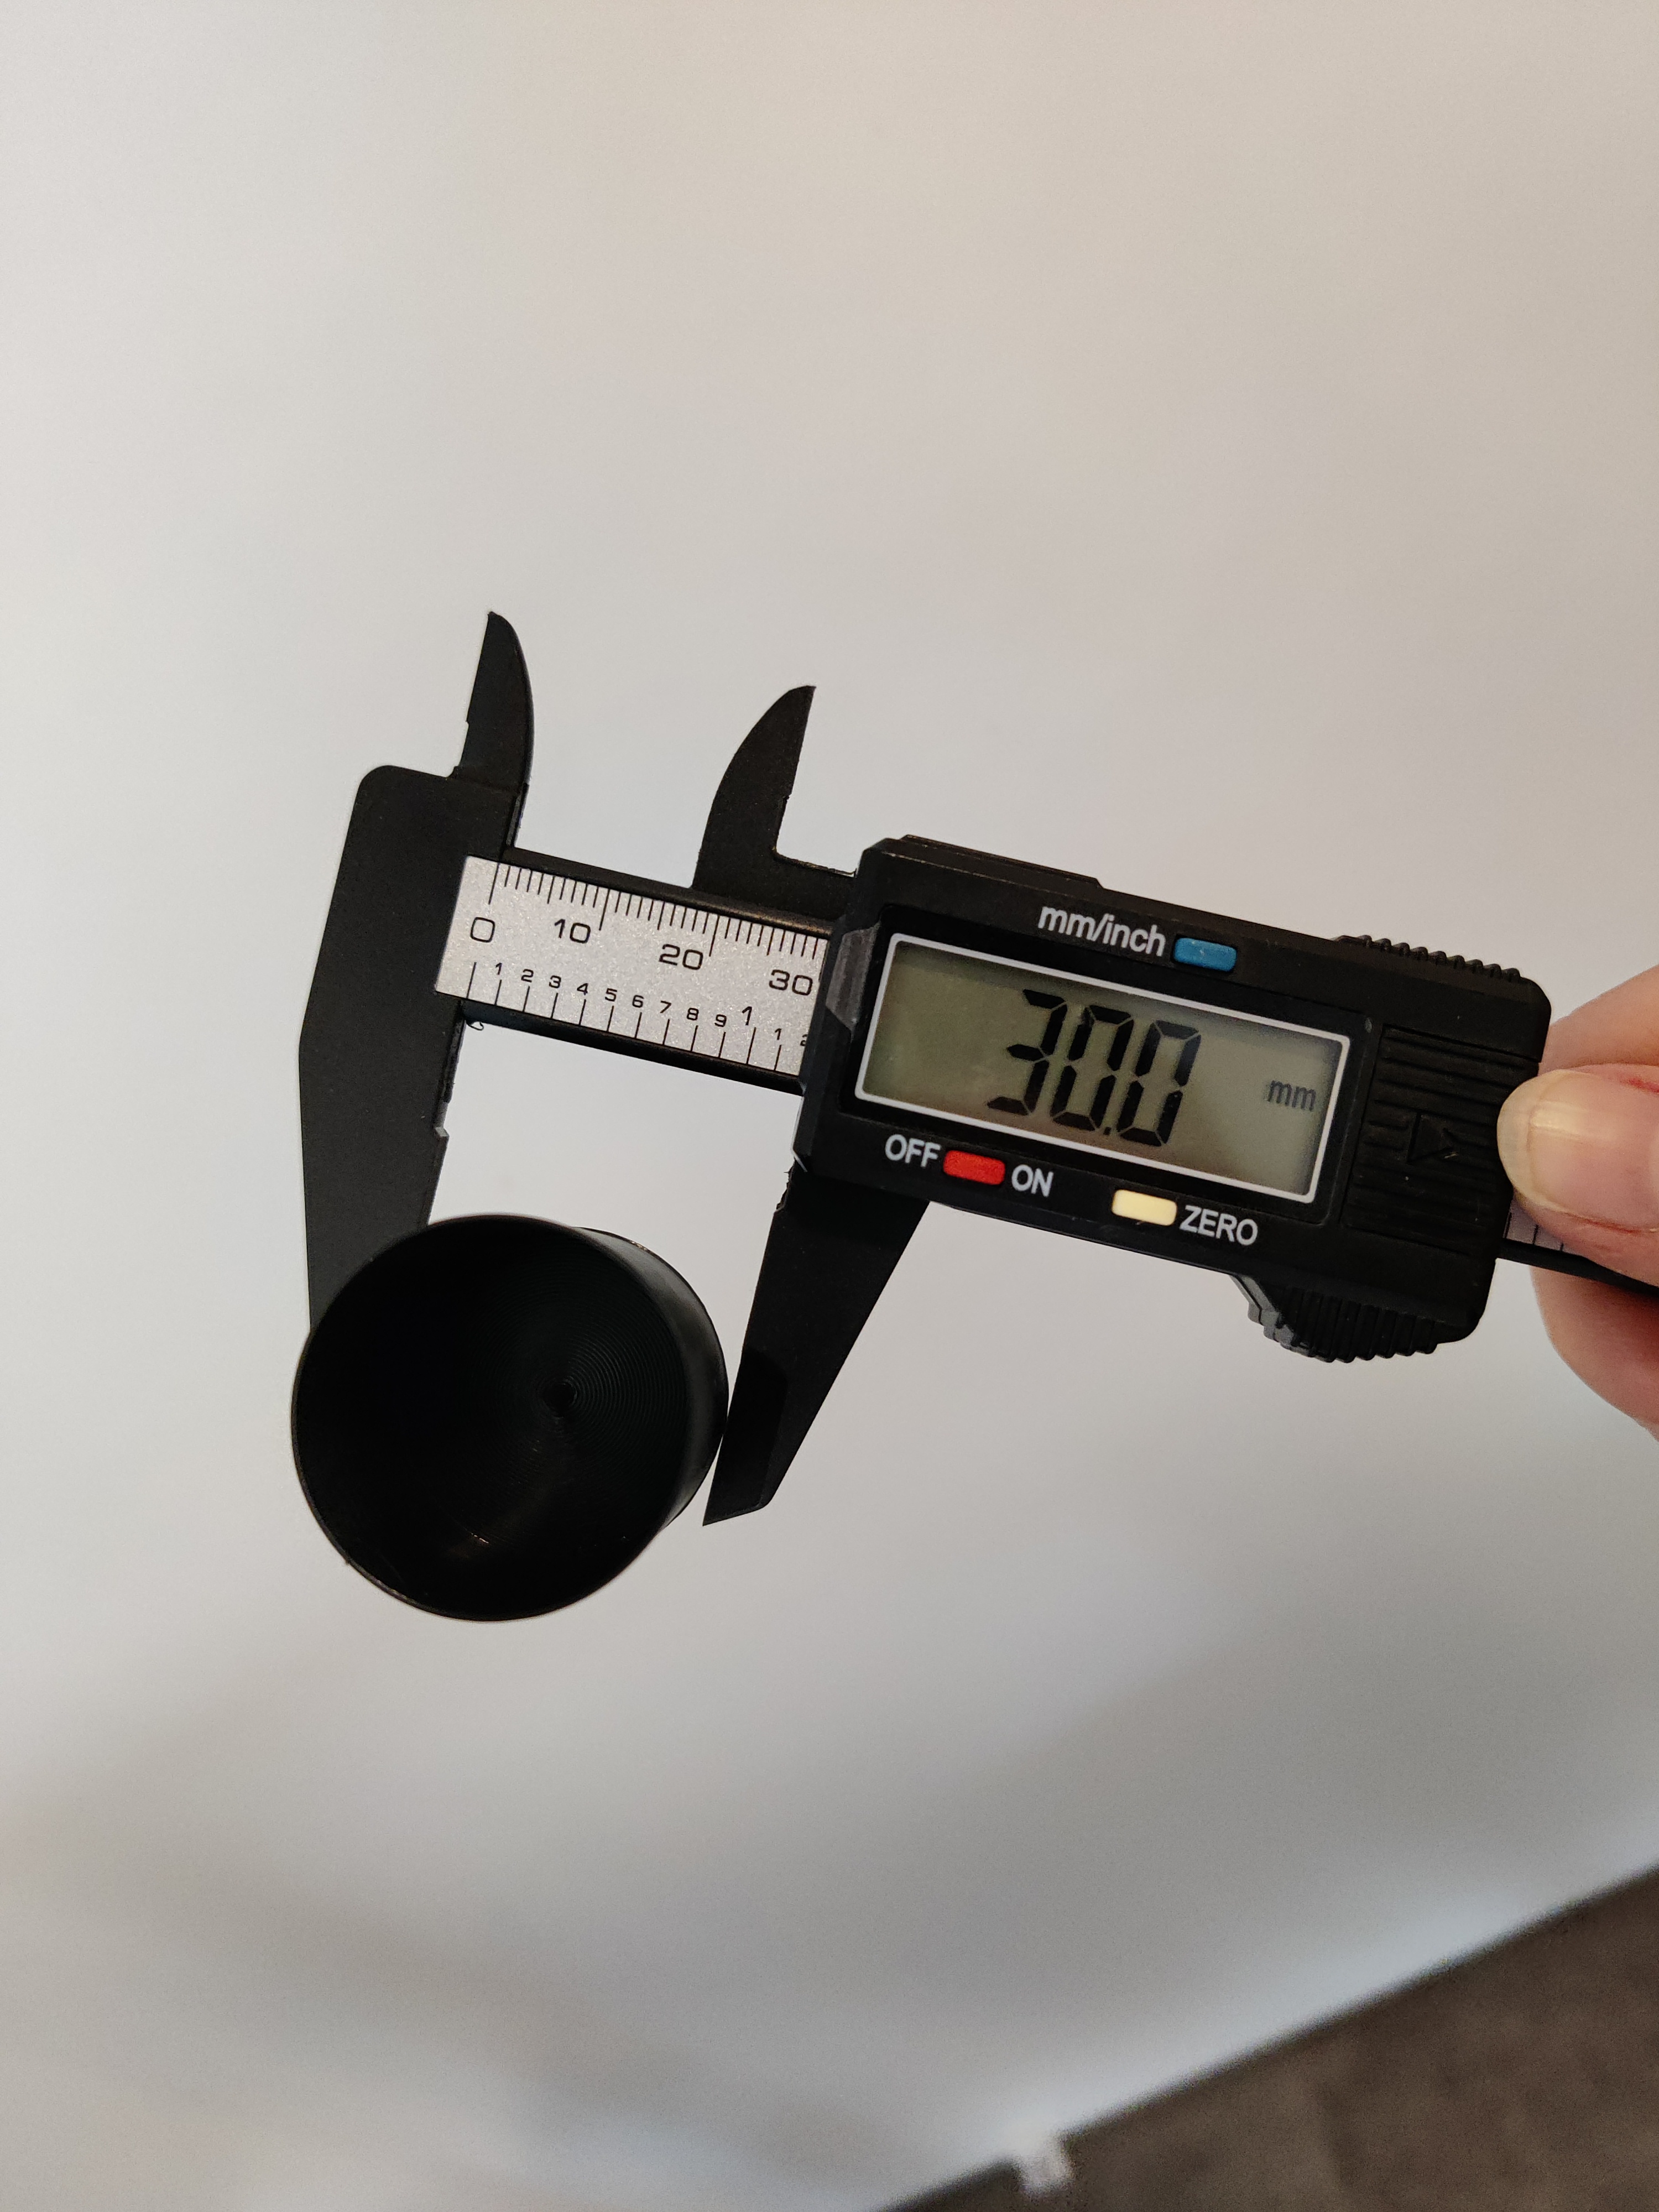
The print took about 1 hour and the supports came right off with some light pulling. Some nubby bumps were left on the model, but could definitely be sanded down if needed. When measured on the smooth areas, it was exactly 30.0mm in diameter
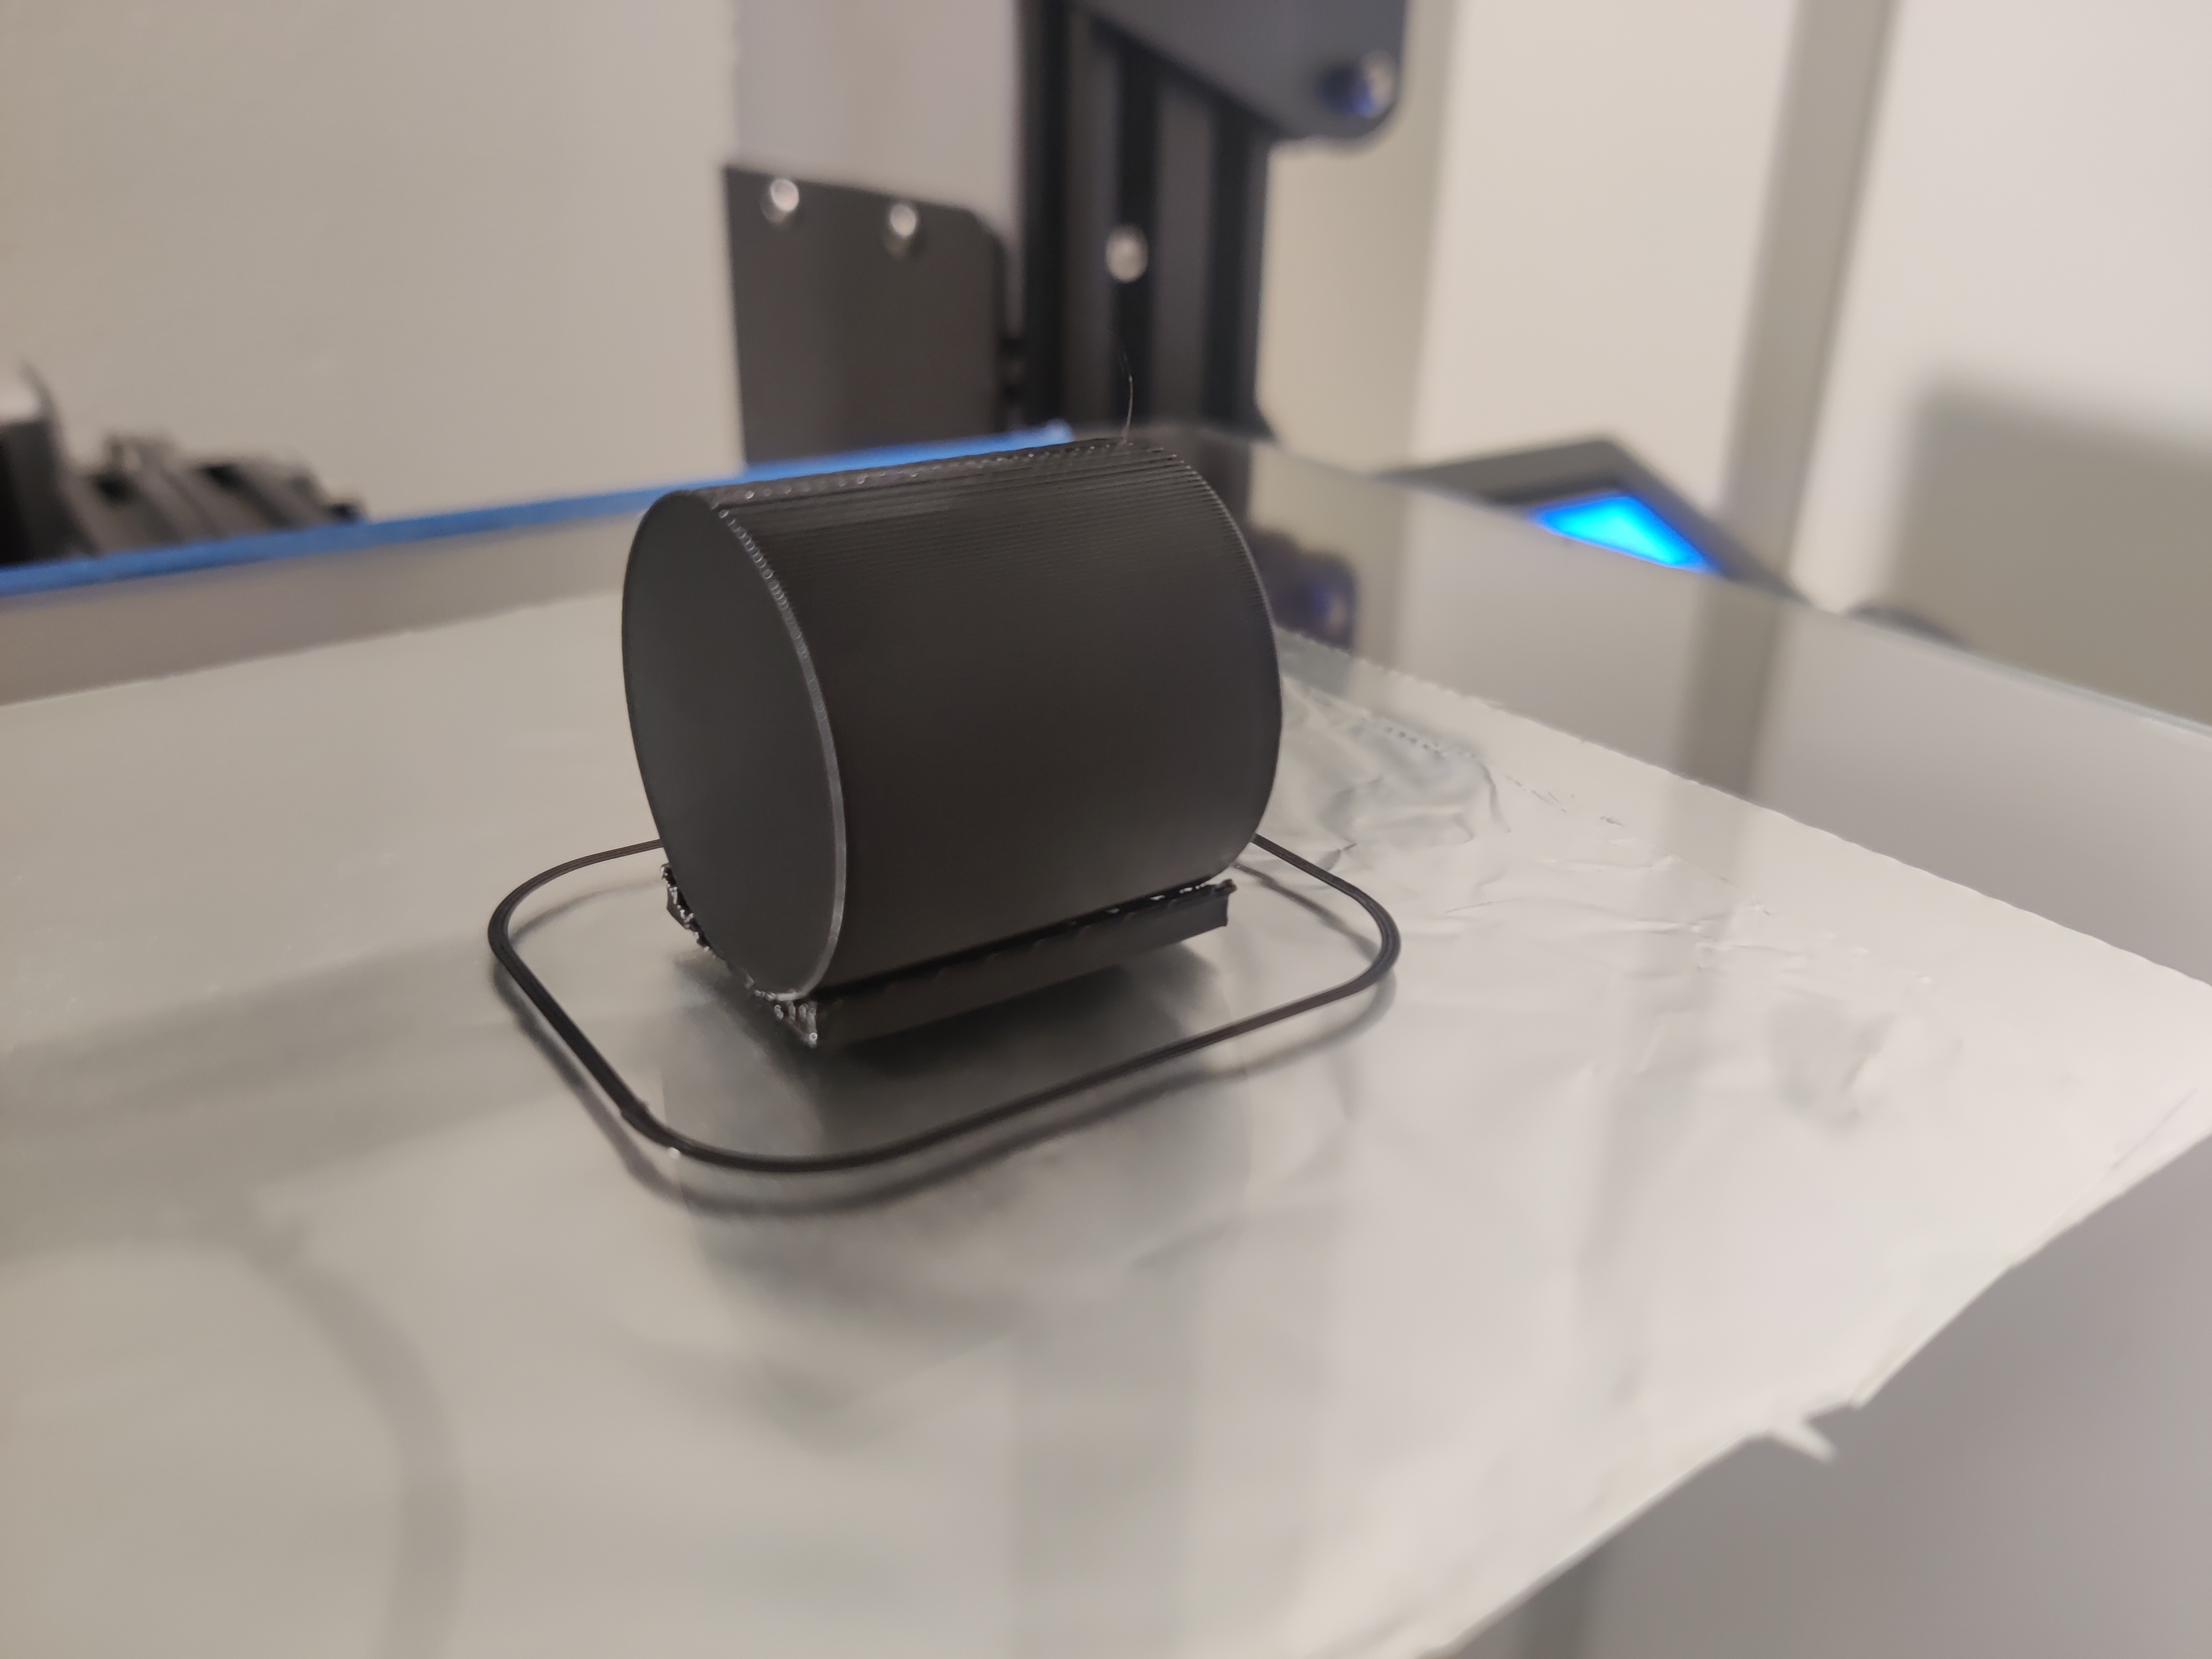
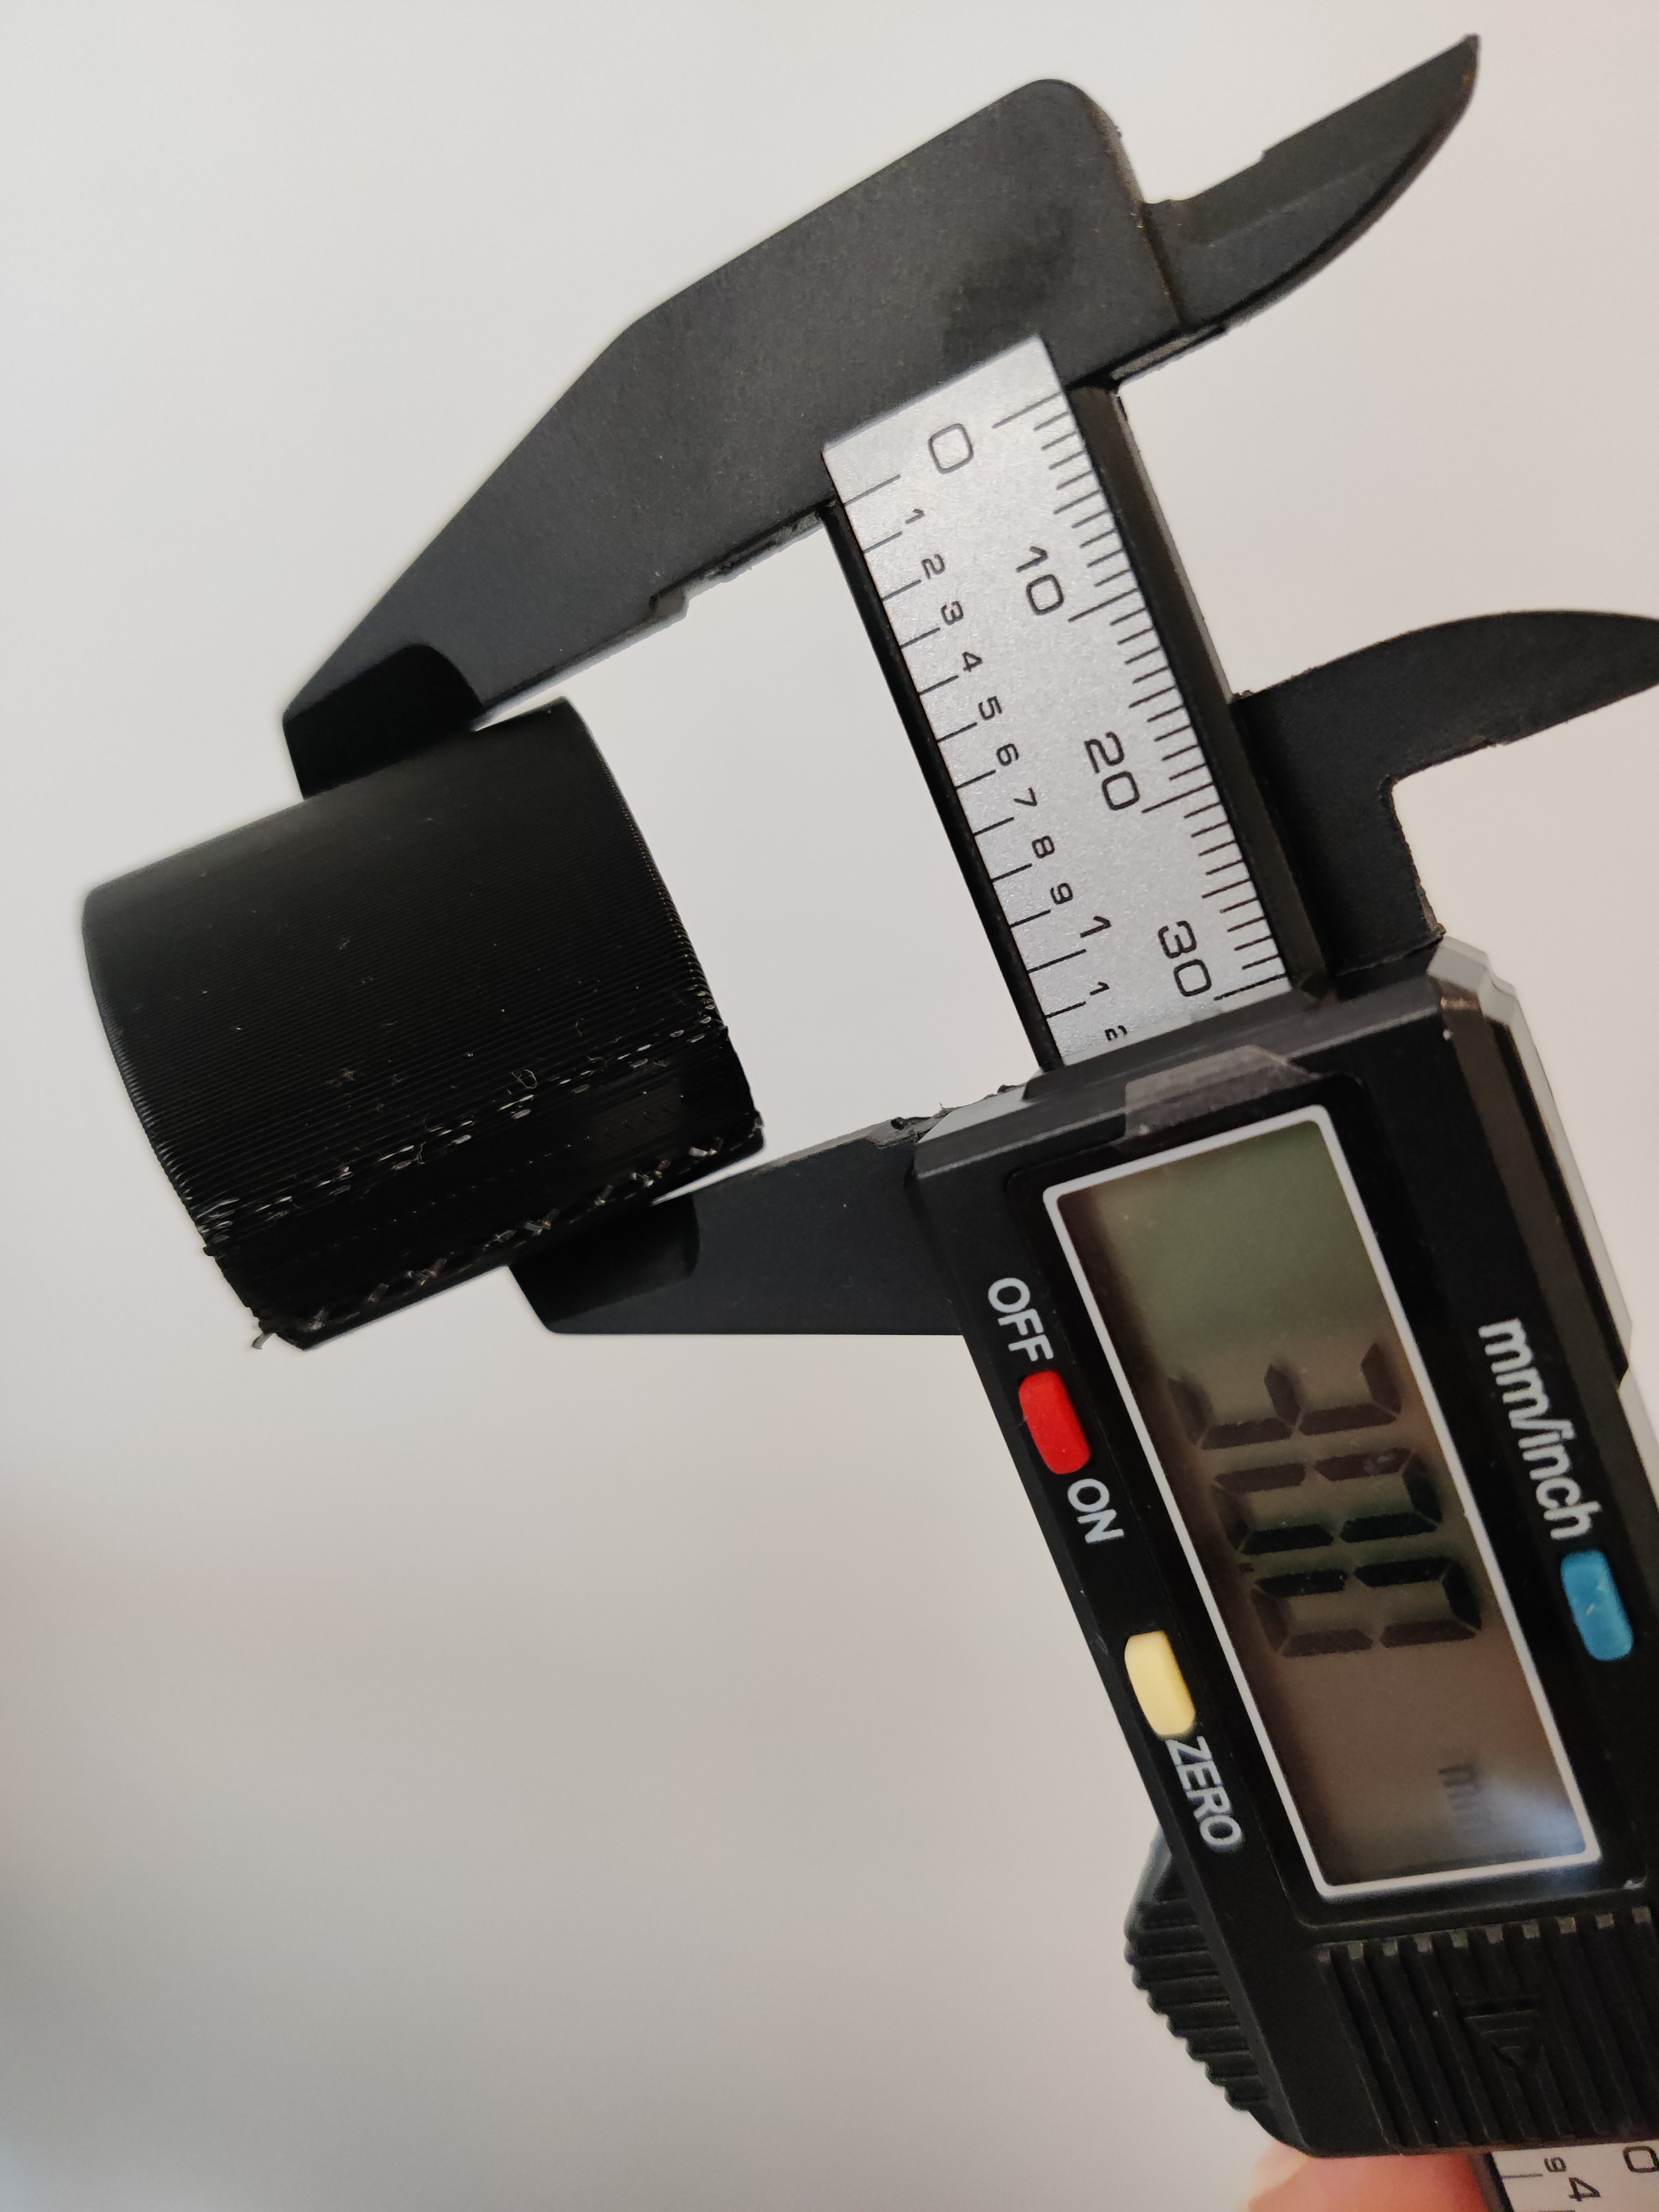
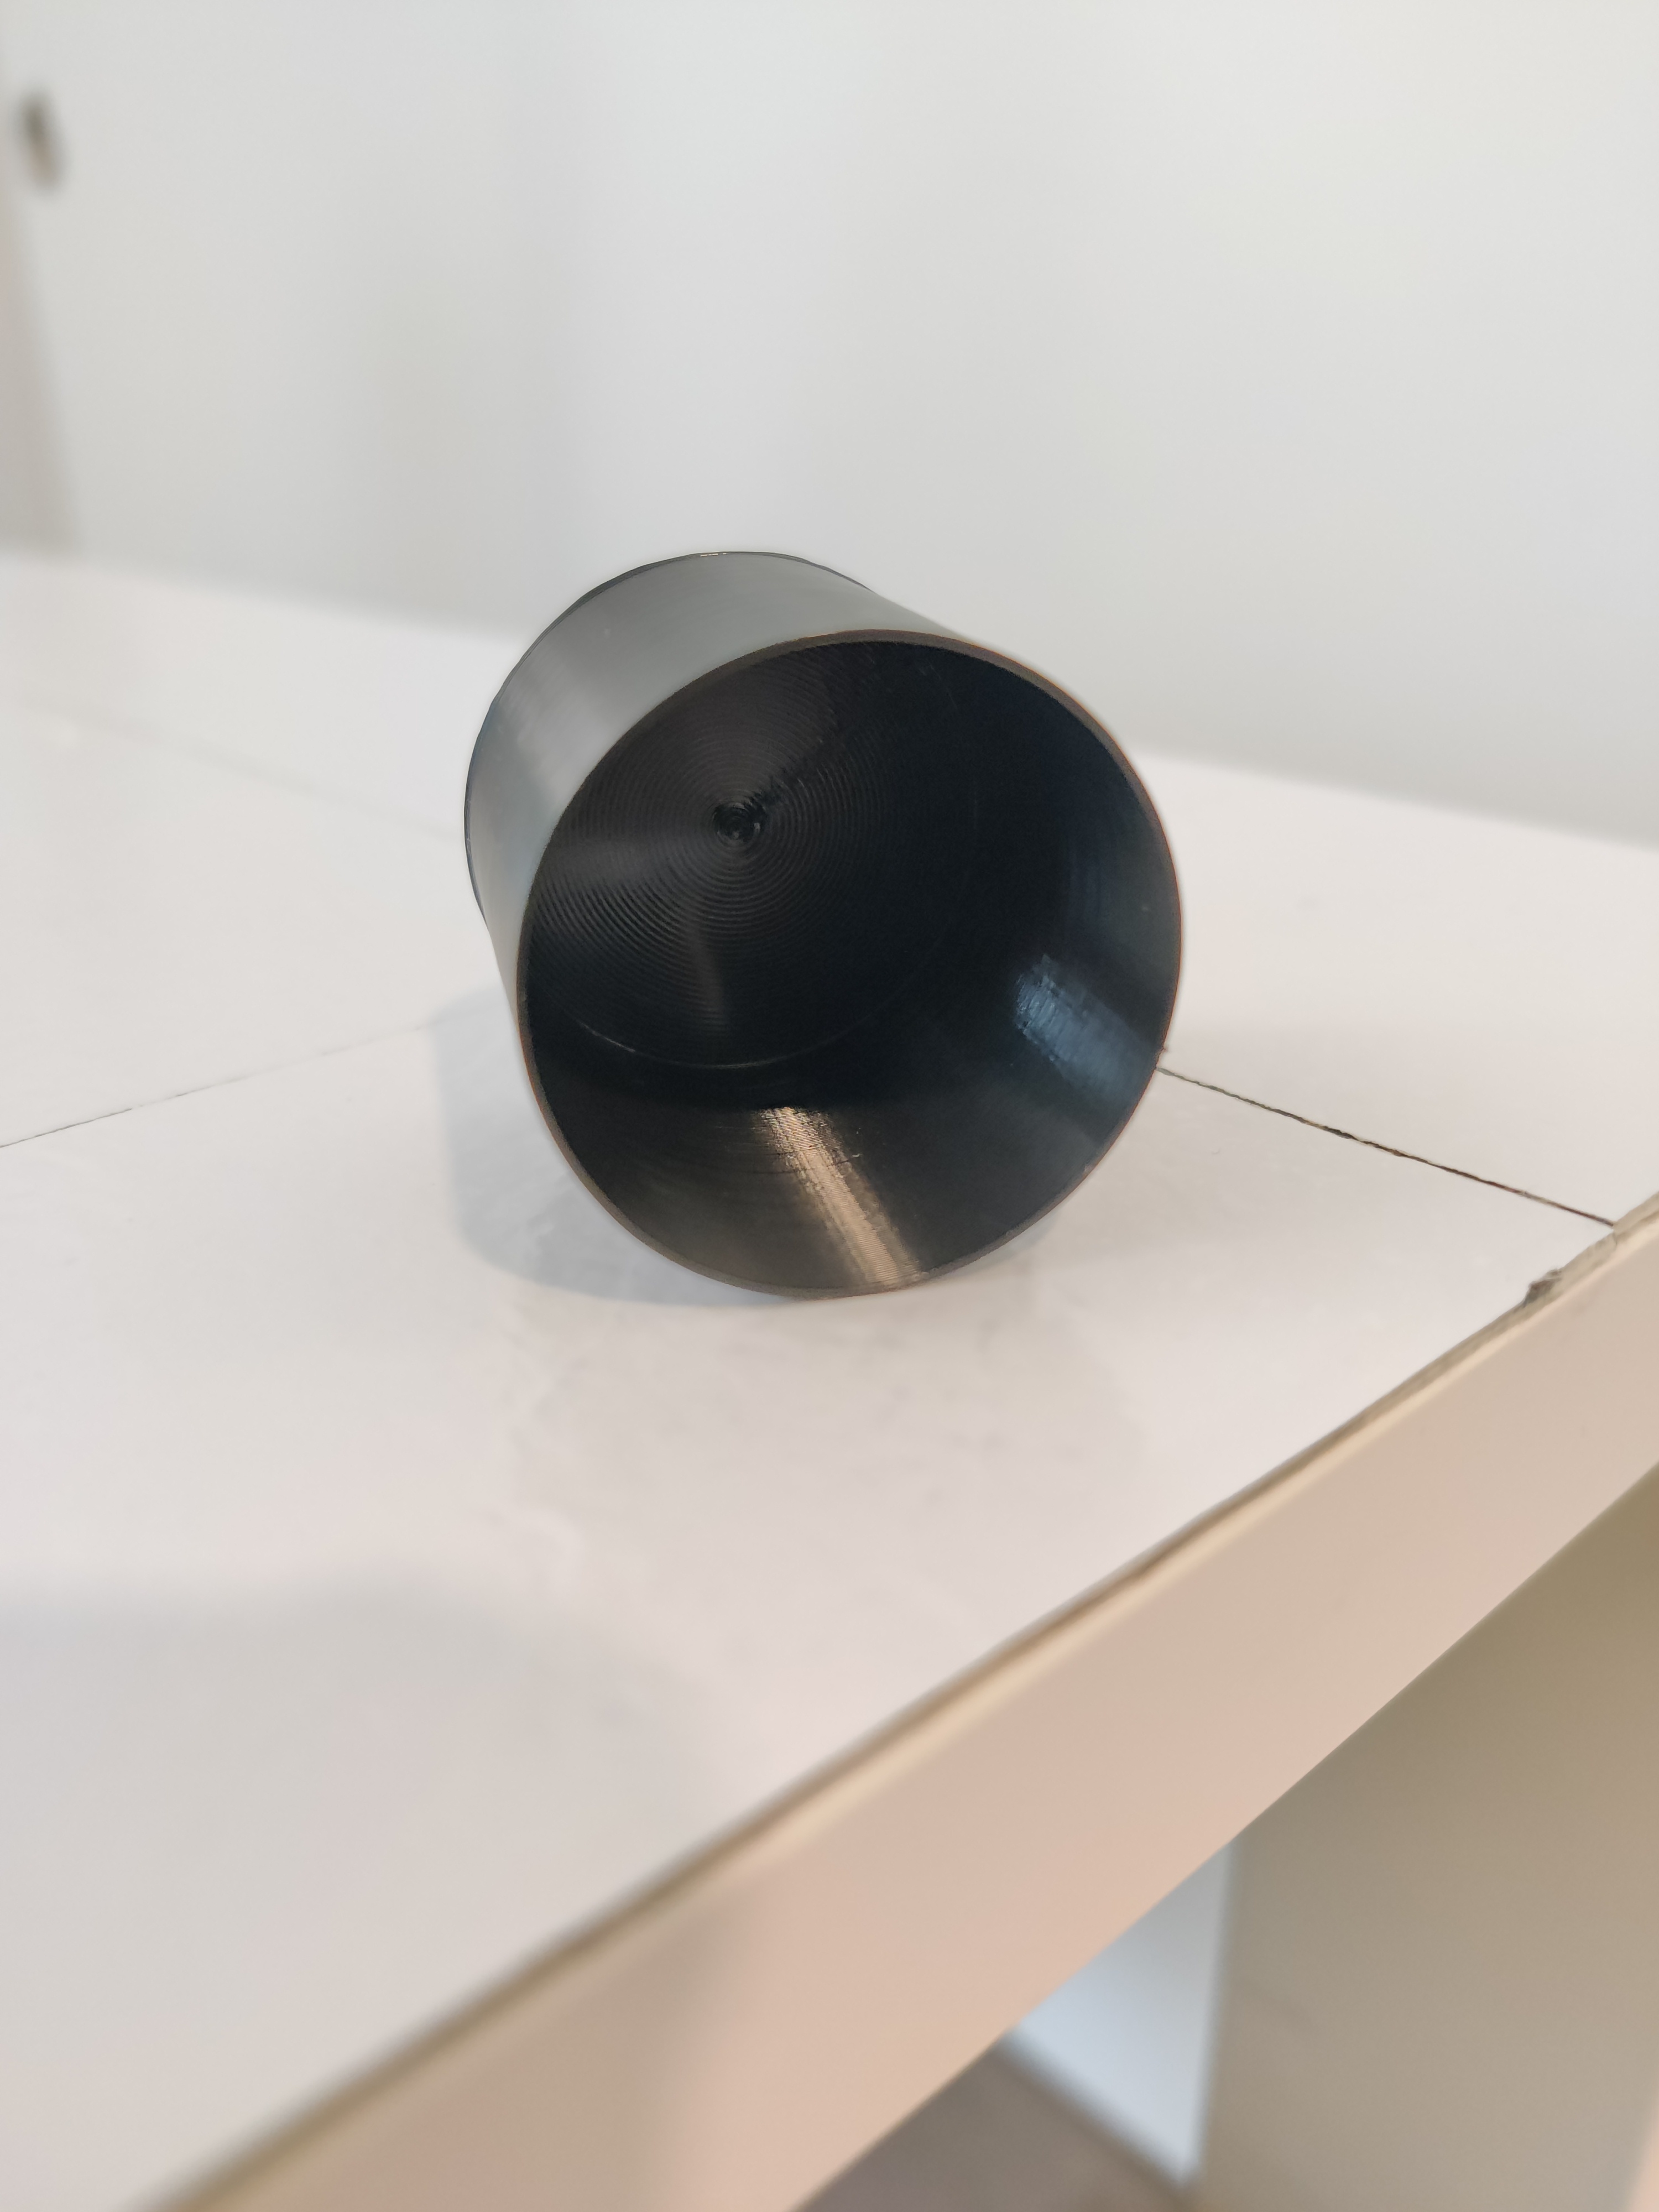
The last cylinder I printed was the one with spiralized outer contour. I searched “spiralize” in the settings search and found it under “Special Modes”.
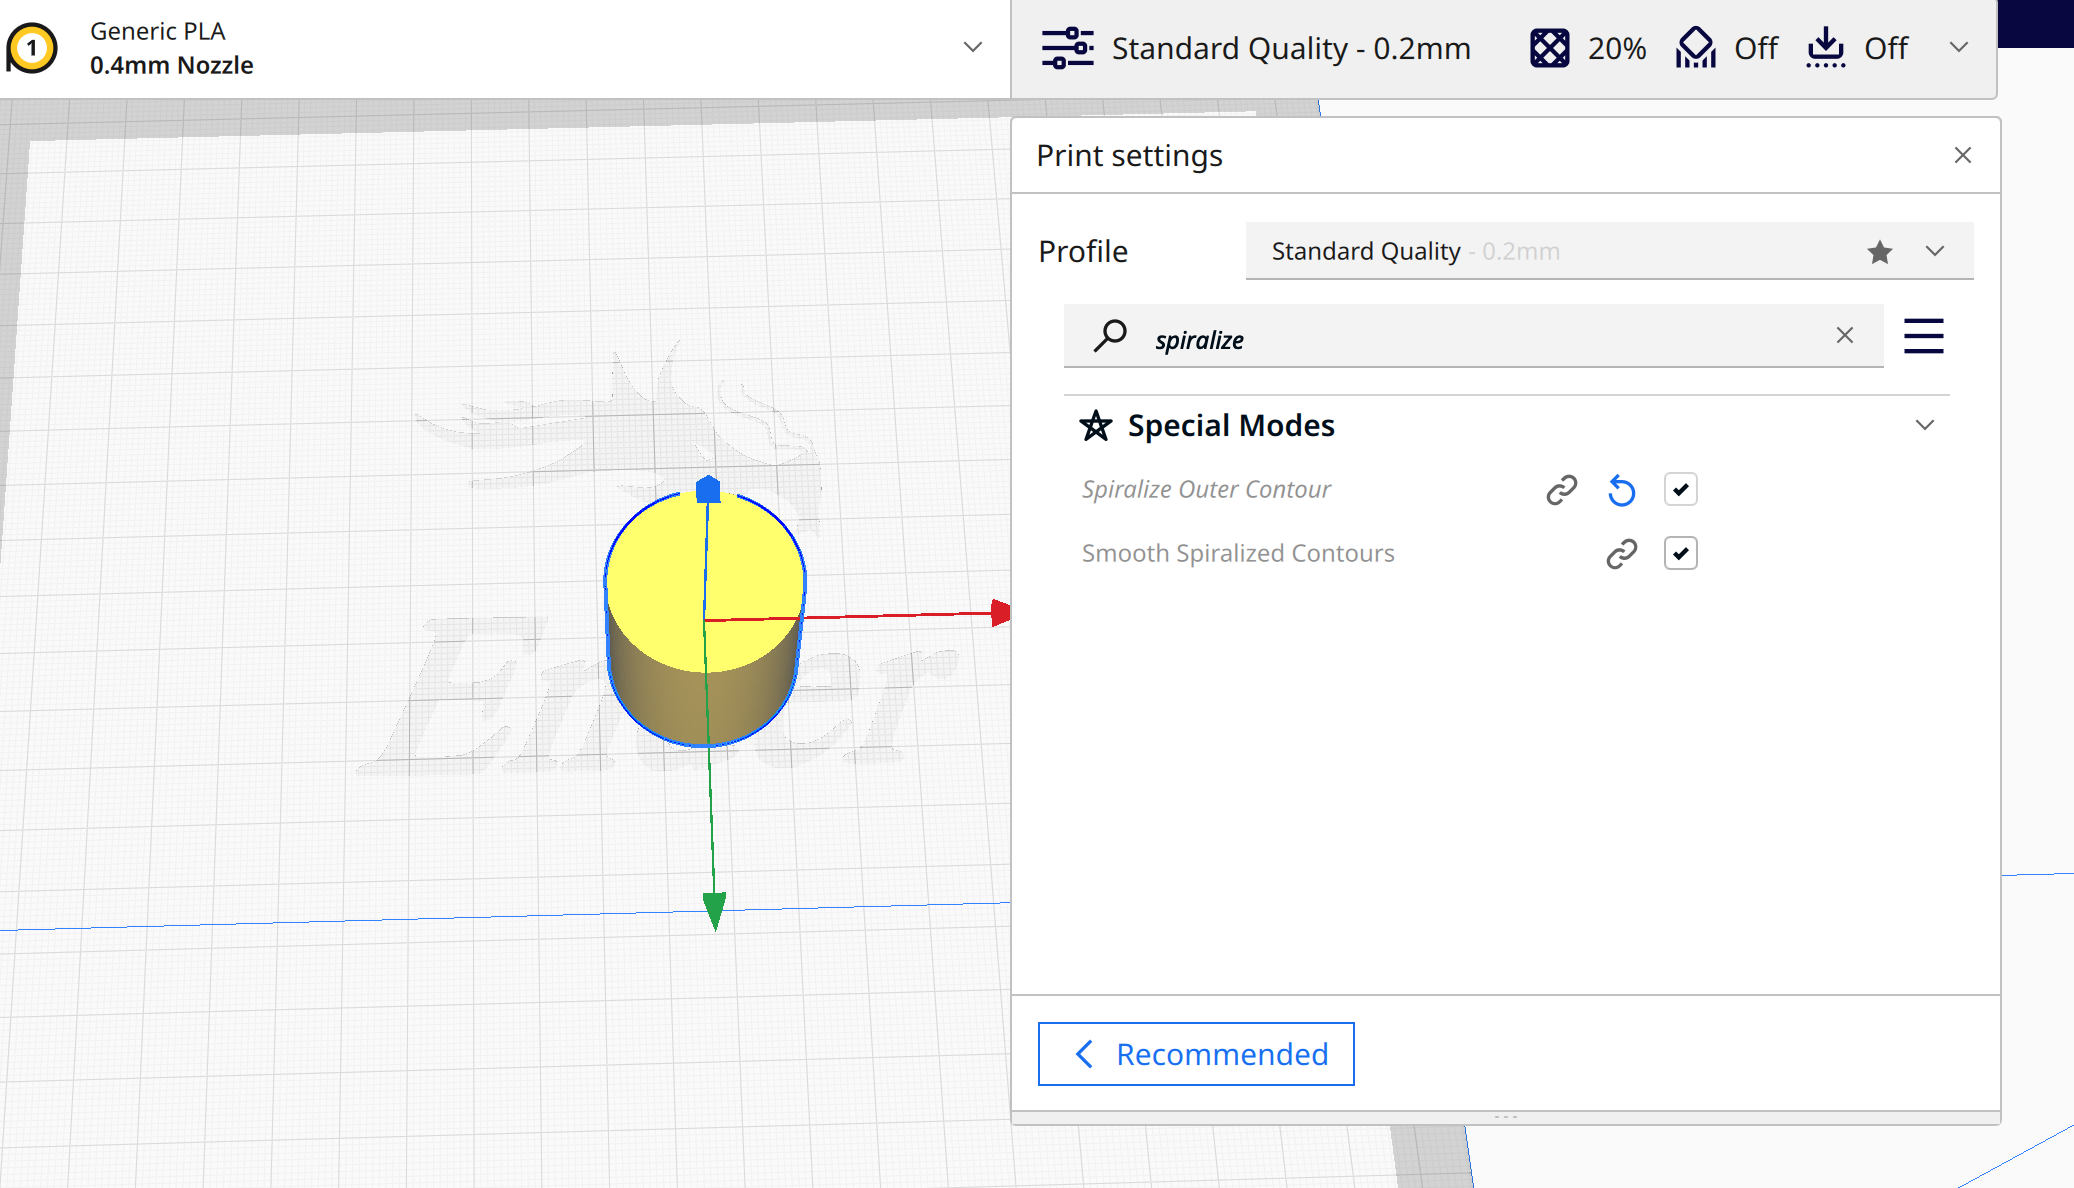
I turned it on, sliced, and previewed the print. I wasn’t expecting it to be hollow, so I thought something was wrong. I did some poking around on Google and found out that this mode is often used for vases and similar objects, so it makes total sense that the print would be open on top. The setting allows you to print almost any shape with the thickness of a single wall; the pressure is shifted spirally upwards. This means that there are no real layers. Instead, the model is built up slowly by gentle, even movements of the Z-axis. The object is composed of a long and uninterrupted chain of filaments, which is gradually built up on itself.
This print measured at exactly 30.0mm. It reminded me of a film canister.
Printing Nested Object
The nested object is the one print that I modeled and printed when I got back from my trip on Monday night.
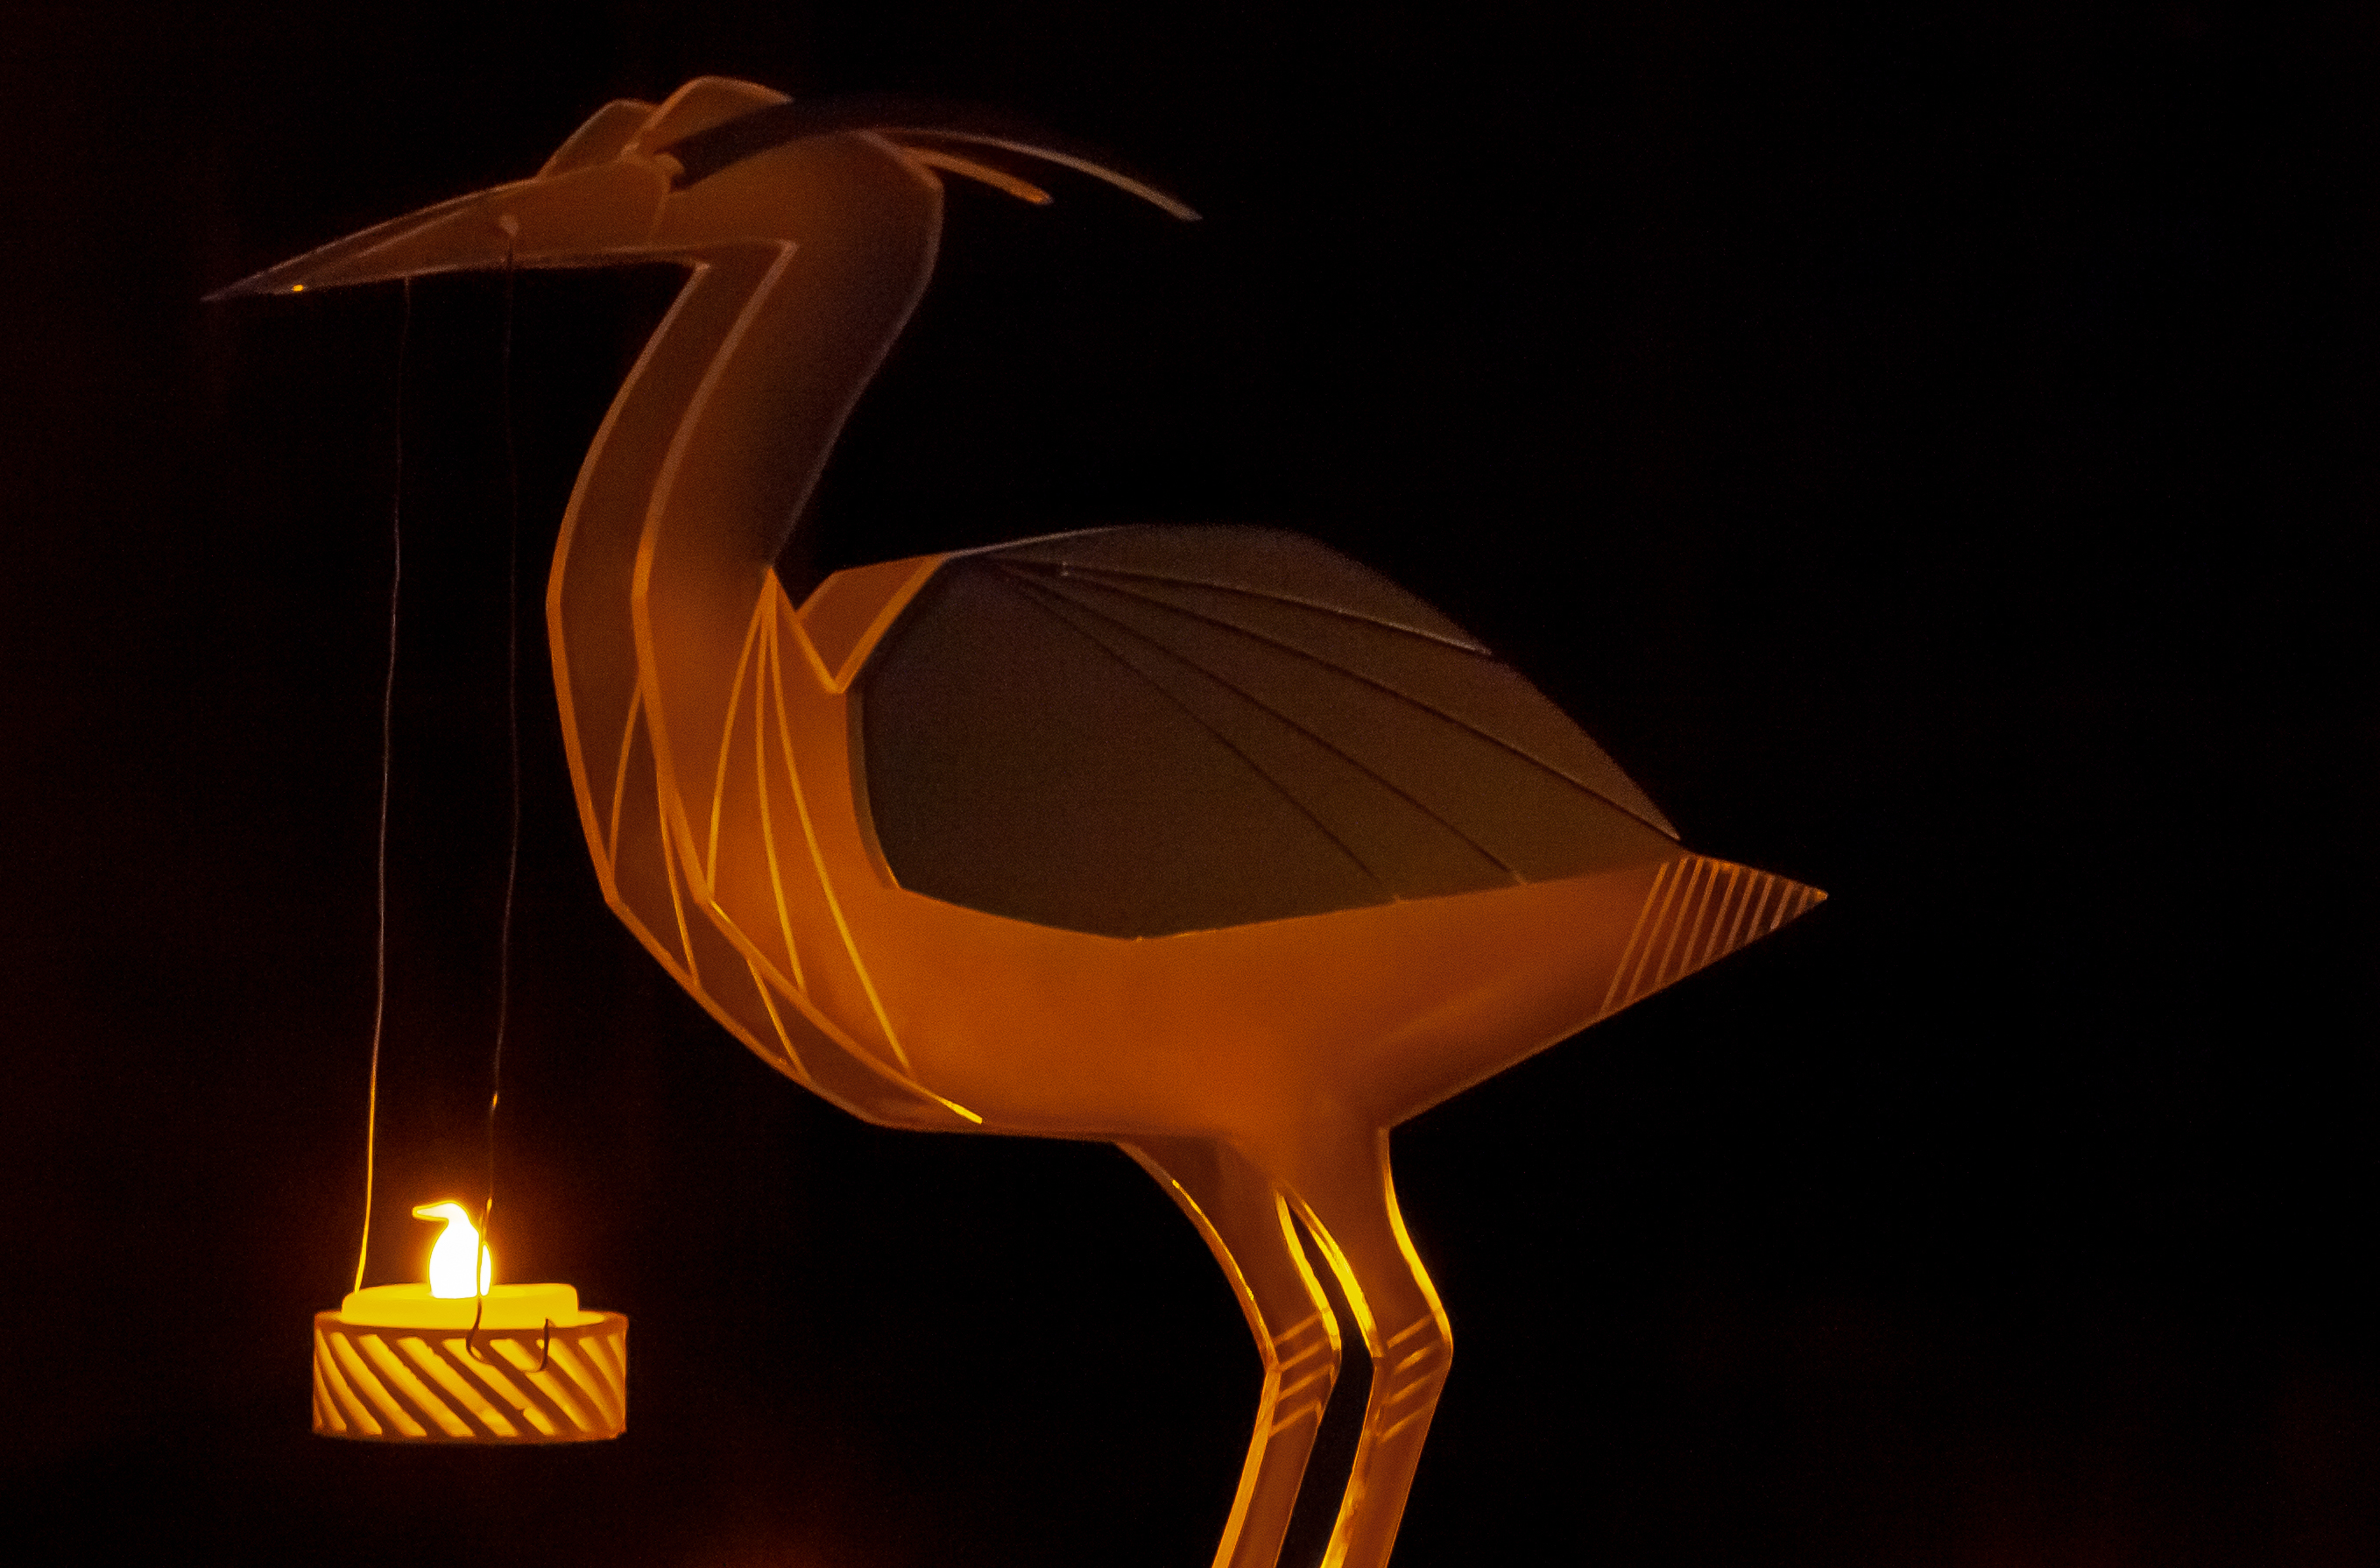
I wanted to make something a little bit more interesting than a box or cylinder, but I didn’t have a lot of time since it was around 12am. I made a simple polyline outline of a bird, nested a smaller bird inside it, and placed a ring around them. :bird::bird:
Here are the steps I followed to make the model:
- Draw angular polyline curves for the bird
- Fillet some of the corners to make a nicer bird shape
- Duplicate the bird and scale it down by 0.4
- Offset both birds by 0.5cm/5mm (revised to 1cm for final print)
- Extrude all curves 2 cm
- BooleanUnion the surfaces that should be connected
- Make a circle that encompasses the nested birds
- Repeat the extrusion process with the circle
- Export to STL
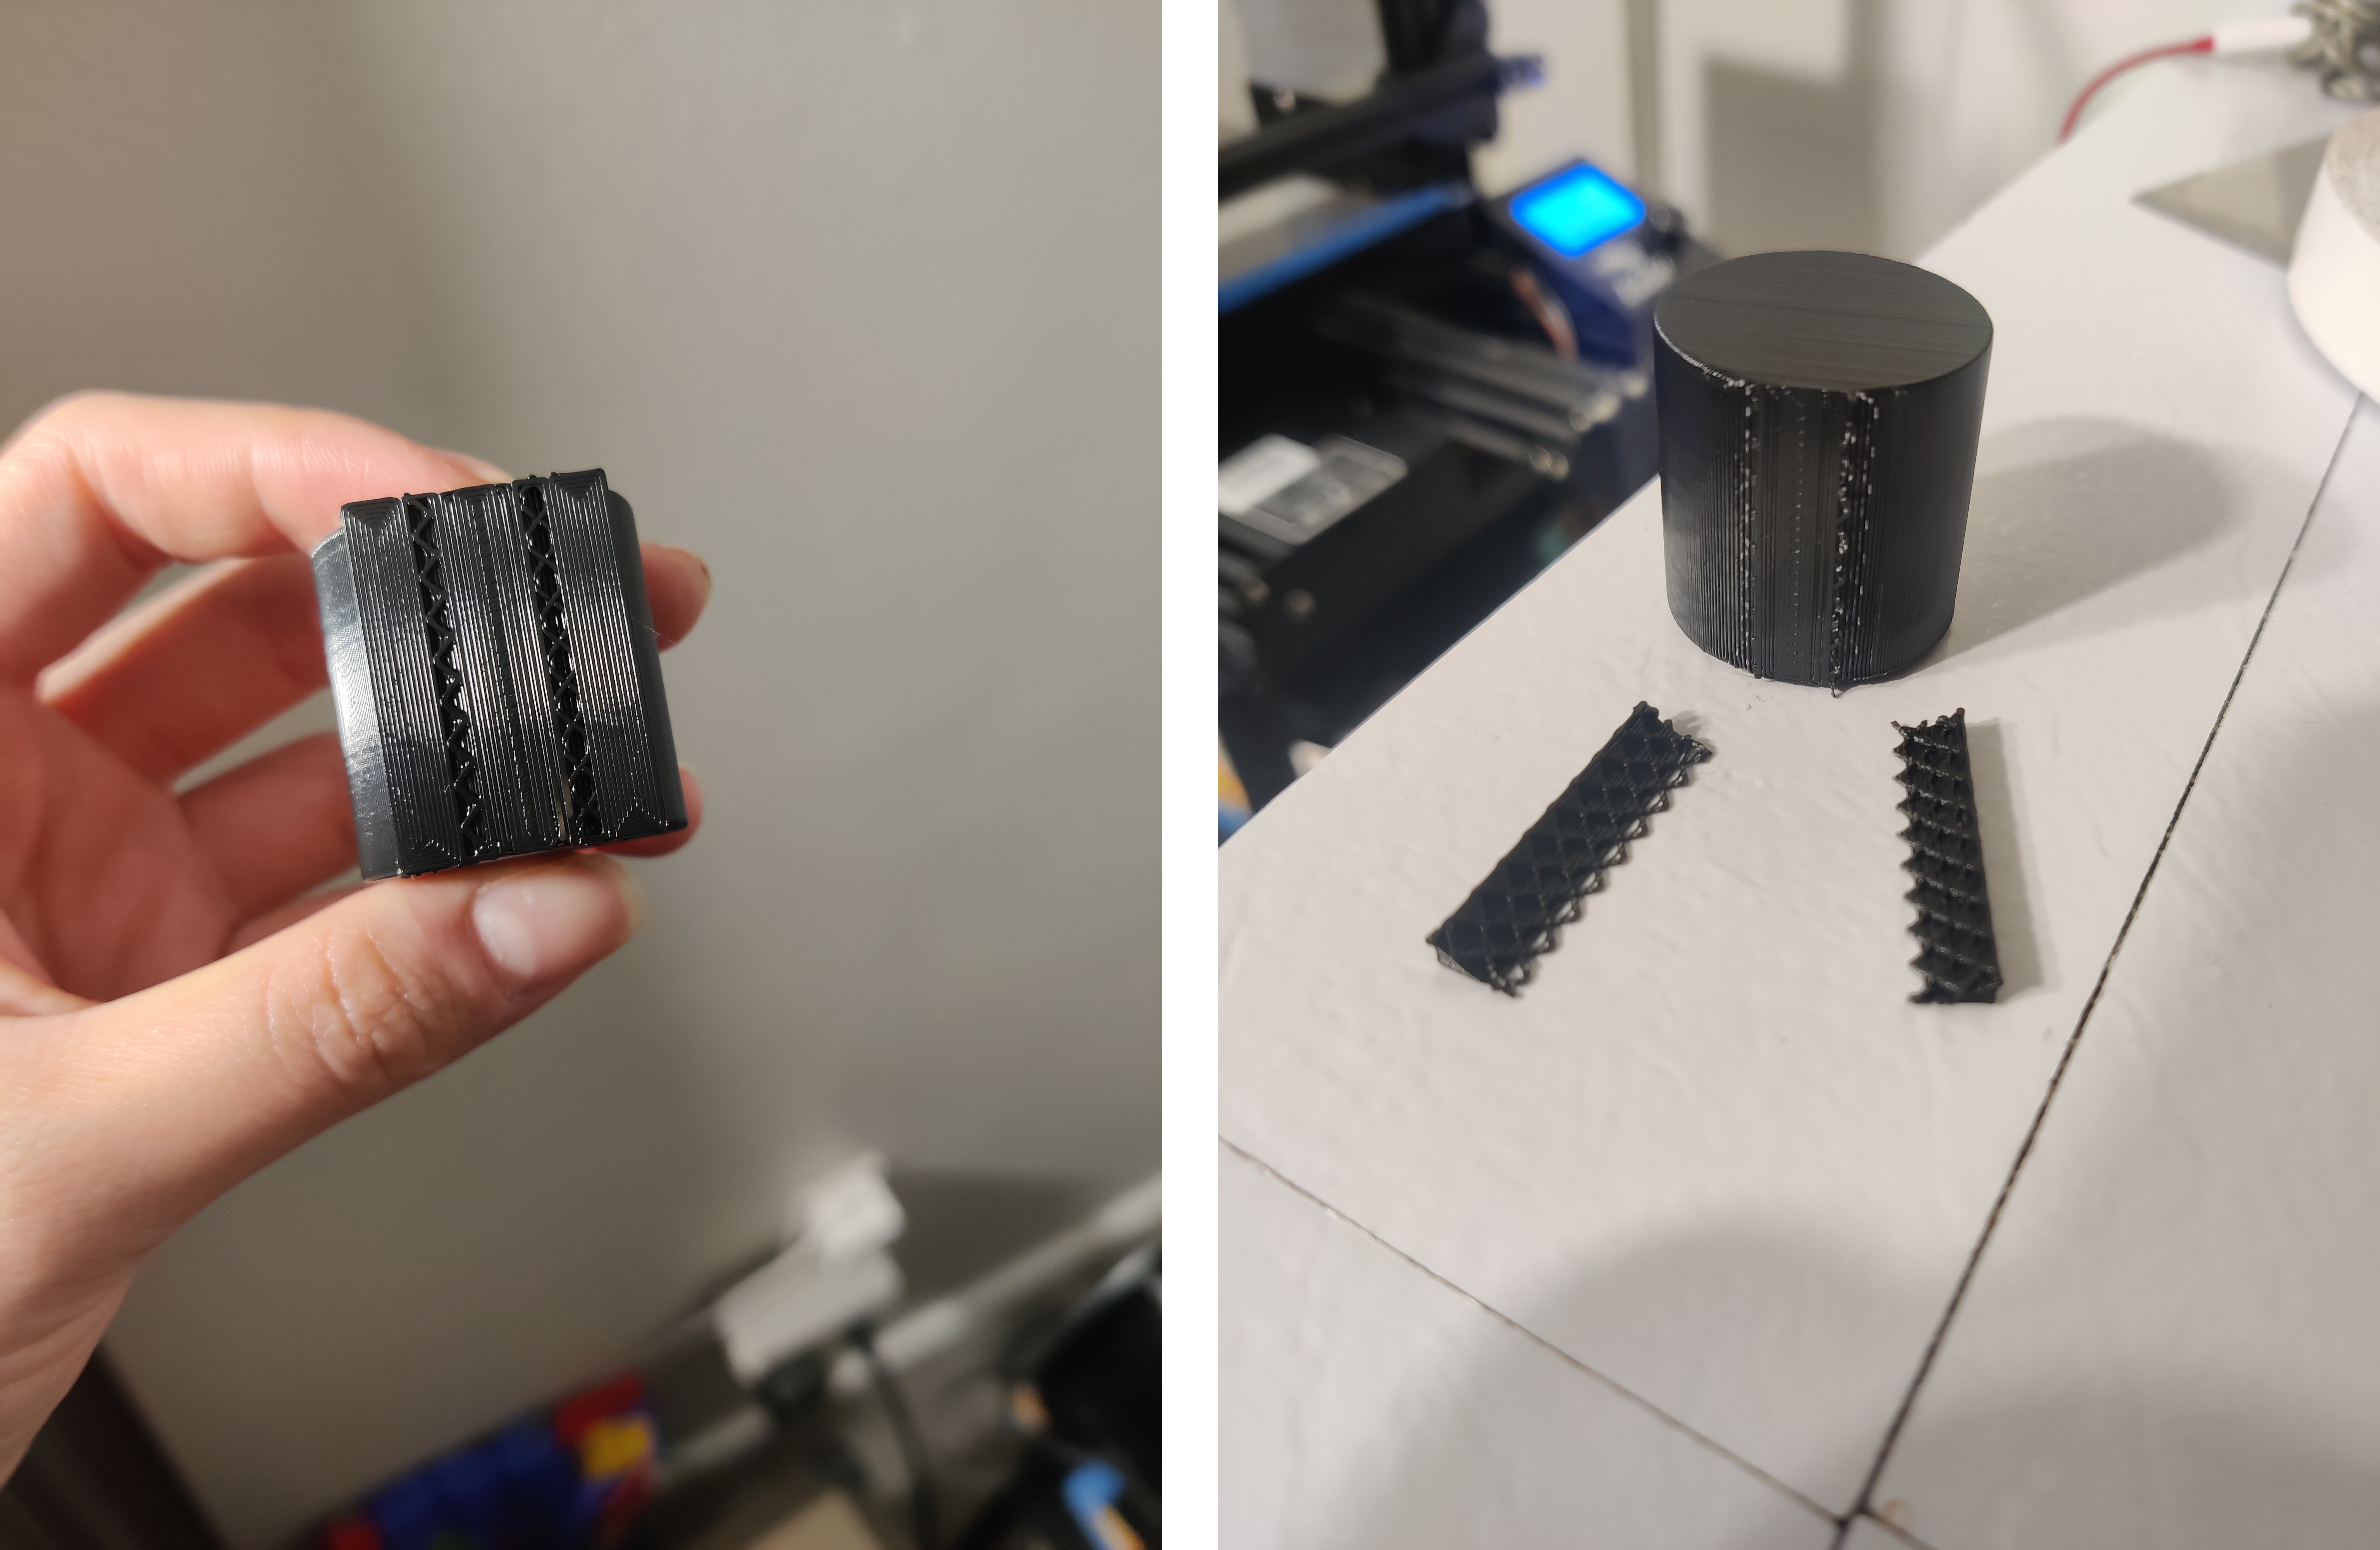
The first time I exported this model and imported it into Cura, I realized that it was way too big, so I scaled it down by 0.7.
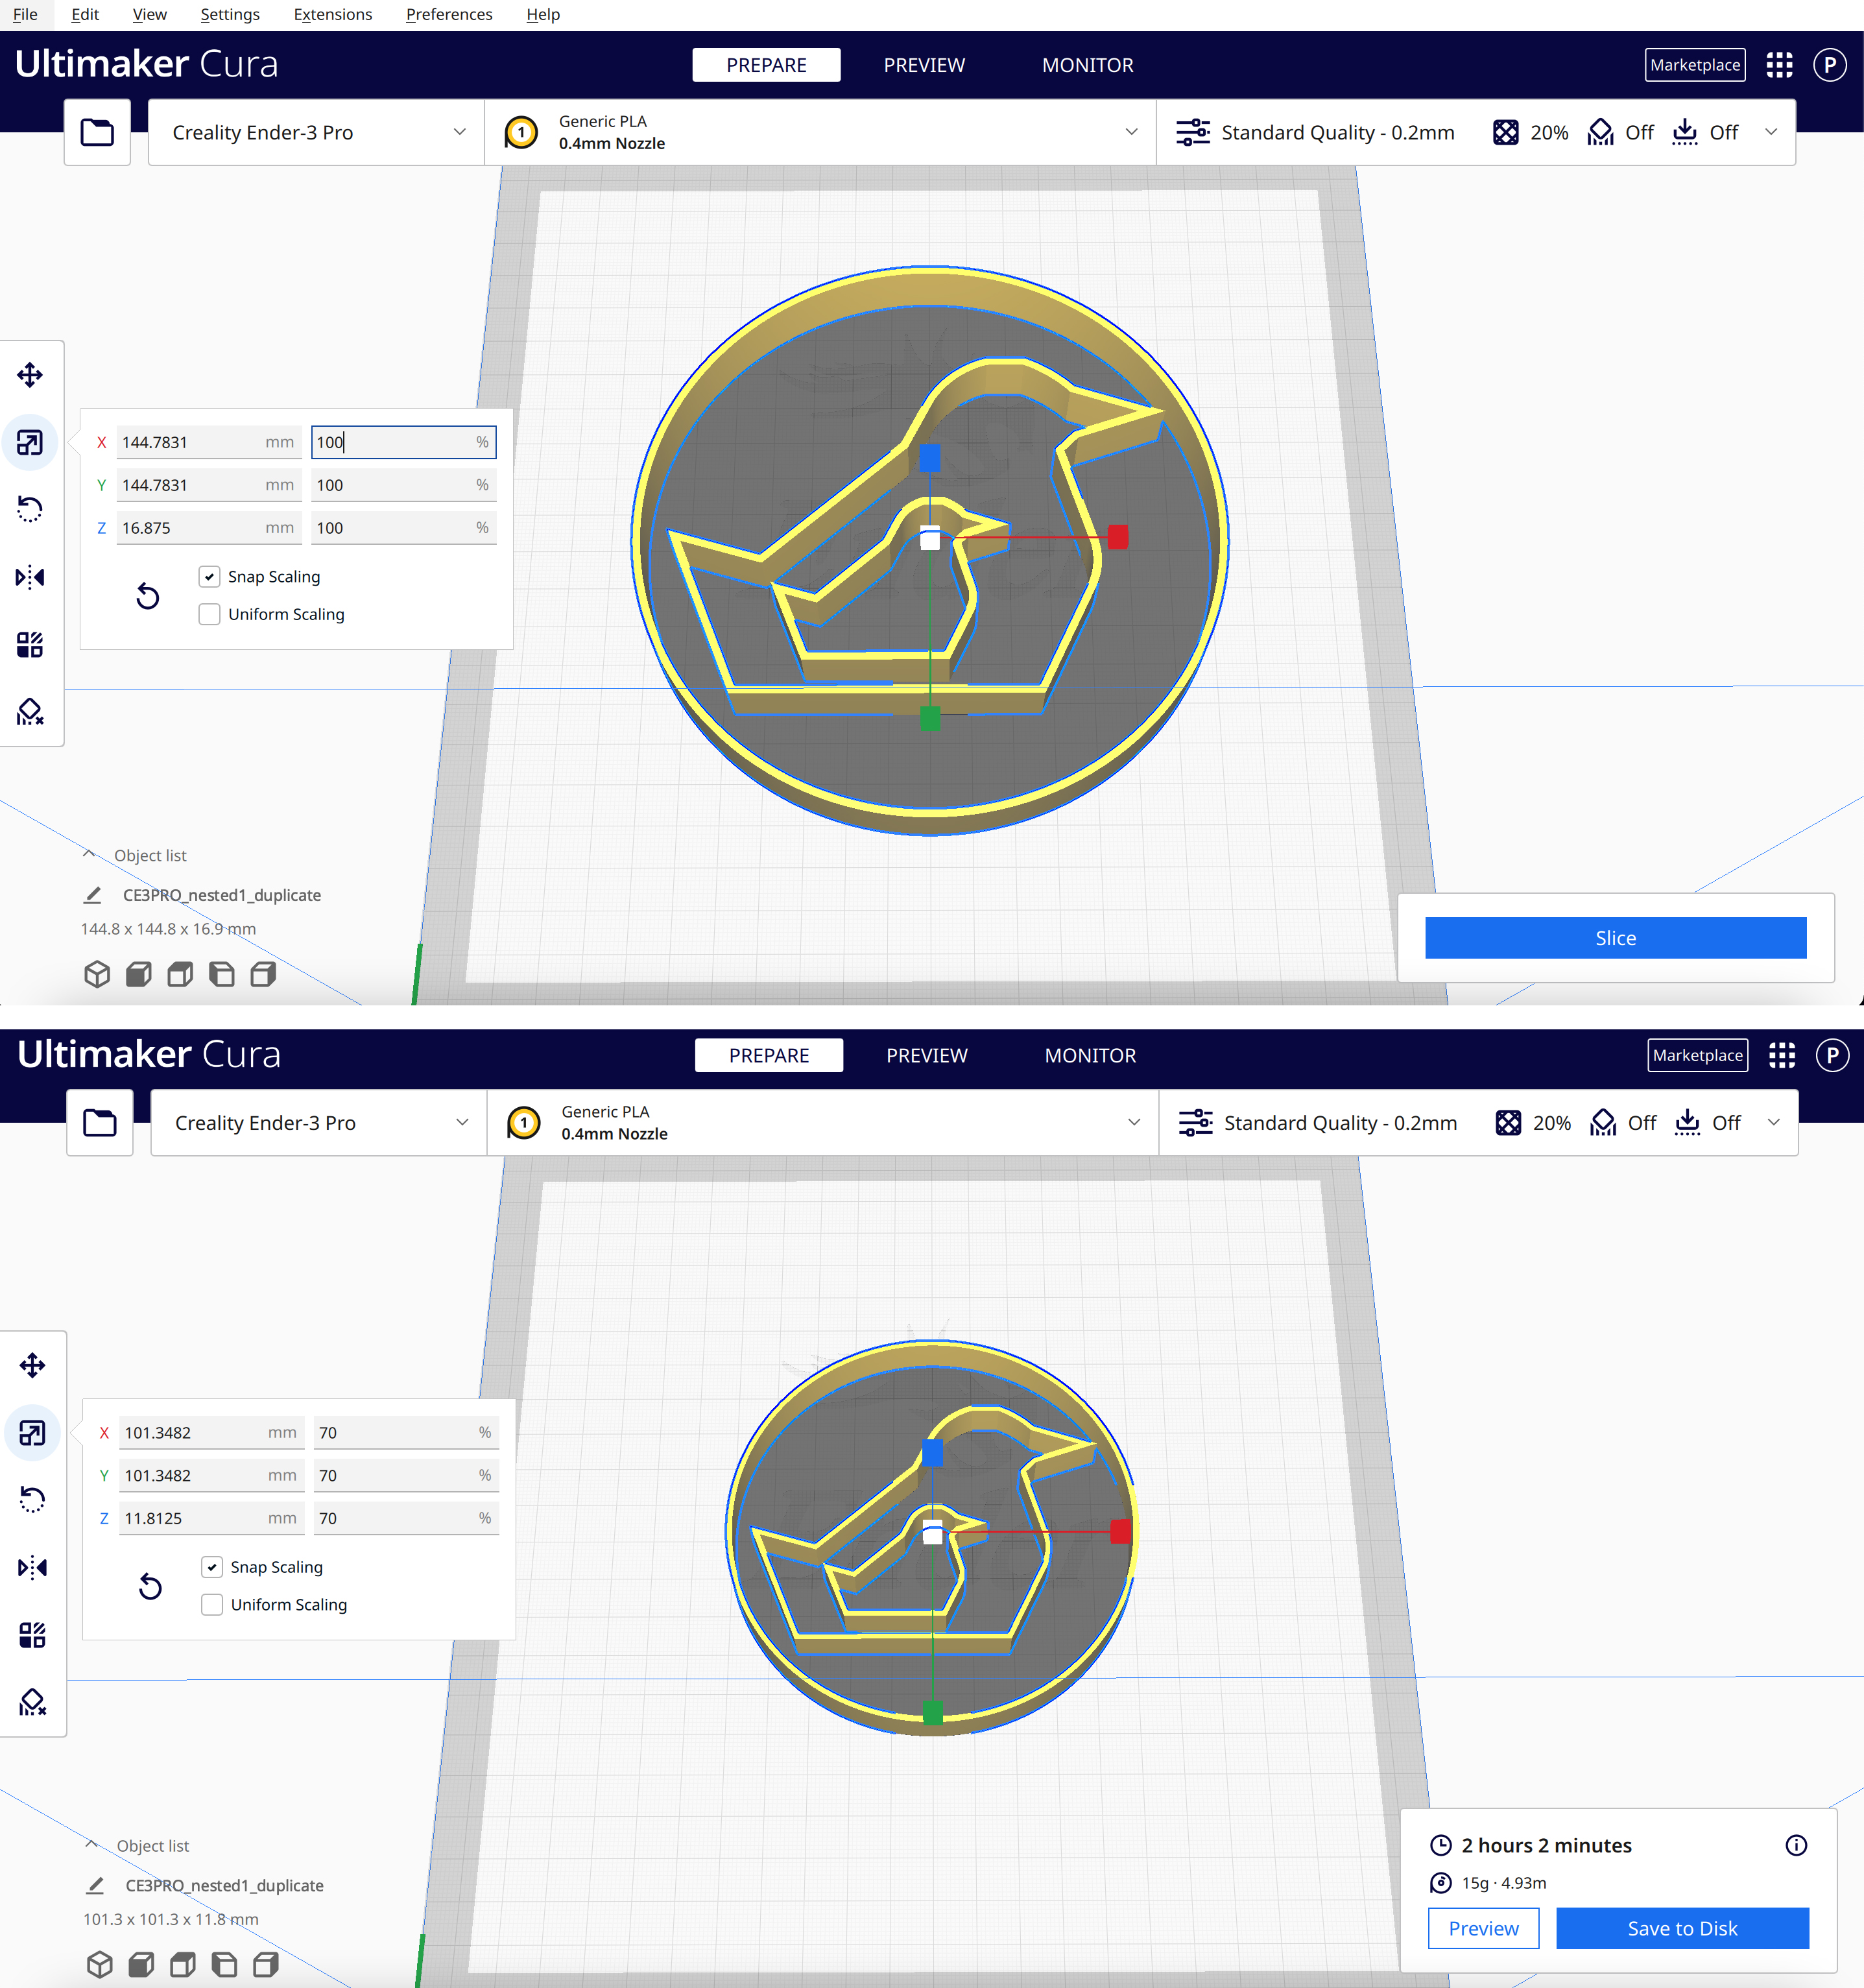 Original vs. scaled in Cura
When I printed this, the base layer didn’t adhere to the bed and messed up the print. I thought that maybe the bed somehow became unlevel while I was out of town (building shifting, etc), so I releveled the bed. Oddly, it didn’t really seem like any adjustments needed to be made.
I printed it again, and it got a little further, but eventually detached again and went haywire, though the result actually looks kind of neat.
 Looks ok….
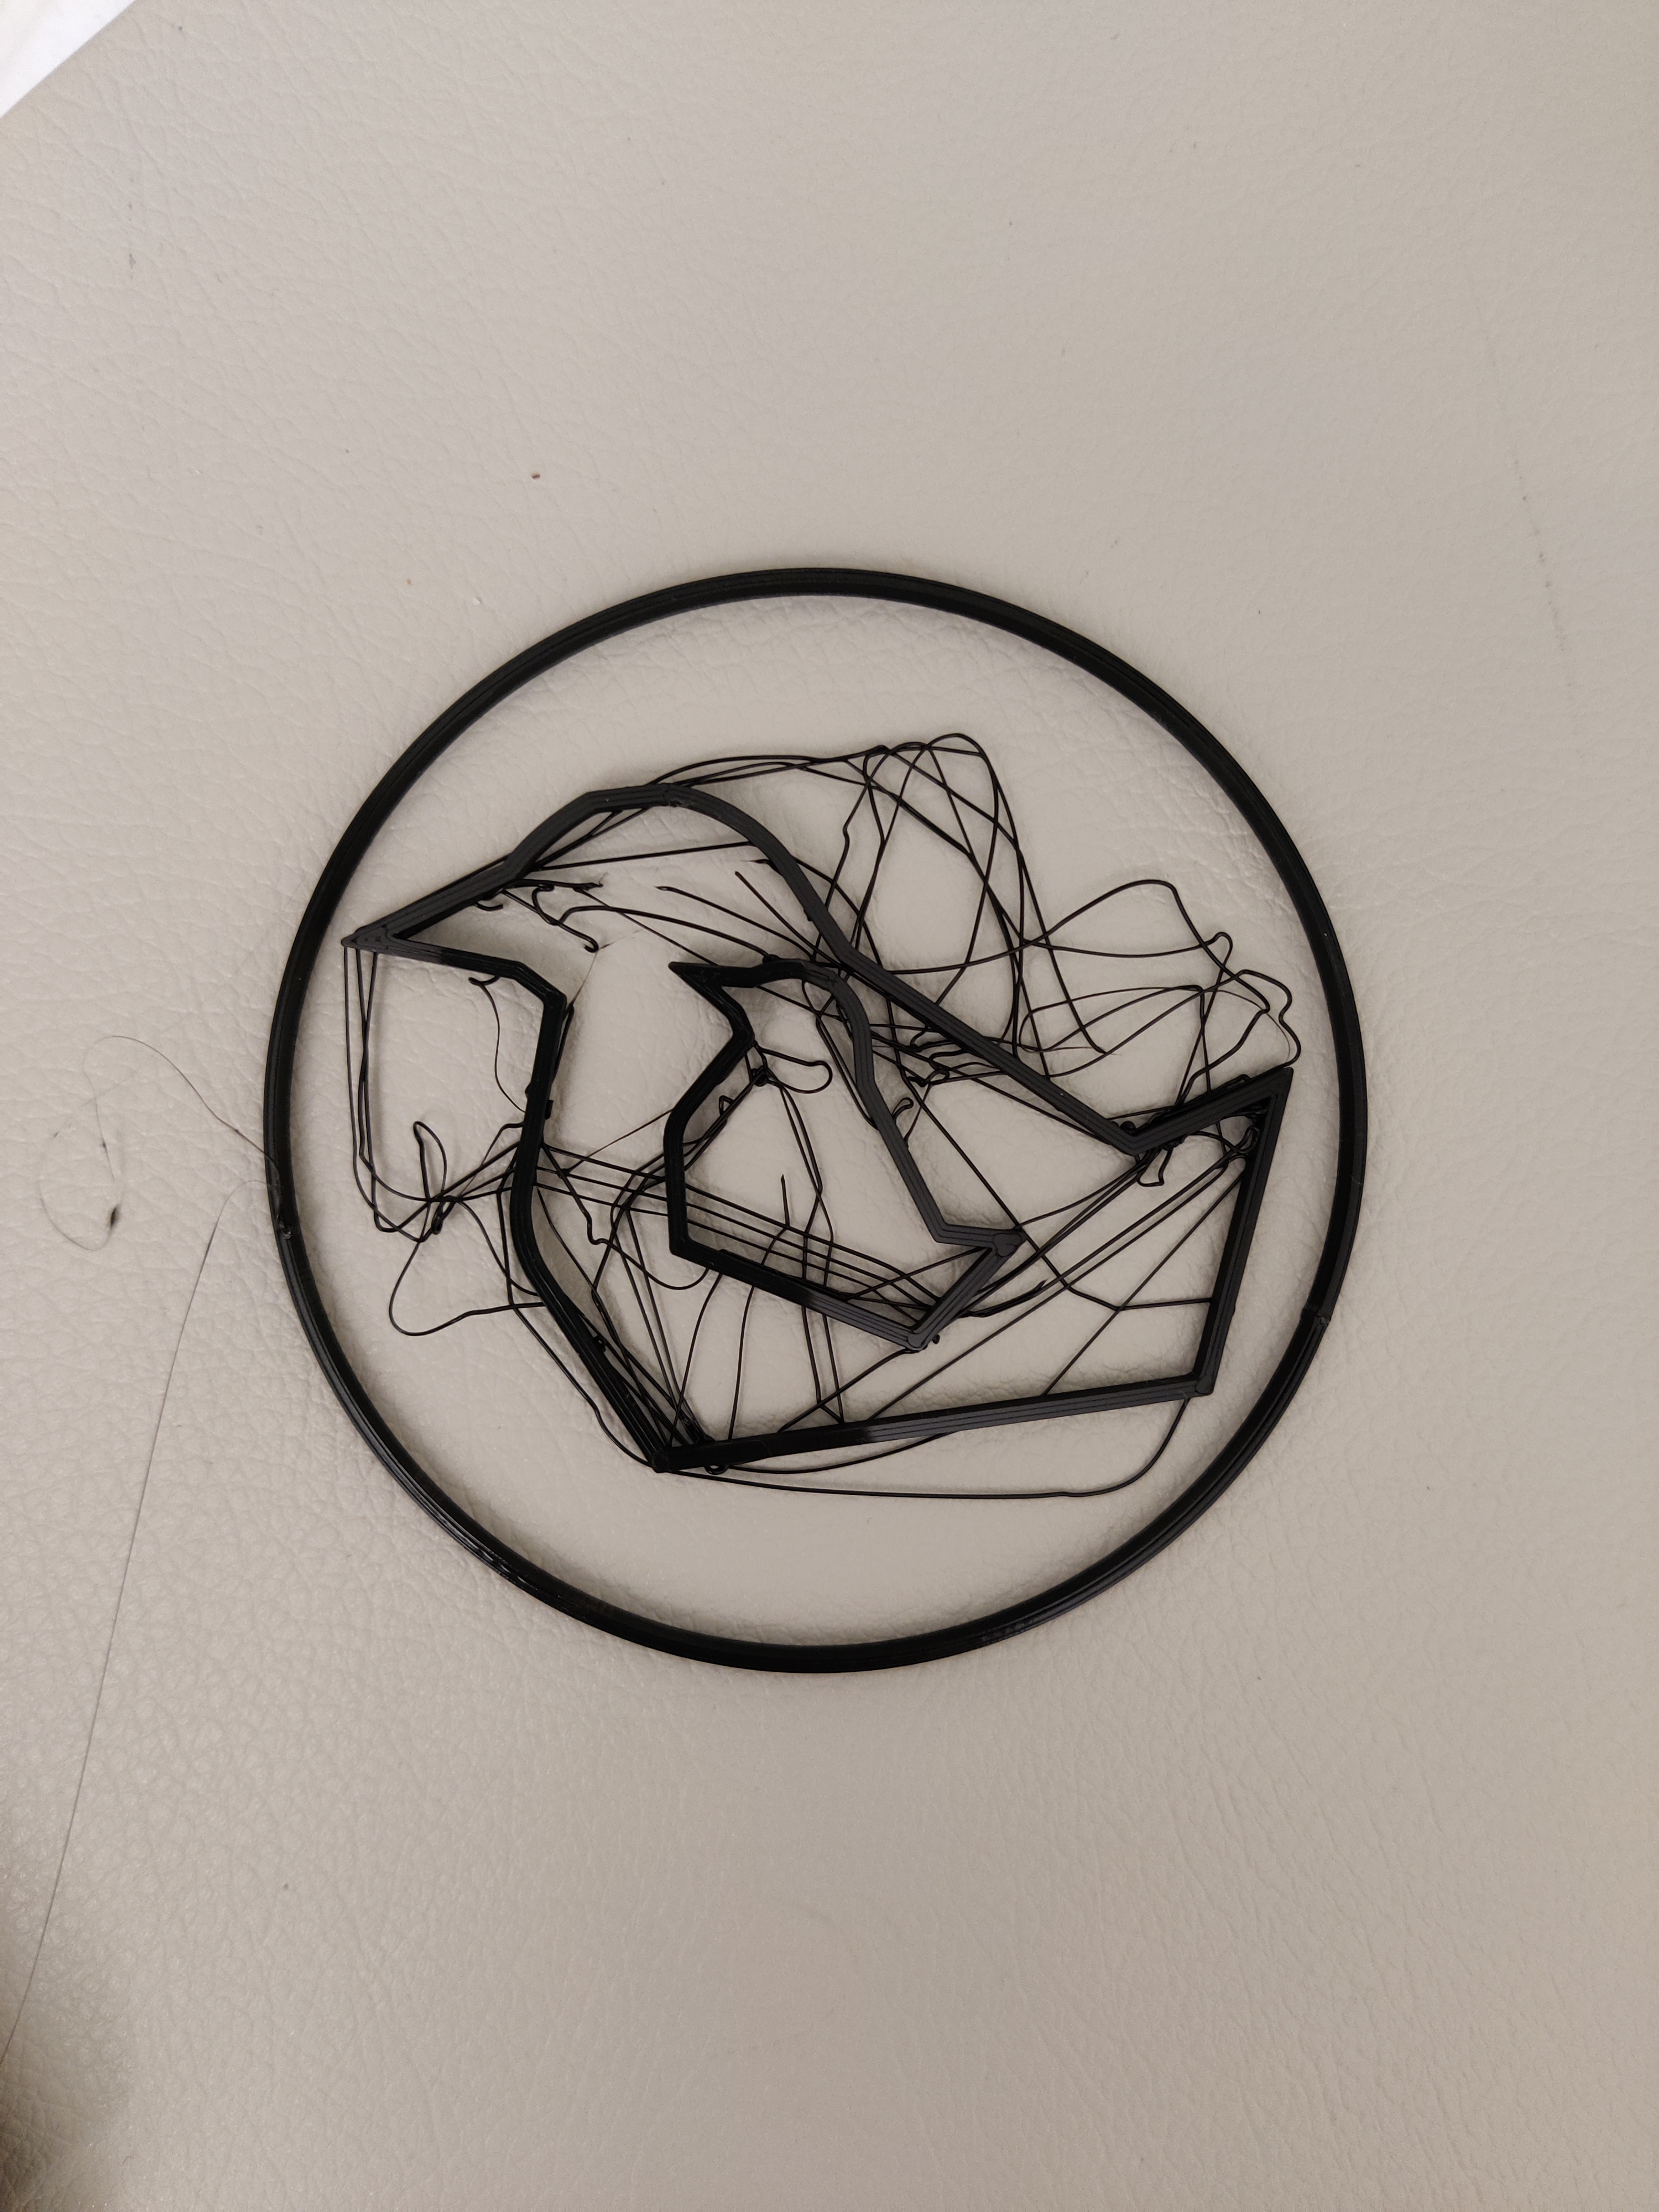 Nevermind
It was getting really late at this point, around 1am, so I had to figure out a solution that would stick because I couldn’t afford to keep printing and starting over.
I examined the failed prints and thought that perhaps when I scaled it down in Cura, the thickness of the walls became too thin to structurally support the model as it was building up. I went back to Rhino and remade the model the right smaller size and with an offset of 1cm instead of 0.5cm, so that the walls of the bird and circle were 1cm thick and did not need scaling in Cura.
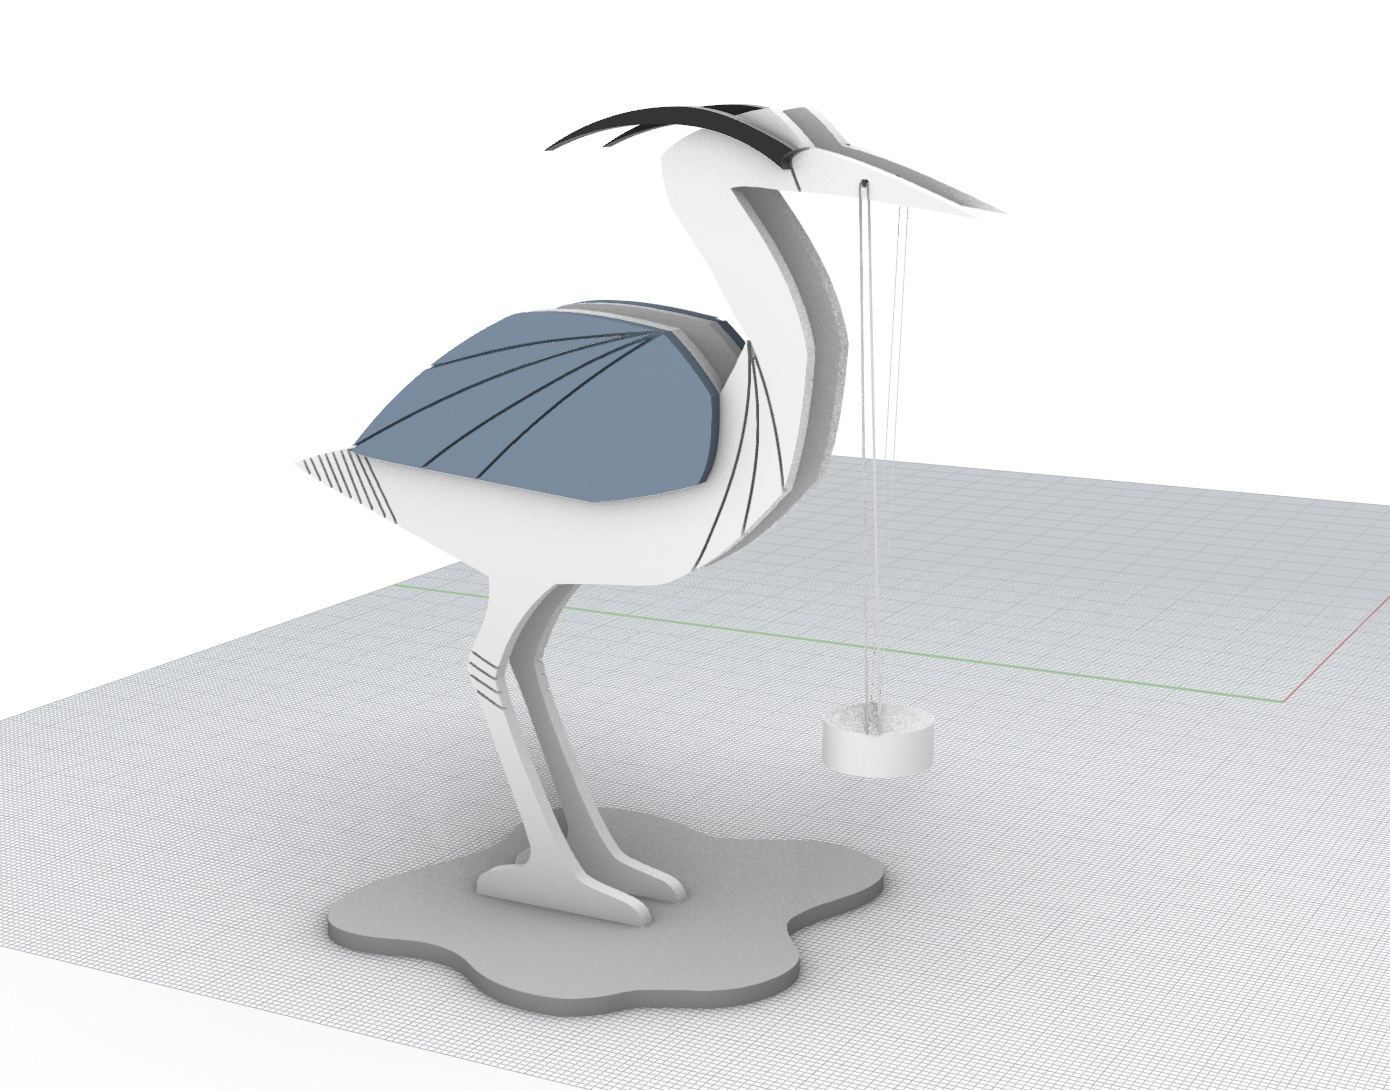
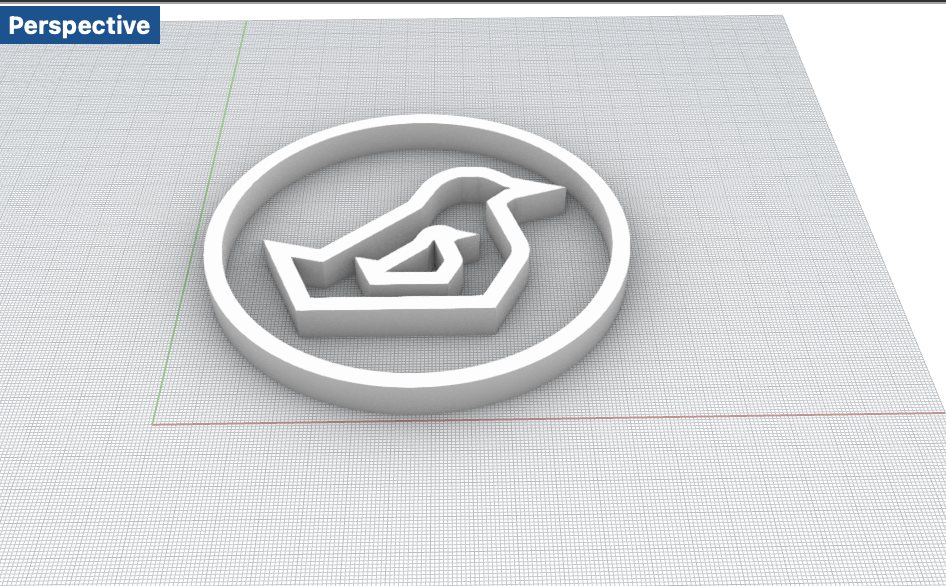 Rendering in Rhino
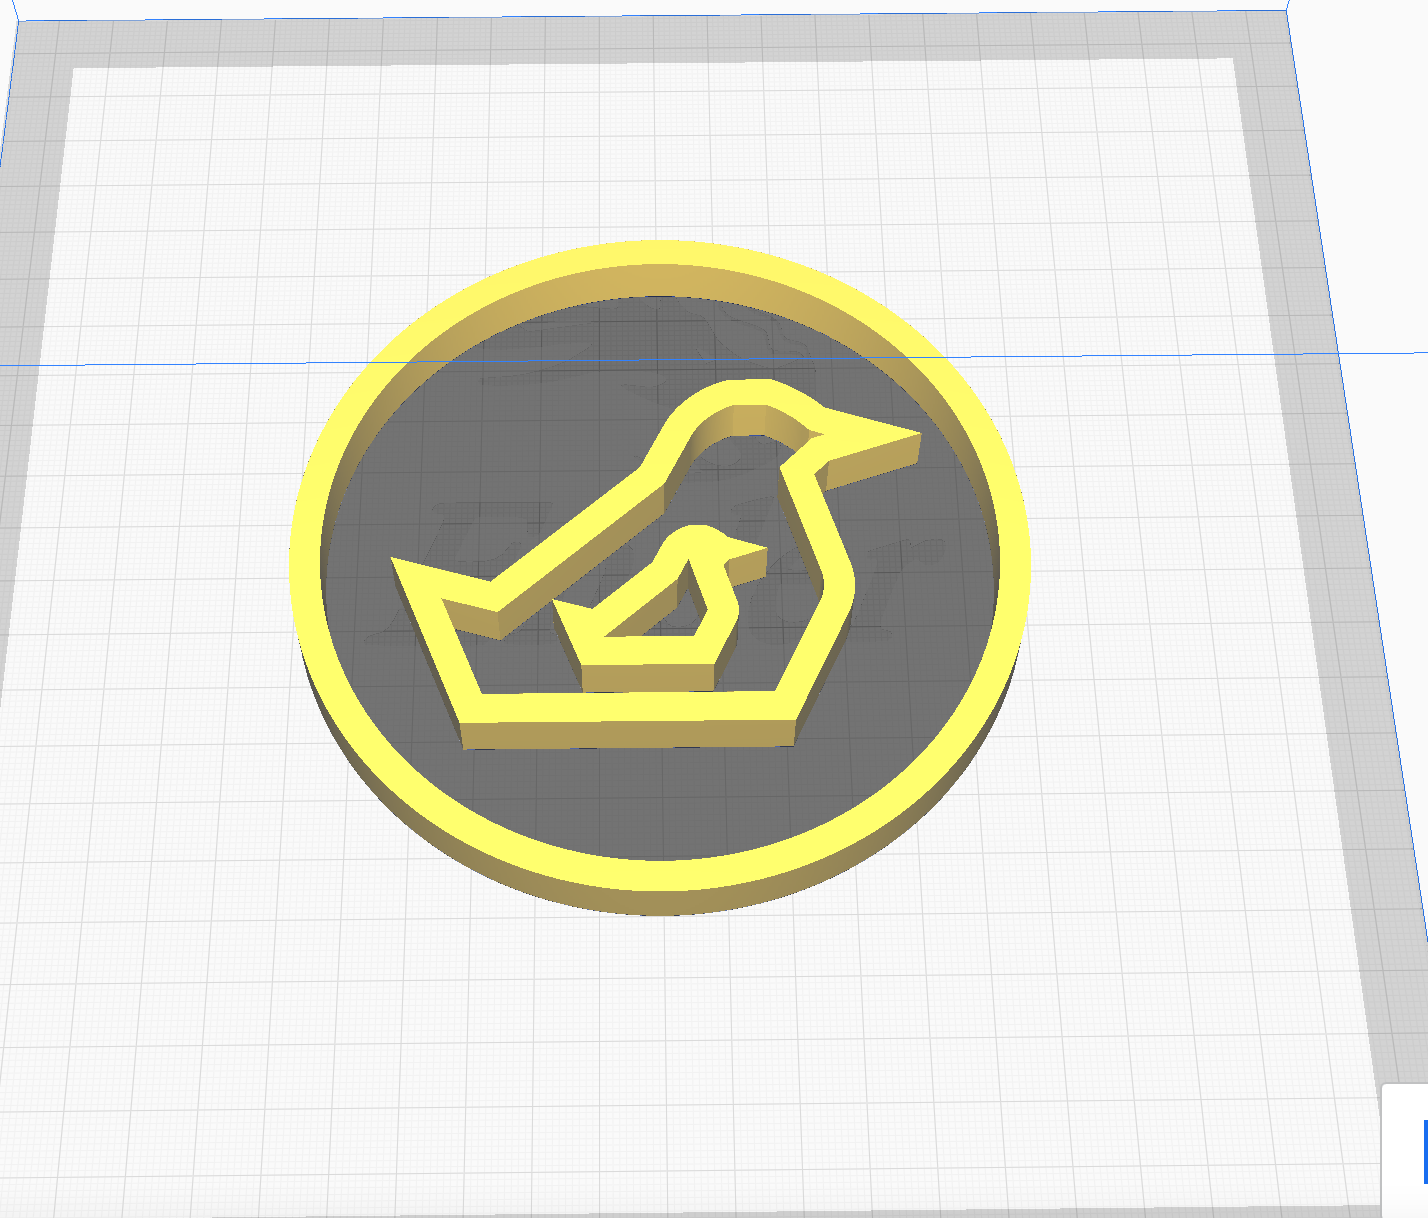 Preview in Cura
I also put a tiny bit of glue down on the bed to ensure more adhesion. I started the print, monitoring it intently for the first half hour. All seemed good, so I did some other work while it was printing.
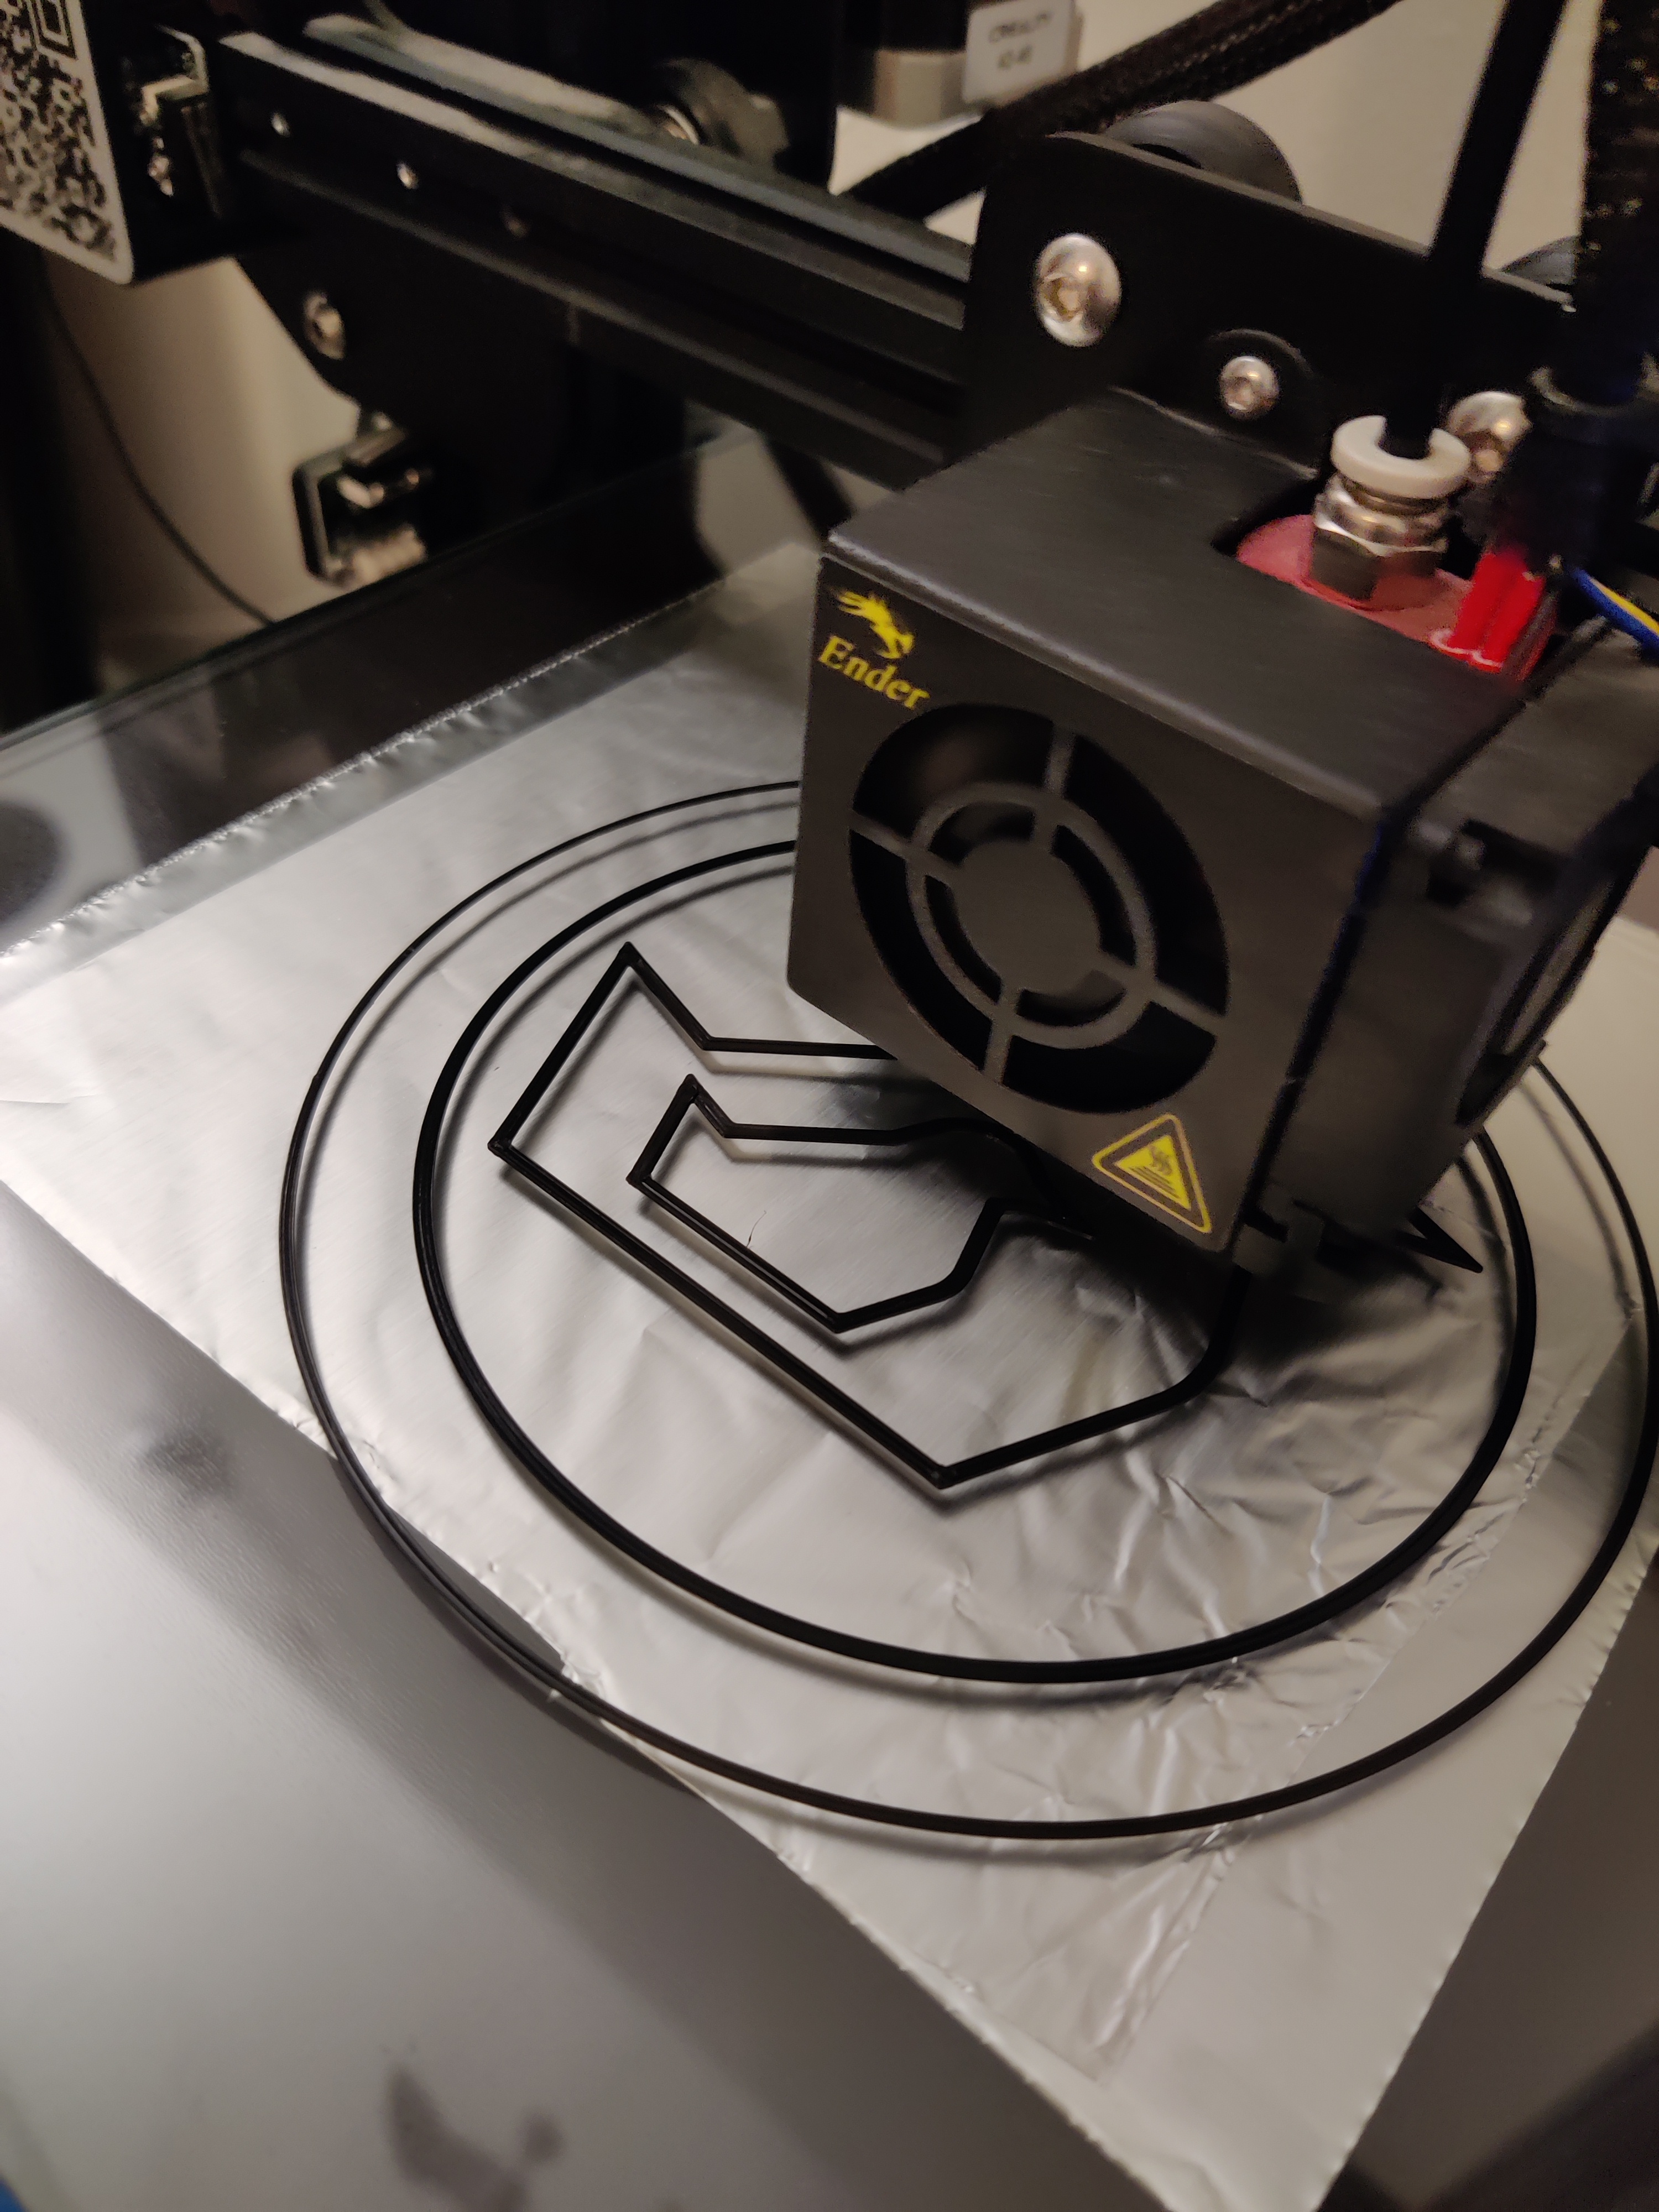
It was interesting to watch how it filled in the layers from the most inner object to outer.
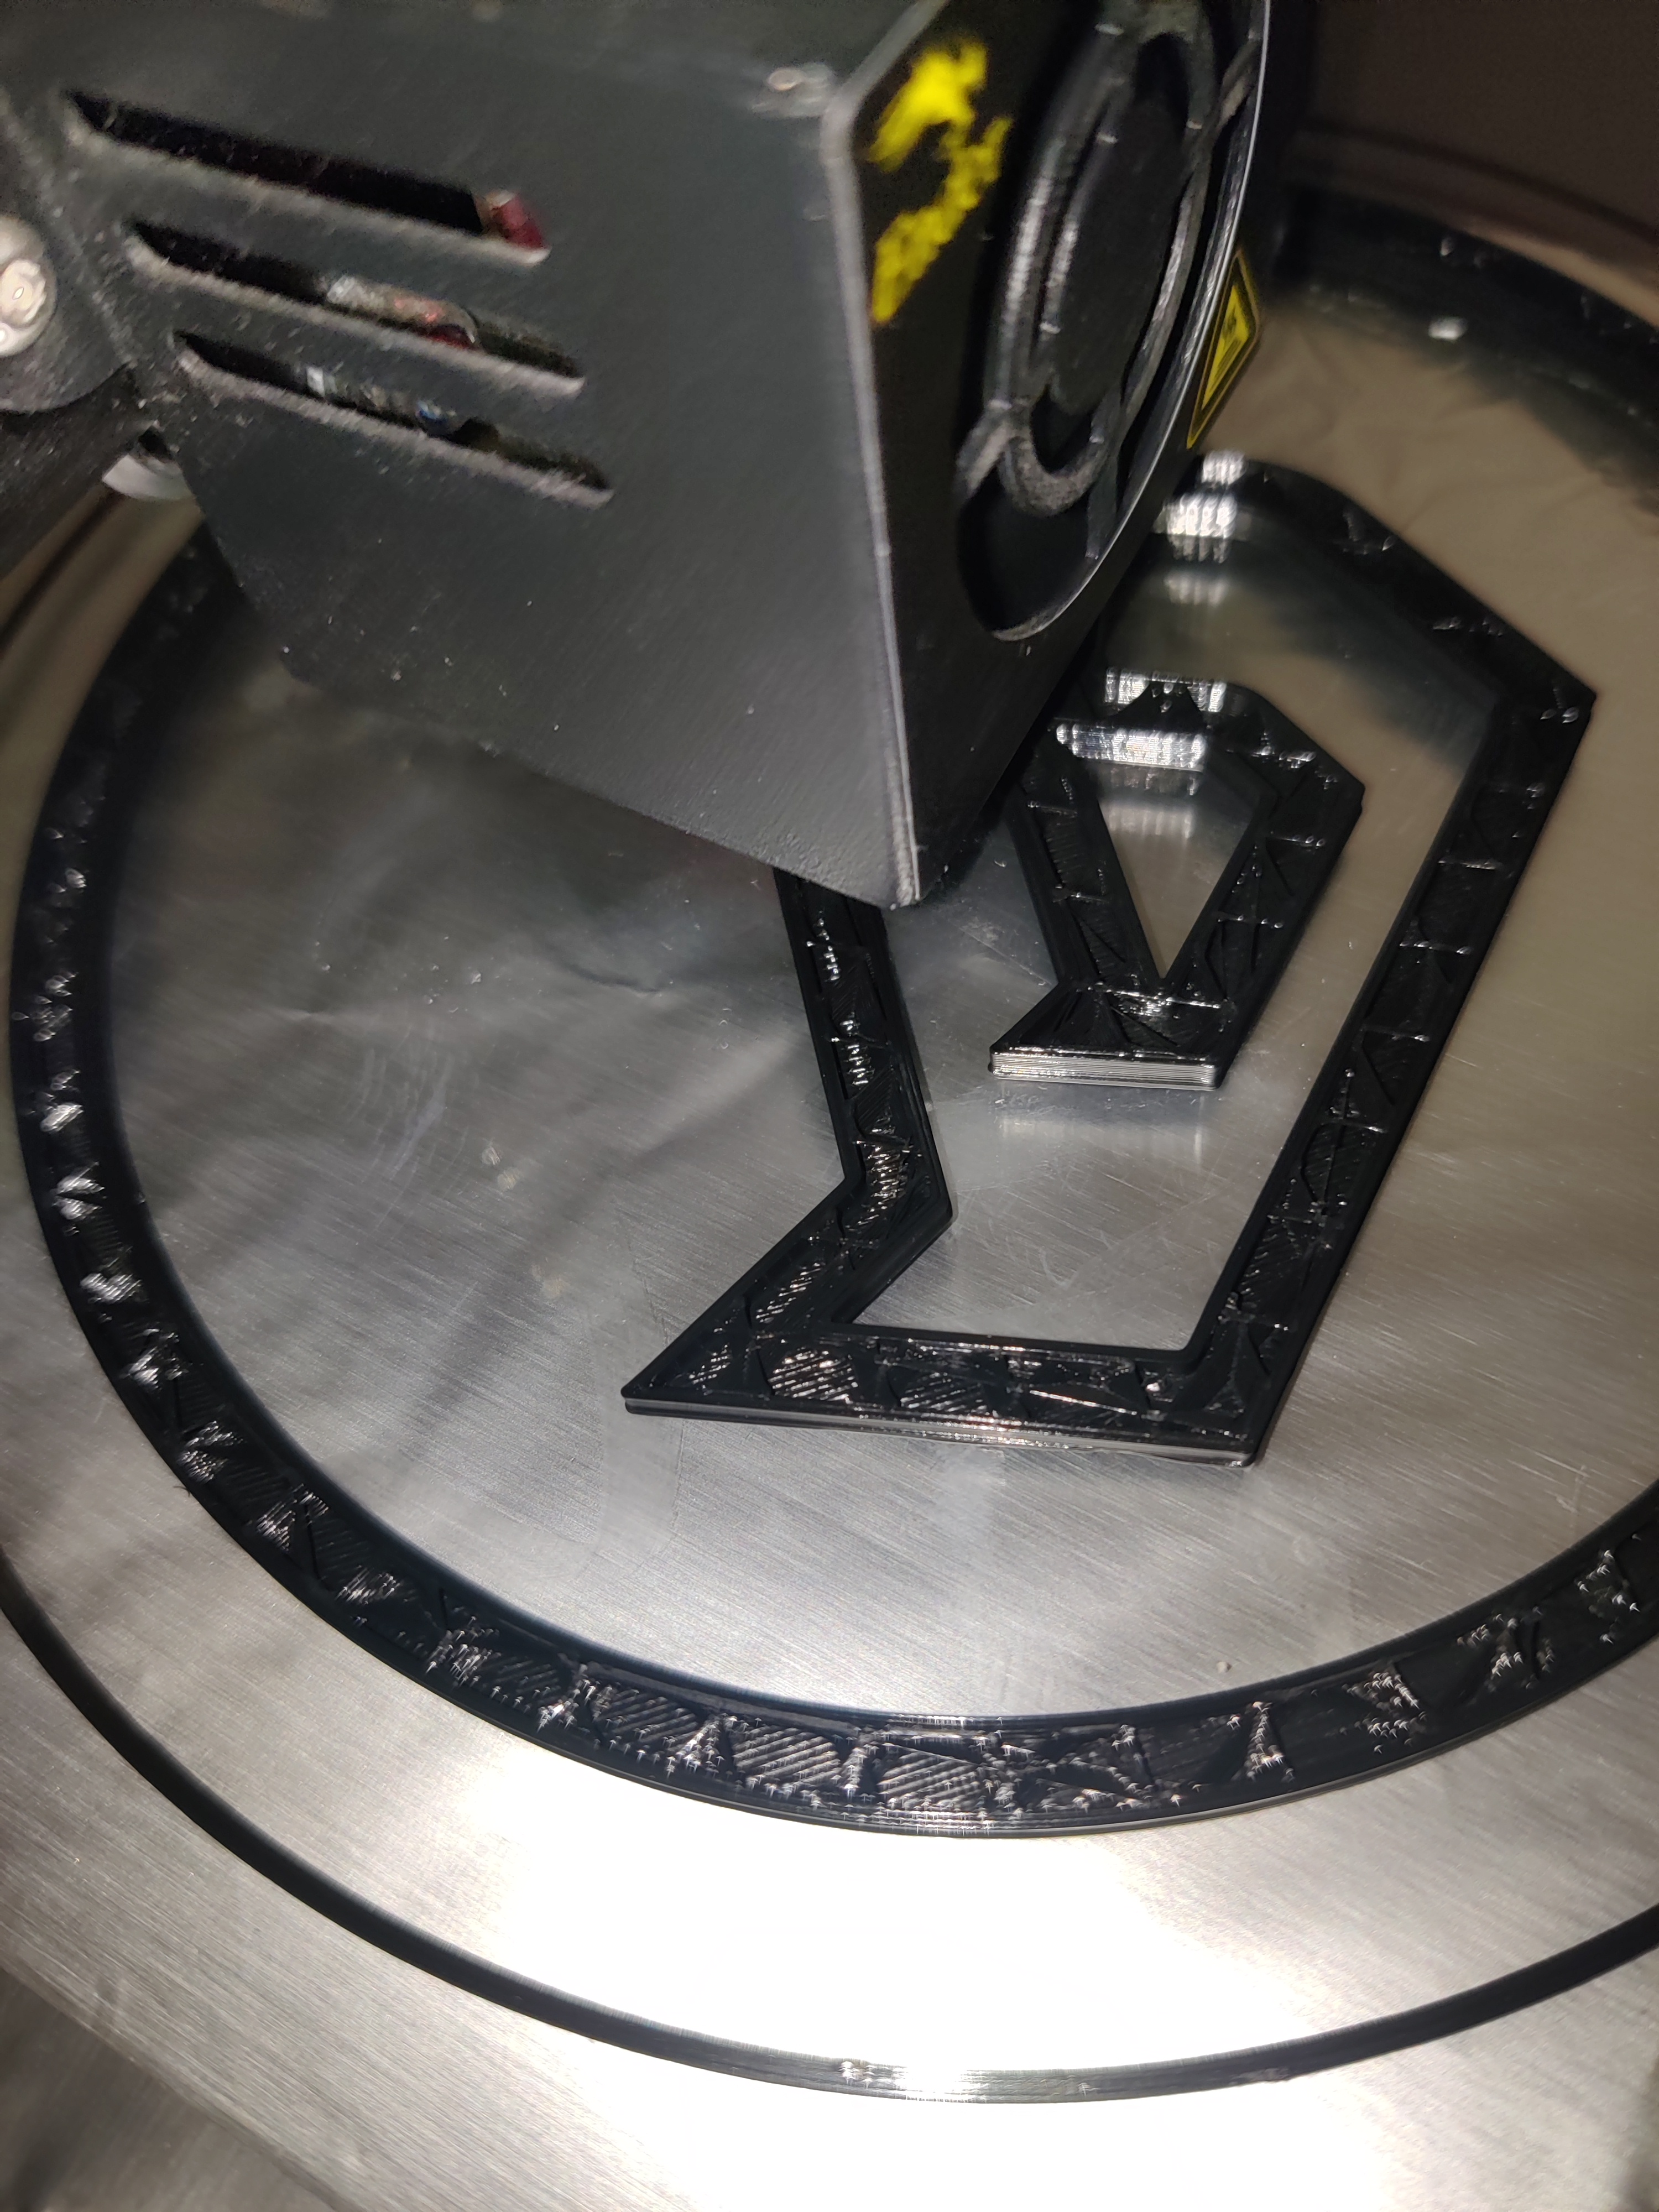 In progress print
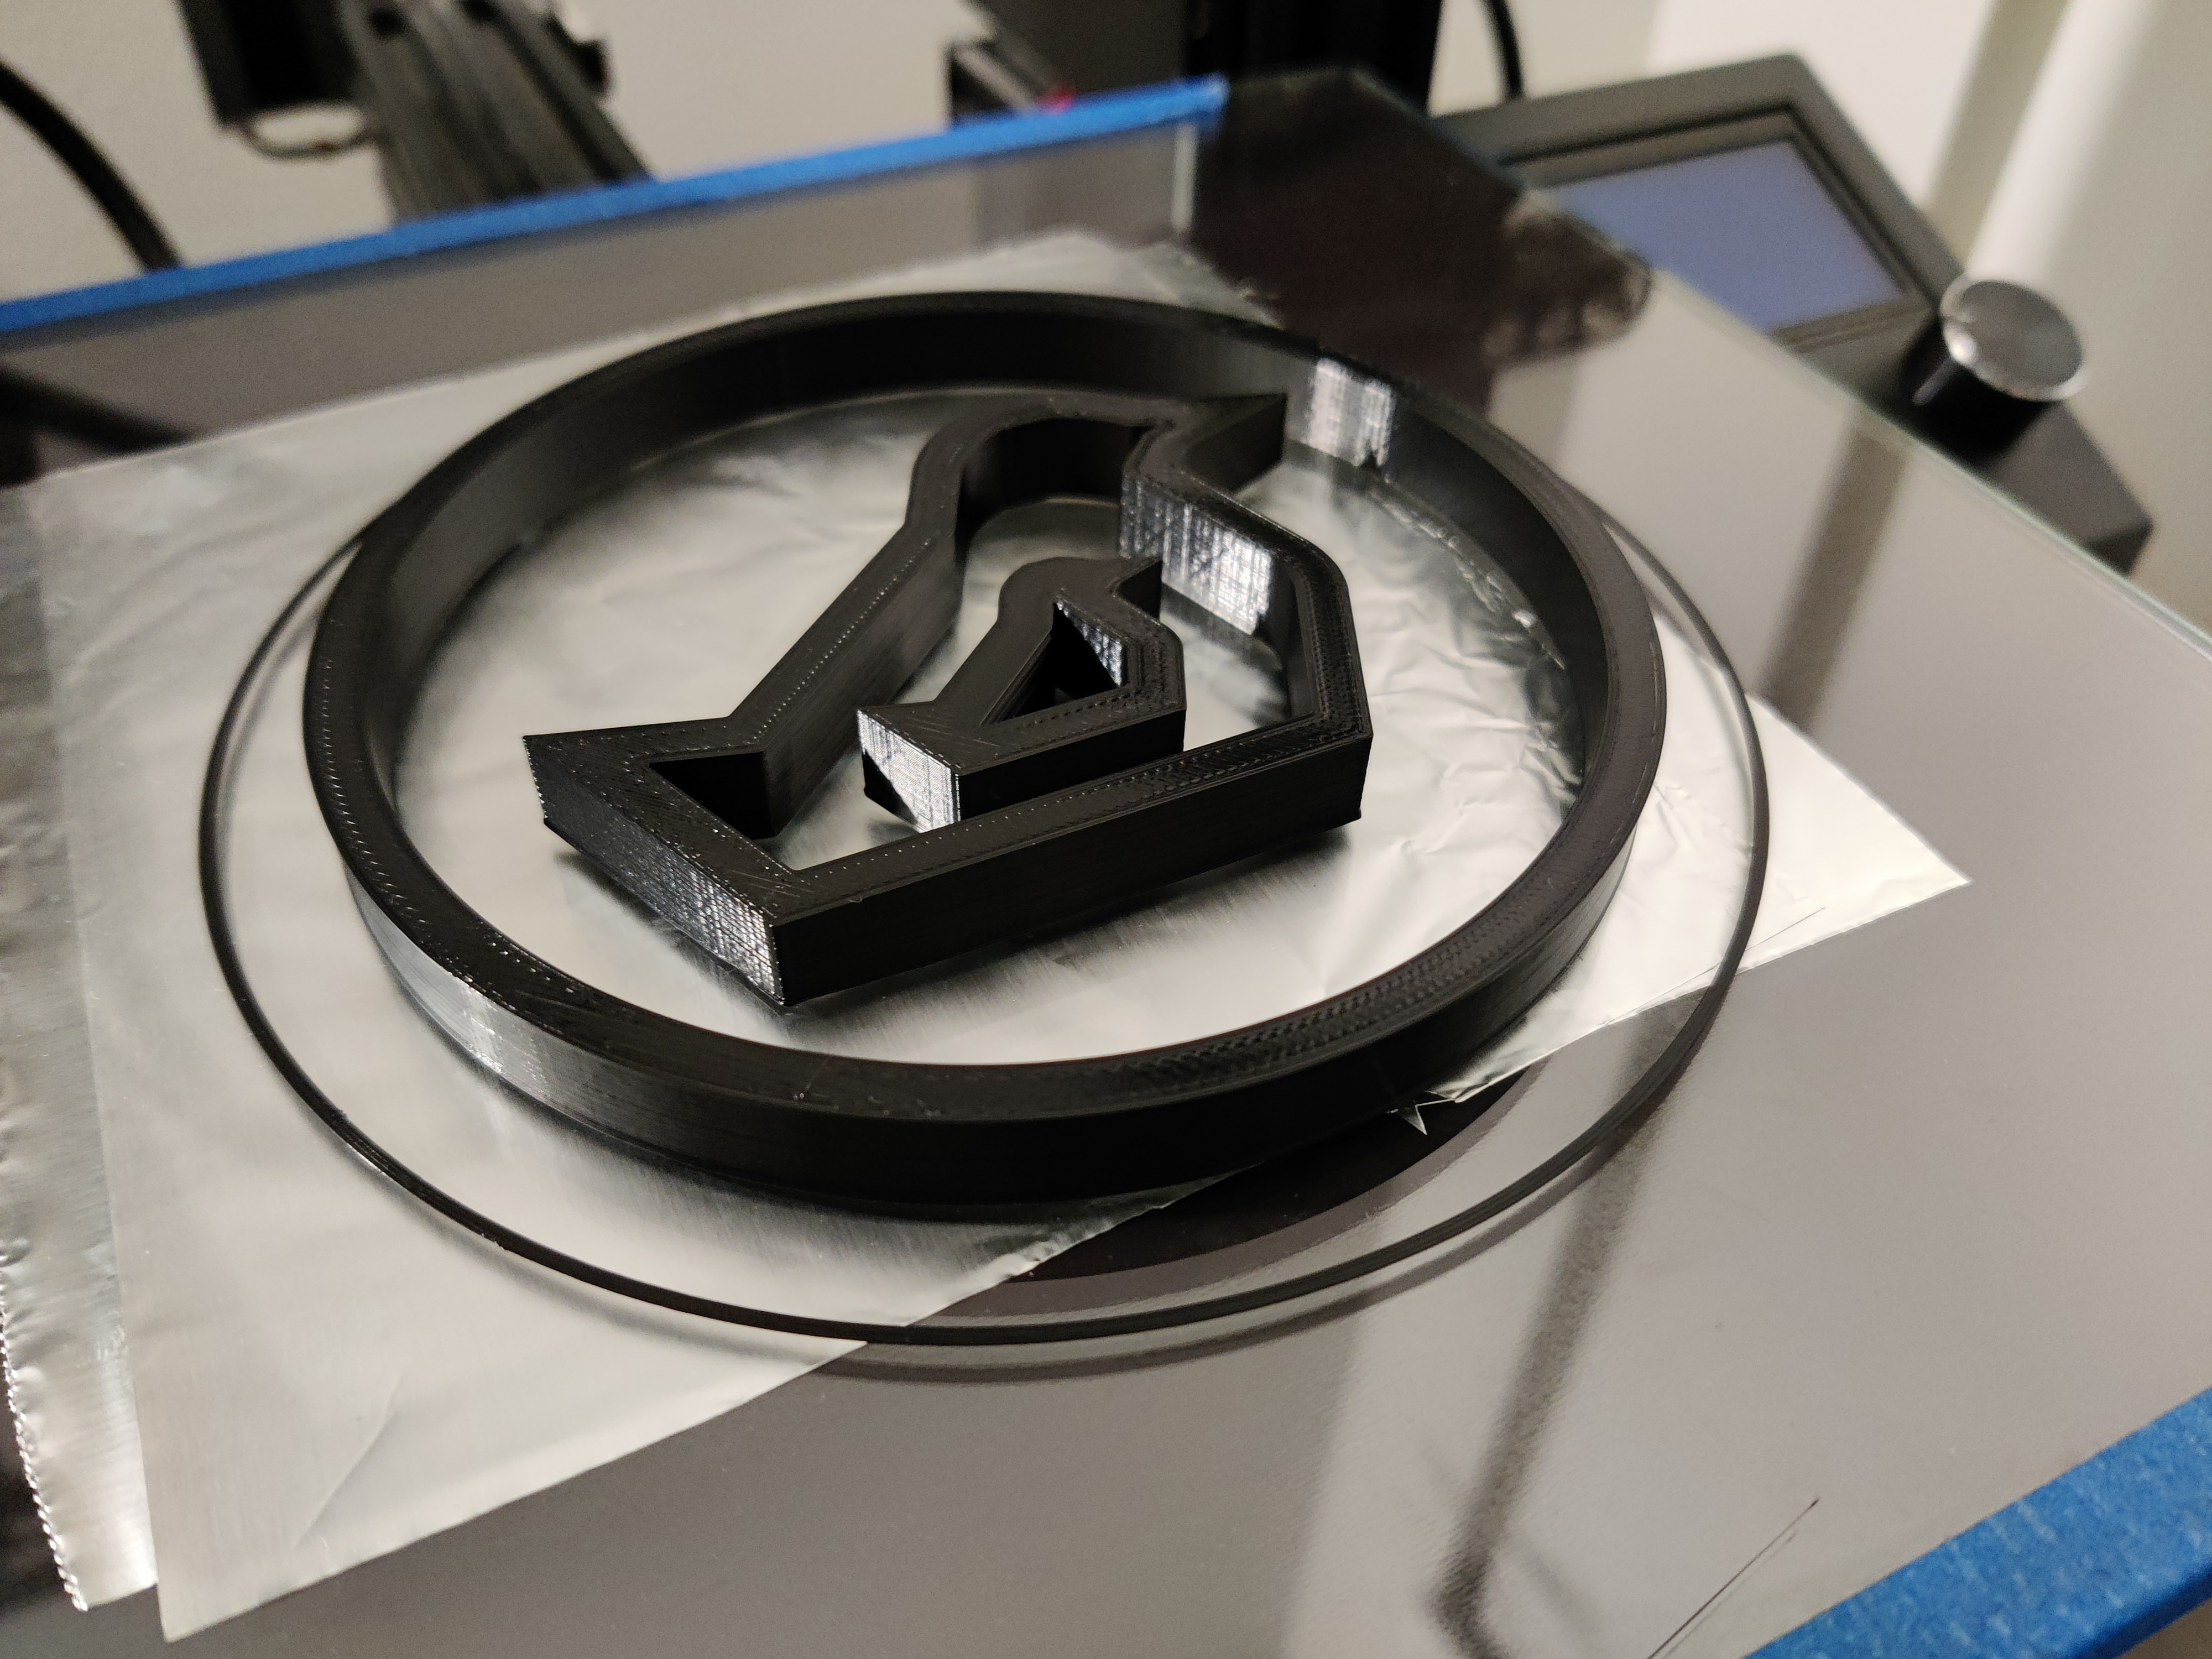
The print took just over 3 hours and looked perfect (YAY). After letting the bed cool down completely (I left it overnight since it was now around 4am), the prints came right off with a little elbow grease. The birds actually look pretty neat! Some of the measurements varied by .02mm, similar to some of the earlier prints.
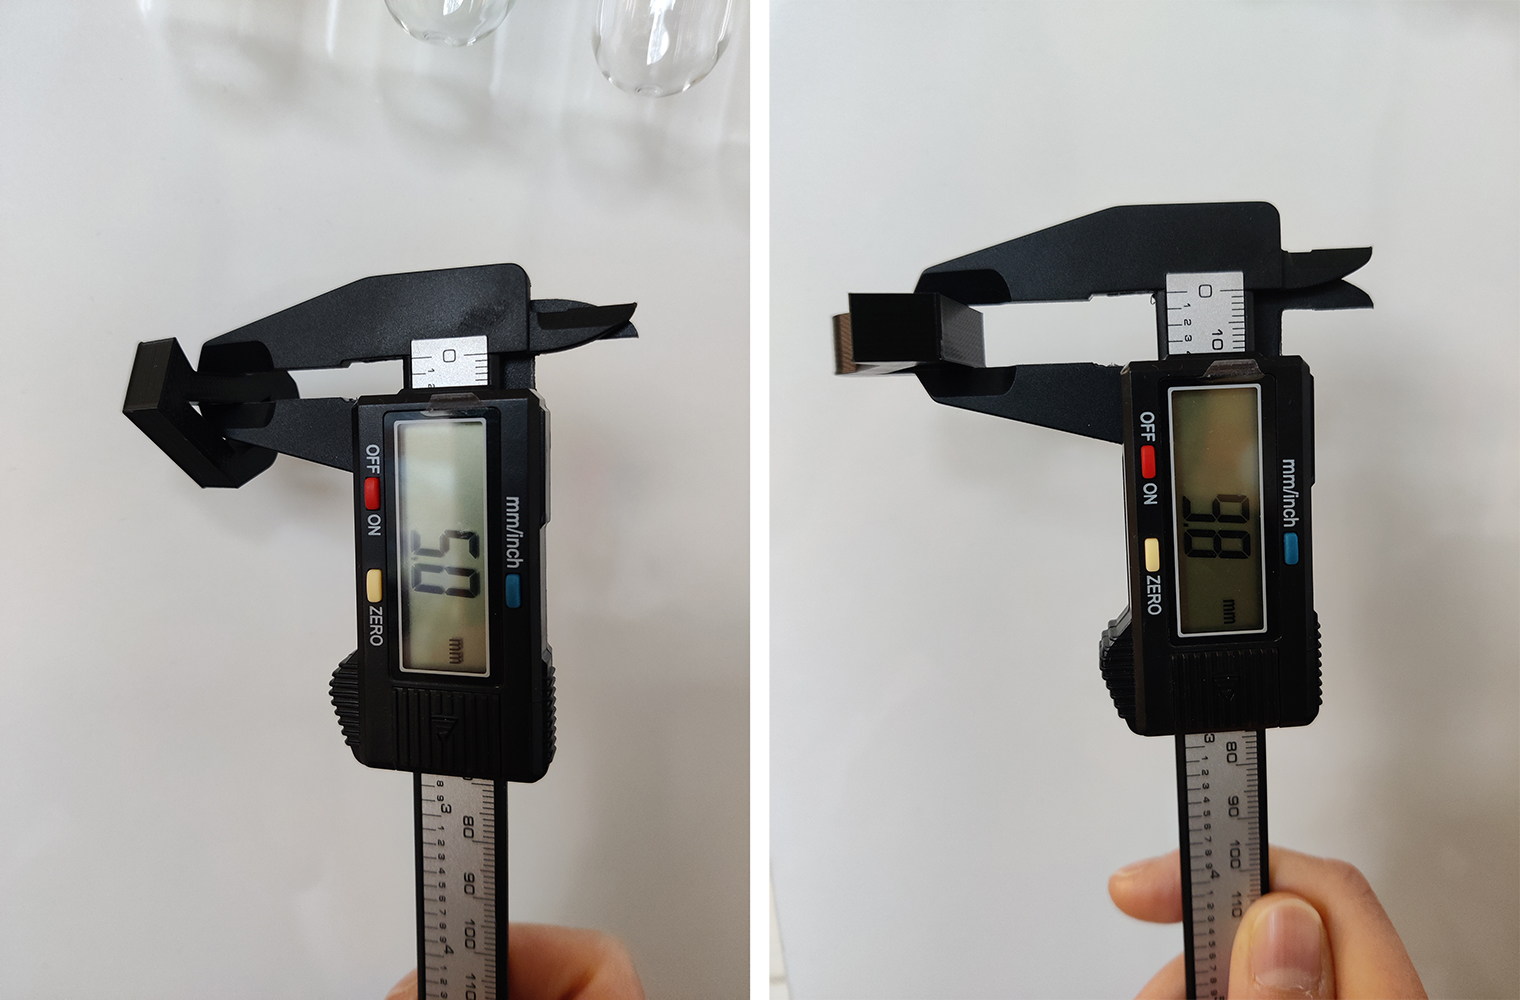 Small bird measurements
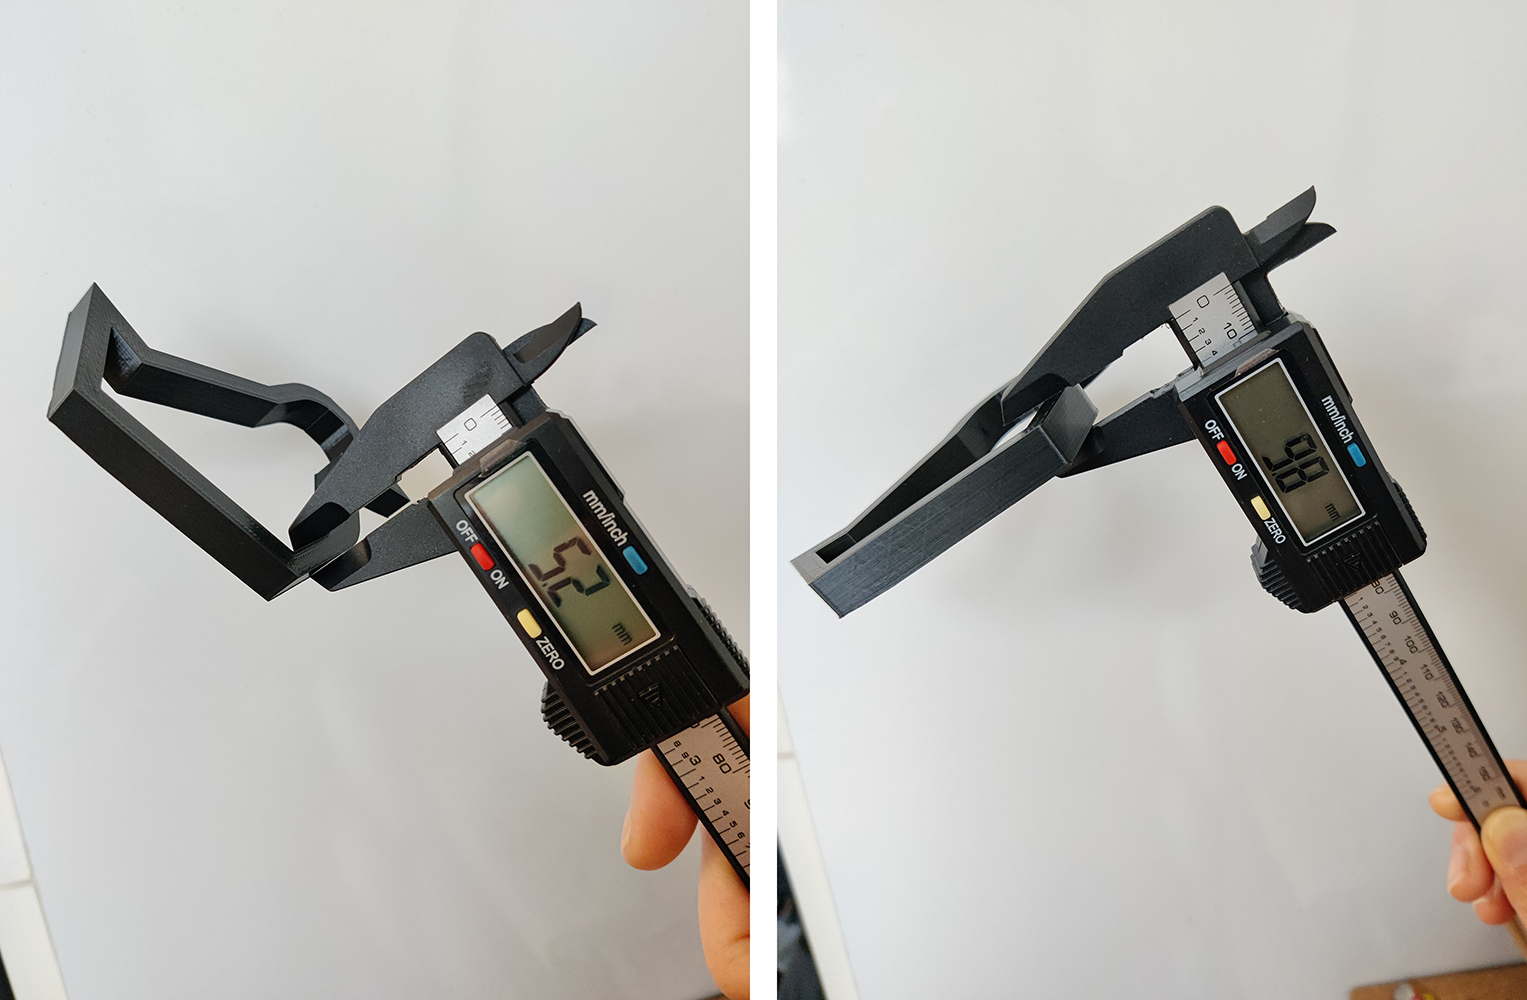 Large bird measurement
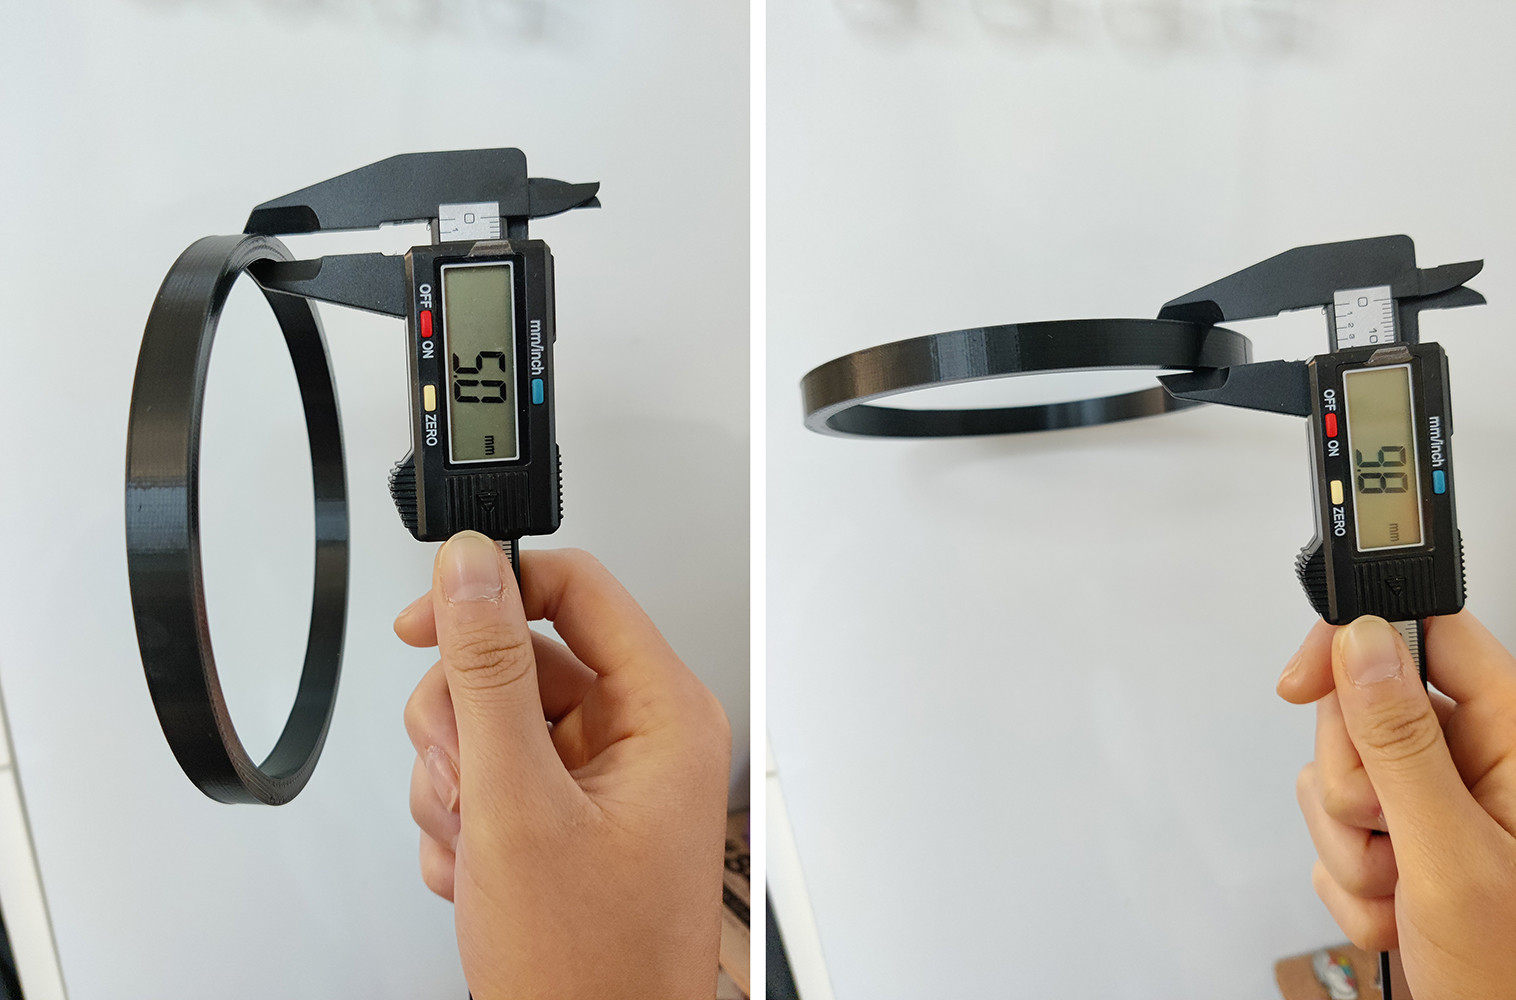 Ring measurements
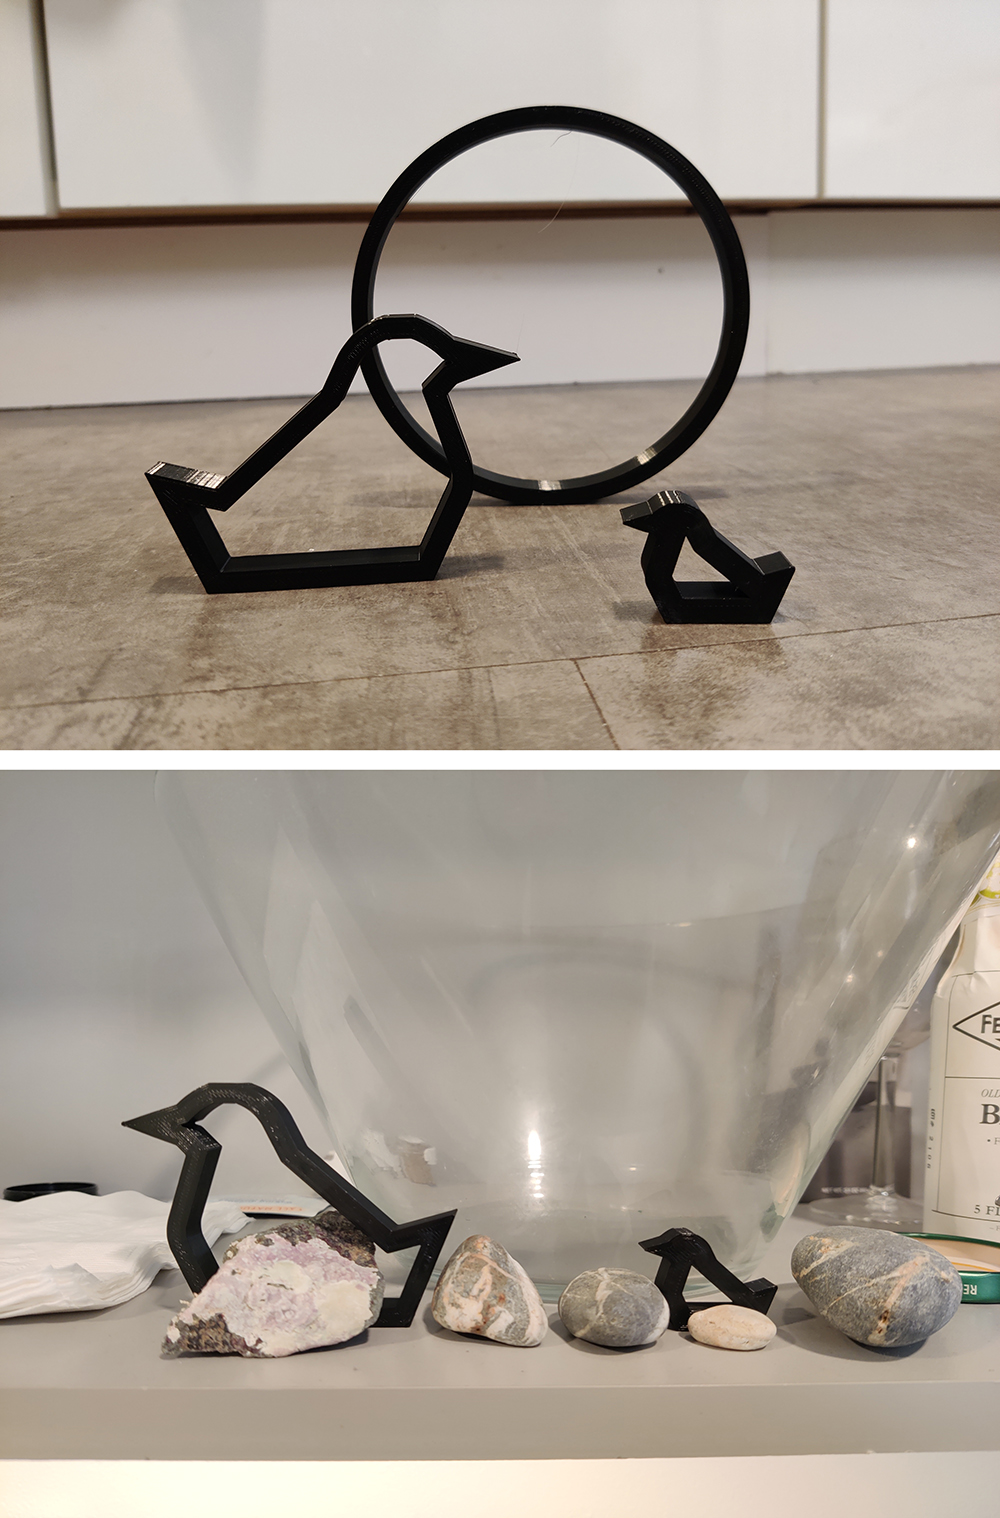 Birds on display
From the measurements of these prints, it looks like my printer prints with about +/- .02mm accuracy, and is rather precise. I forgot to document with photos, but all my cylinders and tubes meausred at exactly 30.0mm height in addition to the widths documented above.